
Free download: Top 10 Natural & Easy Remedies for Joint Pain from Home. Learn these helpful remedies.
Estimated Reading Time: 7 minutes read
Many of us do tasks every day that need lots of wrist action, like typing or lifting things. Doing this a lot can hurt our wrists. When our wrists hurt often, it means we’re using them too much. But don’t worry; we can make them feel better and prevent this pain by doing some easy exercises and changing a few habits.
Wrist overuse is when our wrists hurt because we’re using them a lot. It’s like when our wrists are telling us they need a break. To help them, we can change how we work, give them some rest, and do exercises.

Table of Contents
Why Does Wrist Overuse Happen?
Our wrists are among the most used joints in our body, yet we might not notice how much we rely on them until they start hurting. Daily routines, modern lifestyles, and certain hobbies can place a repetitive strain on our wrists, leading to what’s known as overuse or repetitive strain injuries.
Some common causes of wrist overuse include:
- Typing: Spending hours typing on a computer or texting on mobile devices.
- Playing musical instruments: Repeated motions while playing the guitar, piano, or other instruments.
- Sports: Activities like tennis, bowling, or golf where the wrist is used a lot.
- Crafting: Tasks like knitting, sewing, or other handcrafts that require repetitive wrist movements.
- Lifting heavy objects: Regularly carrying heavy bags or lifting weights without proper form.
- Using tools: Repeated use of hand tools or machinery that requires wrist action.
When our wrists face such consistent and repetitive strain, several symptoms might surface:
- Wrist pain: This might be a dull ache or even a sharp sting during certain movements.
- Wrist swelling: A noticeable puffiness around the wrist area.
- Stiffness: Difficulty in moving the wrist as smoothly as before.
- Odd sensations: Like tingling or a pins-and-needles feeling in the hand.
It’s essential to recognize these signs early and make necessary adjustments. For instance, if typing is the culprit, consider adjusting your chair and keyboard’s height to ensure a more wrist-friendly posture.

Regularly stretching and taking breaks can also reduce the strain. And remember, variety is key – switching tasks and using both hands can help distribute the load and give overworked wrists a well-deserved break.
Combating Wrist Overuse: Targeted Exercises for Relief and Strength
Our wrists are crucial in many daily tasks, and when overused, they can become a source of pain and discomfort. Adopting exercises designed explicitly for wrist overuse can provide relief and strengthen these essential joints.
Incorporating these exercises into your daily routine can improve wrist health and prevent further strain. Let’s dive into some beneficial movements to assist your wrists.
A. Start with Isometric Exercises
Isometric exercises are about applying force without actually moving the joint. These exercises can help in building strength and are a great starting point, especially if you’re new to wrist exercises.
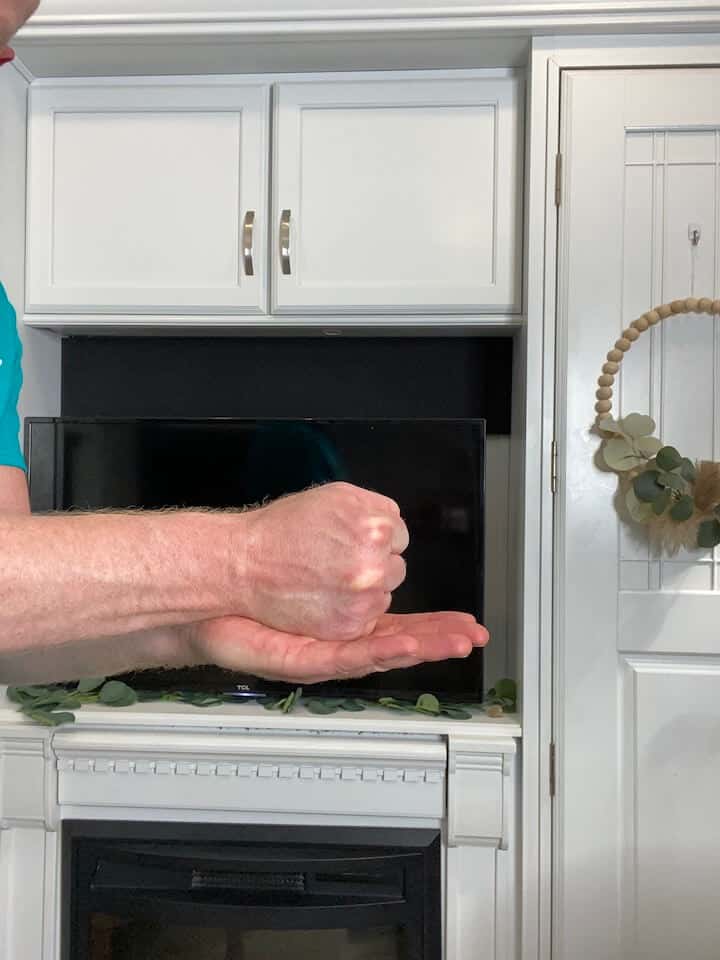
1. Isometric Wrist Strengthening
- Make a first with your injured hand.
- Then, place your uninjured hand against your fist.
- Gently push the injured fist into the uninjured hand. Muscles should activate, but the injured wrist should not move.
- Adjust where you press your fist to activate the different muscles that support your wrist.
- You’ll press your wrist four ways: up, down, and then on each side.
- Hold the press for 5 seconds, 10 repetitions, and 2 sets in each of the four directions.
a. Wrist Flexion

Push your wrist upwards against resistance without changing the angle of your wrist.
b. Wrist Extension
Push your wrist upwards against resistance without changing the angle of your wrist.

c. Ulnar Deviation

Push your wrist upwards against resistance without changing the angle of your wrist.
d. Radial Deviation
Push your wrist downwards against resistance without changing the angle of your wrist.
2. Grip Strength


- Begin with the injured wrist supported in whatever position feels most comfortable (e.g. on a table, pillow, or resting on your legs).
- Position the arm neutral so that the thumb is pointed towards the ceiling.
- Gently squeeze the object and hold for 5 seconds, then relax.
- Repeat 10 repetitions for 2 sets.
Isometrics are especially useful because they target specific muscles without a lot of movement. This can help in easing into an exercise routine without causing more strain. Remember to breathe normally when doing these exercises.
B. Stretch Out Those Wrists
Stretching helps in maintaining flexibility. It’s a good practice to incorporate stretches into your routine, especially if you’re someone who’s prone to wrist discomfort.
1. Wrist Flexion Stretch


- Straighten your arm and bend your wrist forward as if signaling someone to “come.”
- Use your opposite hand to gently apply pressure across the back of your hand and pull it towards you until you feel a stretch on the top of your forearm.
- Hold for 30 seconds.
- Repeat 5 times, then move to the other arm.
2. Wrist Extension Stretch

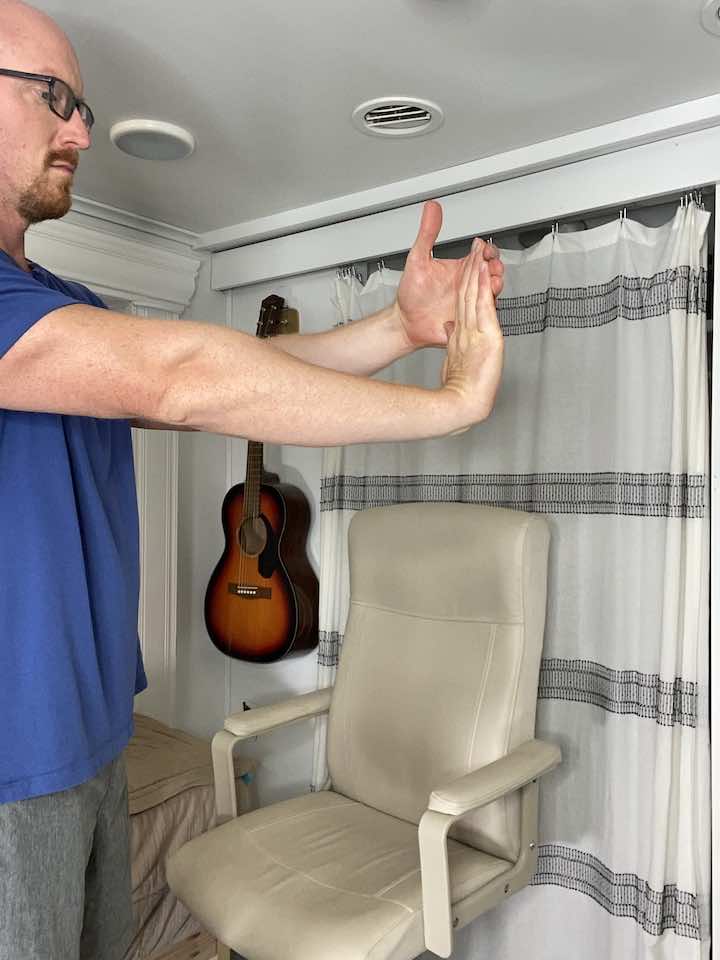
- Straighten your arm and bend your wrist as if signaling someone to “stop.”
- Use your opposite hand to gently apply pressure across the palm and pull it toward it until you feel a stretch inside your forearm.
- Hold for 30 seconds.
- Repeat 3 times, then move to the other arm.
Gentle stretching can relieve tightness and prepare the wrist for more intense activities. Regularly stretching helps keep our wrists supple and can reduce the risk of injuries.

C. Resistance Training for Strength
Using resistance, like bands, can take your exercises to the next level. They help build strength, ensuring you have strong wrists that can easily handle daily tasks.
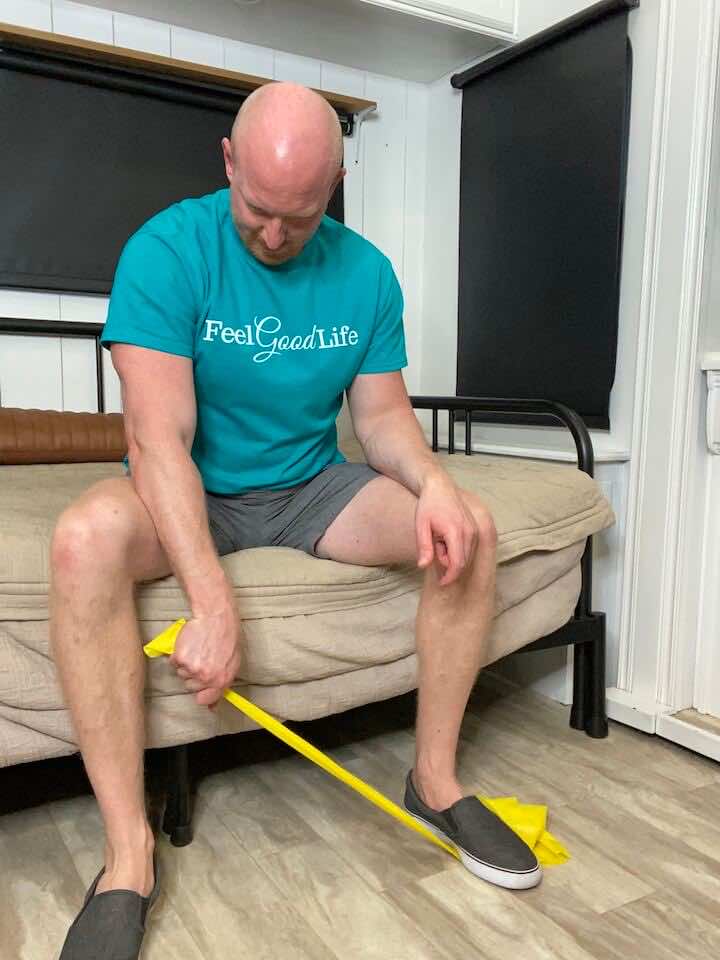
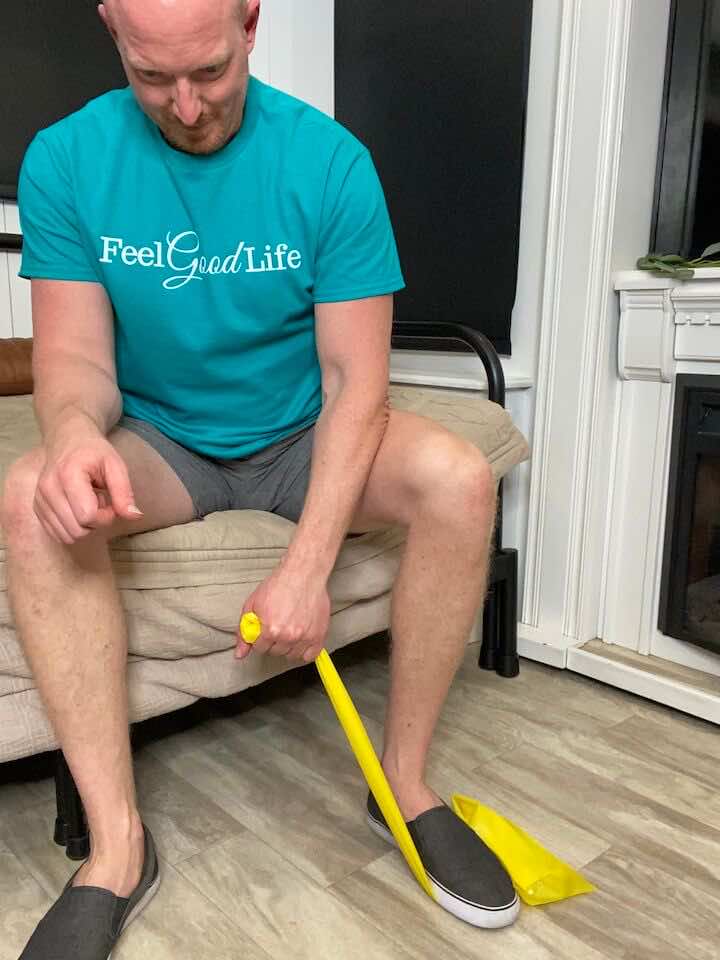
1. Wrist Flexion Stretch with Resistance Band

- Position yourself just like with wrist extension, only this time the palm should be facing up towards the ceiling, with the wrist straight.
- You can again use either a resistance band (light, medium or heavy) anchored under your foot or a light-free weight (2-3 lb).
- Slowly flex the wrist (moving the palm towards you), then return to neutral.
- Repeat 10-15 repetitions for 2-3 sets.
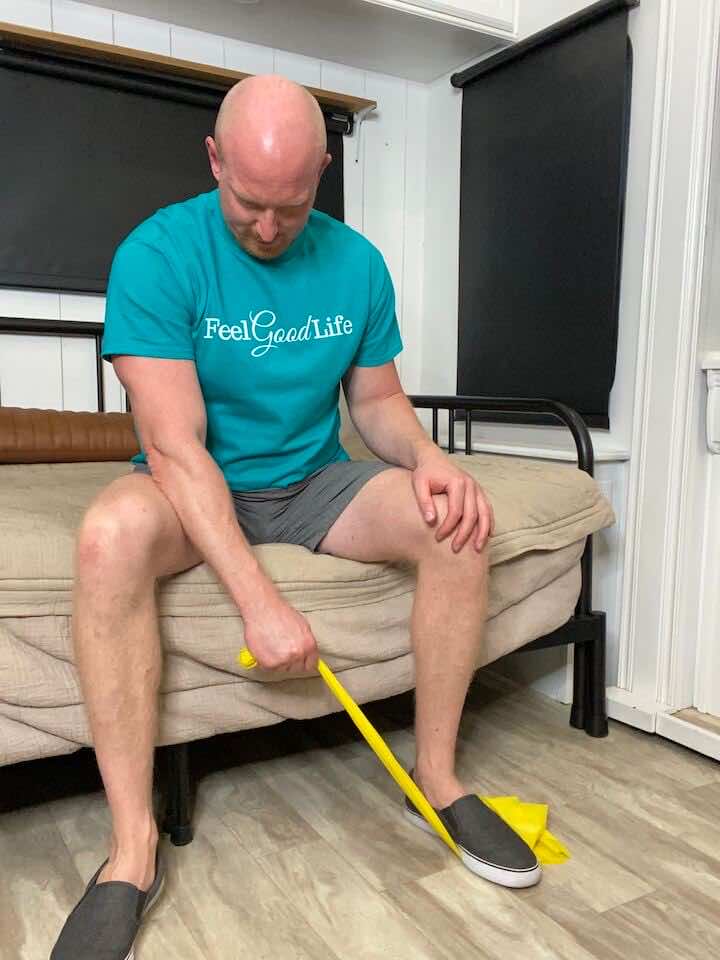
2. Wrist Extension Stretch with Resistance Band
- Position yourself seated with the working arm supported on a table, such as your coffee table. The wrist and hand should be hanging off the edge of the table.
- The palm should be facing down towards the floor, with the wrist straight.
- You can use either a resistance band (light, medium, or heavy) anchored under your foot or a light-free weight (2-3 lb).
- Slowly extend the wrist (moving the top of the hand back towards you), then return to neutral.
- Repeat 10 repetitions for 3 sets.
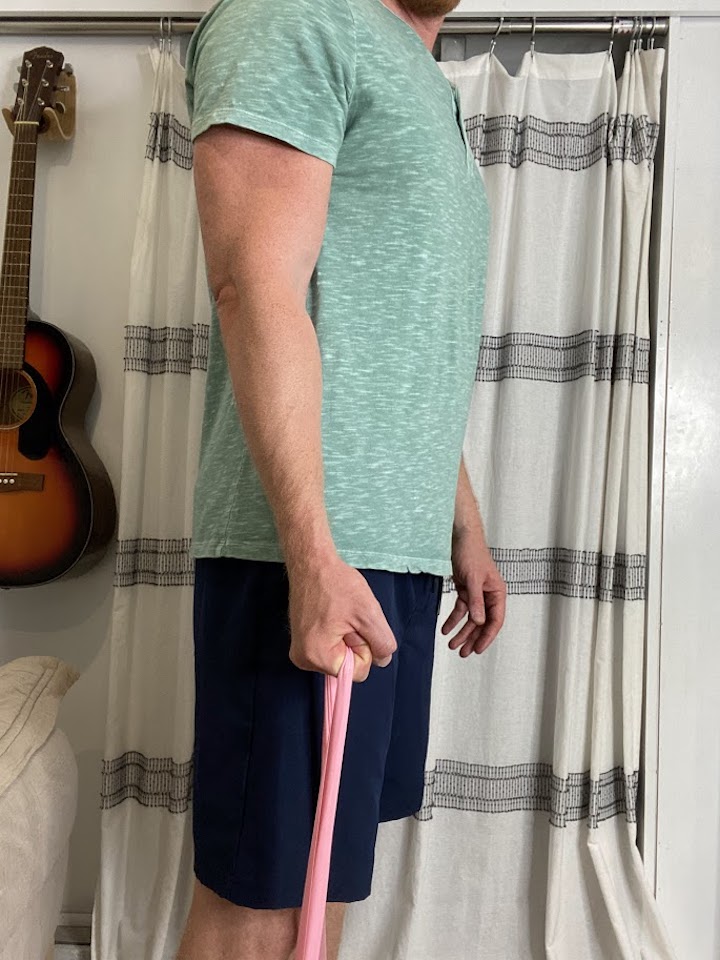
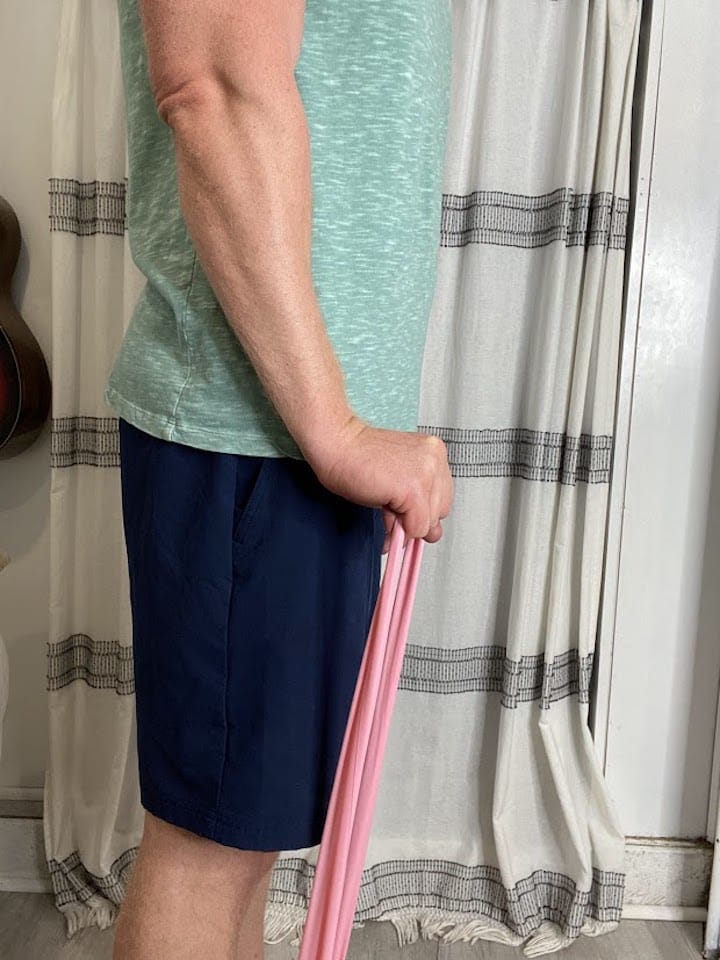
3. Wrist Ulnar Deviation with Resistance Band
- Place a resistance band under your foot (opposite side of your injured wrist) and hold on to the band with the injured hand.
- Hold the band with your hand so that your palm is facing the floor and there is tension on the band.
- Keep your hand in a fist and move your wrist so that your pinky side it moving to the side. It’s not a big movement, so don’t try to force extra ROM if it’s painful!
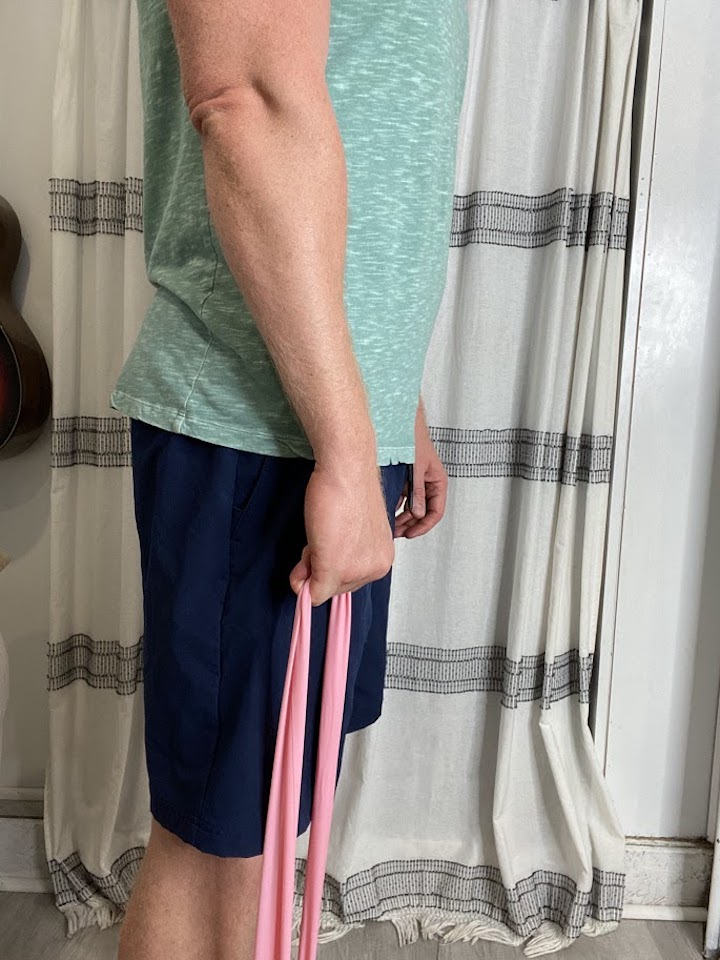
4. Wrist Radial Deviation with Resistance Band

- Place a resistance band under your foot (same side of your injured wrist) and hold on to the band with the injured hand.
- Hold the band with your hand so that your thumb is facing the ceiling and there is tension on the band.
- keep your hand in a fist and move your wrist so that your fist moves up and down. It’s not a big movement from the wrist so don’t try to force extra ROM if it’s painful!
Adding resistance to your exercises can amplify the results. It challenges the wrist muscles more, making them stronger over time. But always start slowly and gradually increase resistance to prevent further discomfort or injury.
Wrapping Up
Over time, our wrists bear the brunt of repetitive actions, from typing and texting to lifting or even simple daily tasks. Though seemingly harmless, these consistent movements can accumulate and cause discomfort or pain.
Fortunately, we have the power to alleviate this pain and reinforce our wrist health. Incorporating regular exercises can fortify and provide much-needed relief to our wrists.
Furthermore, making minor adjustments in our work habits and posture and ensuring we take periodic breaks can significantly reduce the strain. It’s essential to remain attuned to any signals our wrists send us.
By proactively attending to them and offering them the attention and care they deserve, we can ensure their longevity and resilience, allowing us to continue our daily routines without a hitch.
Wondering What's Next?
Discover 11 Easy, At-Home “Stretch Exercises” for Stronger, Pain-Free Joints (click below)