Free download: Top 10 Natural & Easy Remedies for Joint Pain from Home. Learn these helpful remedies.
Estimated Reading Time: 5 minutes read
The wrist is a key part of our arm. It helps us do things like grab items, write, or even wave hello. Sometimes, the side of the wrist near the little finger hurts. This side is linked to the ulna, one of the arm bones.
When this side of the wrist hurts, it can be hard to do daily tasks. This pain can feel like a dull ache or a sharp pinch. It might get worse when you hold things, twist your wrist, or move your hand in some ways. Knowing why this happens and how to ease the pain can make everyday tasks easier again.

Table of Contents
Why Does the Ulnar Side of the Wrist Hurt?
The wrist is quite a complex joint, and a lot is happening in a small space. One particular area near the side of your little finger can sometimes be a source of pain. This is closely connected to the ulna, a major bone in the forearm. When you feel pain here, it could be due to different reasons. Let’s dive into some common causes.
- TFCC tears: Think of the TFCC as a cushion between the wrist bones. If this gets damaged, it can lead to pain.
- Ulnar impaction syndrome: Sometimes, the ulna bone is too long for the wrist. This can put more pressure on the side of the wrist, causing discomfort.
- Arthritis: Just like other parts of the body, the wrist can also develop arthritis. This means the joint wears down over time, causing pain.
- Ulnar nerve entrapment: The ulnar nerve runs close to the wrist. If it gets pinched or pressed, it can lead to pain, numbness, or tingling on the side of the wrist.
- Fractures or sprains: A fall or injury might damage the bones or ligaments on the ulnar side, leading to pain.
- Repetitive motion injuries: Activities that require you to use your wrist, like typing or playing sports repeatedly, can strain the ulnar side over time. This repetitive strain can result in pain or discomfort.
If you have ulnar wrist pain, you might notice:
- A sharp pain or a dull ache on the side of your wrist near your little finger.
- Your wrist might feel stiff, or you could see some swelling.
- Moving your wrist or holding things can become challenging.
- Turning or twisting your wrist can make the pain worse.
Exercises for Ulnar Sided Wrist Pain Relief
Engaging in targeted exercises can help alleviate ulnar wrist pain. They not only relieve pain but can also enhance wrist strength and flexibility. Here’s a regimen to consider:
A. Stretches
Stretching is an essential first step in addressing ulnar wrist pain. Gentle stretches can help ease tension, increase blood flow to the affected area, and prepare the wrist for more strenuous exercises.
Regular stretching can improve the wrist’s flexibility, which can help prevent further injuries. The following are the stretches that target the muscles supporting the ulnar side of the wrist:

1. Wrist Flexion Stretch


- Straighten your arm and bend your wrist forward as if signaling someone to “come.”
- Use your opposite hand to gently apply pressure across the back of your hand and pull it towards you until you feel a stretch on the top of your forearm.
- Hold for 30 seconds.
- Repeat 5 times, then move to the other arm.
2. Wrist Extension Stretch

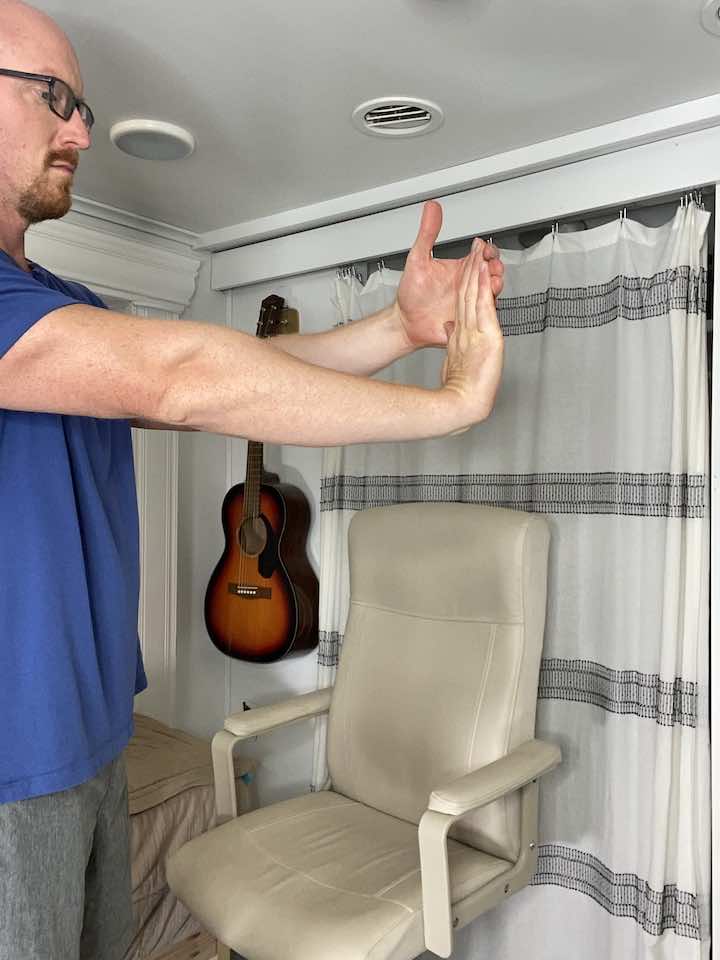
- Straighten your arm and bend your wrist as if signaling someone to “stop.”
- Use your opposite hand to gently apply pressure across the palm and pull it toward it until you feel a stretch inside your forearm.
- Hold for 30 seconds.
- Repeat 3 times, then move to the other arm.
B. Begin with Isometrics
Isometric exercises are a type of strength training where the joint angle and muscle length do not change during contraction. They’re great for those who might experience pain with regular movements.
By focusing on the wrist, isometrics can provide stability and strength without putting additional strain on the injured area. Here are the recommended isometric exercises:
1. Wrist Ulnar Deviation Isometric

- Make a first with your injured hand.
- Then, place your uninjured hand against your fist.
- Push your wrist upwards against resistance without changing the angle of your wrist.
- Hold the press for 5 seconds, 10 repetitions, and 2 sets in each of the four directions.
2. Grip Strength
- Stand in a comfortable position with your feet shoulder-width apart.
- Hold a tennis ball in the palm of your hand.
- Squeeze your hand into the tennis ball and hold for 5 seconds.
- Release and repeat 10 times and 2 sets.
- If this becomes too easy, create a bigger gap between your fingers — the bigger the gap, the greater the challenge.

C. Resistance Training
After starting with stretches and isometrics, resistance training can be introduced to strengthen the muscles around the wrist further. Using resistance bands or other tools can effectively challenge the wrist muscles.
As these muscles become stronger, they offer better support to the joint, thus reducing the risk of future injuries. Here are the exercises for resistance training:
1. Wrist Ulnar Deviation with Resistance Band

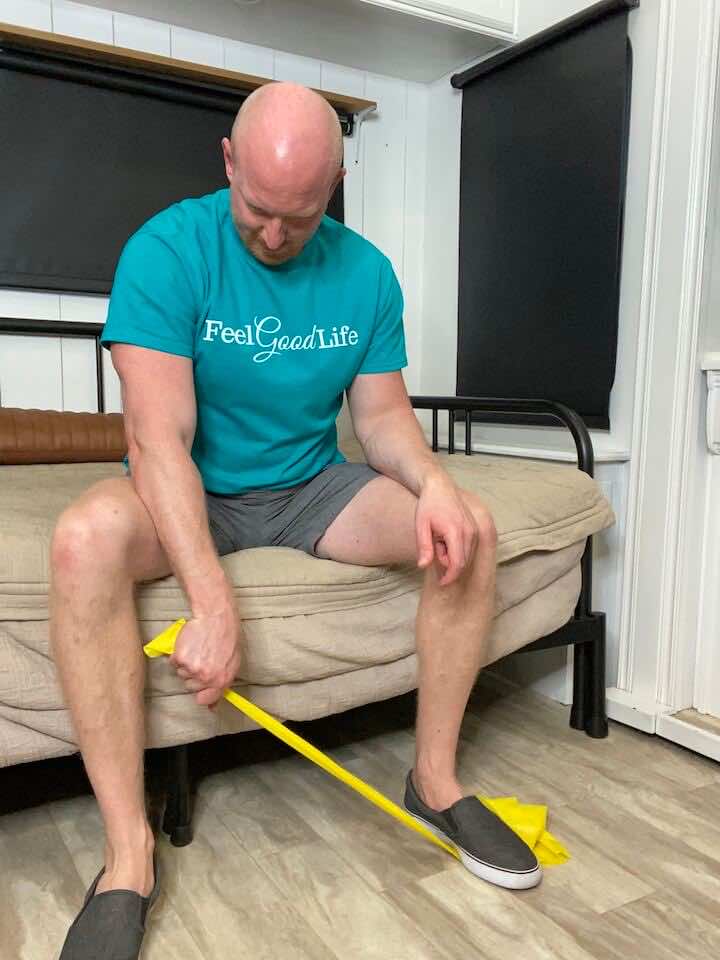
- Place a resistance band under your foot (opposite side of your injured wrist) and hold on to the band with the injured hand.
- Hold the band with your hand so that your palm is facing the floor, and there is tension on the band.
- Keep your hand in a fist and move your wrist so that your pinky side it moving to the side. It’s not a big movement, so don’t try to force extra ROM if it’s painful!
Conclusion
Ulnar wrist pain can be tough to deal with, but with the right exercises, you can find relief and improve your wrist’s strength. Remember to start slow with stretches, build strength with isometrics, and then challenge your wrist with resistance training.
Regular practice and a gentle approach can make a big difference in your wrist health. Always consult with a healthcare professional before starting any exercise routine.
Wondering What's Next?
Discover 11 Easy, At-Home “Stretch Exercises” for Stronger, Pain-Free Joints (click below)