
Free download: Top 10 Natural & Easy Remedies for Joint Pain from Home. Learn these helpful remedies.
Estimated Reading Time: 7 minutes read
Hello, my seasoned friends! As we gracefully age, our bodies might throw us some curveballs, and wrist bursitis can be one of those unexpected surprises. But don’t let that get you down. In this article, we’ll dive into the world of wrist bursitis, discussing its causes and symptoms and the role it plays as we age.
We’ll also provide some fantastic exercises that can help you ease the pain and get back to living your best life pain-free. We promise to keep it light and easy to understand because, let’s face it, we all deserve a little laughter in our lives, especially when we’re dealing with a pesky condition like wrist bursitis. So, please grab a cup of tea, sit back, and let’s embark on this journey to better wrist health together!

Table of Contents
Wrist Bursitis: What is it, and why does it happen as we age?
Wrist bursitis is a condition where the fluid-filled sacs (bursae) near the wrist joints become inflamed, causing discomfort and pain. These bursae are responsible for reducing friction between tendons and bones, making our wrists flexible and mobile.
Our bodies undergo several changes as we age, making us more susceptible to inflammation and conditions like wrist bursitis. Factors like reduced blood circulation, decreased joint lubrication, and wear and tear on our tendons can contribute to the development of wrist bursitis.
The wrist has two major bursae – the radial and ulnar bursae. The radial bursa serves the tendons running through the wrist to the thumb, while the ulnar bursa serves the tendons connected to the index, middle, and ring fingers. Inflammation in either of these bursae can lead to wrist bursitis, causing discomfort and pain in daily activities.
Causes and Symptoms of Wrist Bursitis
Wrist bursitis can be caused by various factors, including:
- Direct blows
- Falls
- Pressure on the wrist
- Repeated stress injuries
- Complications from rheumatoid arthritis, osteoarthritis, or gout
- Infection of the bursae or wrist
In the elderly, wrist bursitis is more common due to age-related wear and tear and decreased joint lubrication.
Some of the main symptoms of wrist bursitis include:
- Tenderness and swelling in the wrist
- Redness over the affected area
- Pain during activities that put pressure on the bursa (like writing or typing)
- Stiffness in the wrist joints
- A small, tender lump in the top part of the wrist
- Pain while bending the wrist backward and applying weight on the wrist
Exercises for Wrist Bursitis
Dealing with wrist bursitis can be challenging, but the good news is that exercises can help alleviate the pain and improve your wrist’s functionality. To make the most out of your exercise routine, we’ve tailored our recommendations based on your current pain level.
A. When Pain is Higher
On days when the discomfort seems unbearable, it’s crucial to take things slow and focus on gentle movements. These exercises aim to provide relief without causing further irritation to your wrist. Remember, listen to your body, and don’t push yourself too hard during this stage.
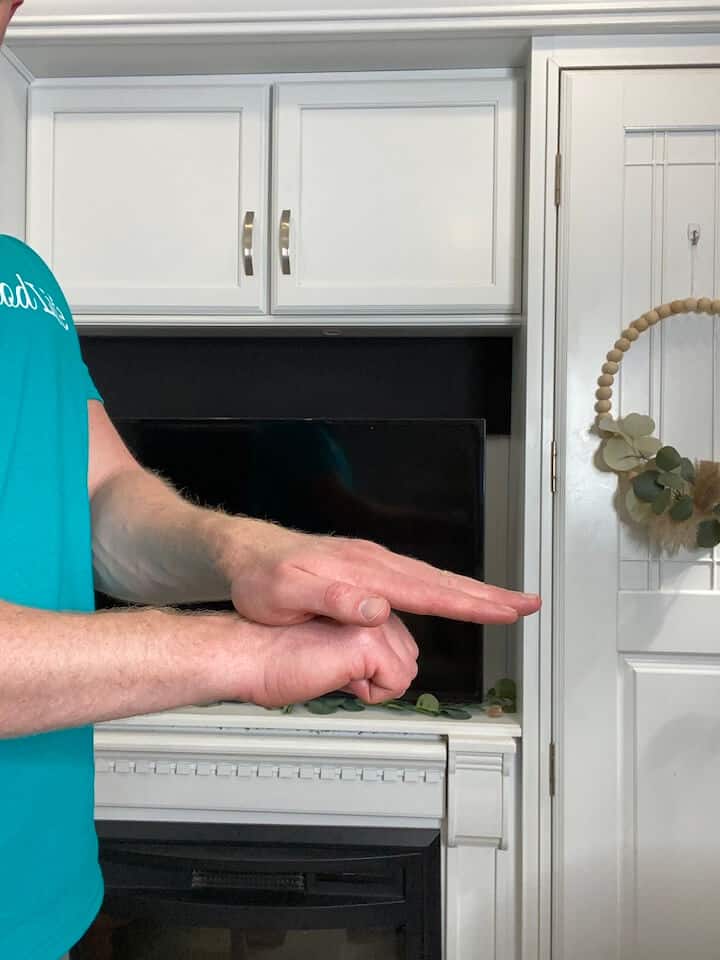
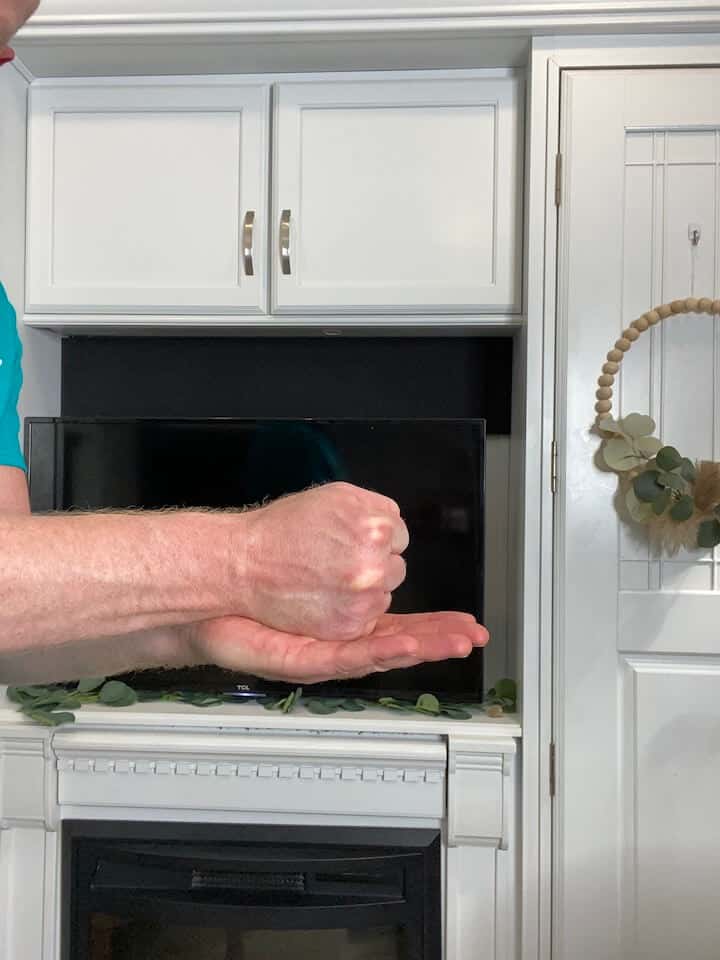
1. Isometric Wrist Strengthening
- Make a first with your injured hand.
- Then place your uninjured hand against your fist.
- Gently push the injured fist into the uninjured hand. Muscles should activate, but the injured wrist should not move.
- Adjust where you press your fist to activate the different muscles that support your wrist.
- You’ll press your wrist four ways: up, down, and then on each side.
- Hold the press for 5 seconds, 10 repetitions, and 2 sets in each of the four directions.
a. Wrist Flexion

Push your wrist upwards against resistance without changing the angle of your wrist.
b. Wrist Extension
Push your wrist upwards against resistance without changing the angle of your wrist.

c. Ulnar Deviation
Push your wrist upwards against resistance without changing the angle of your wrist.
d. Radial Deviation
Push your wrist downwards against resistance without changing the angle of your wrist.
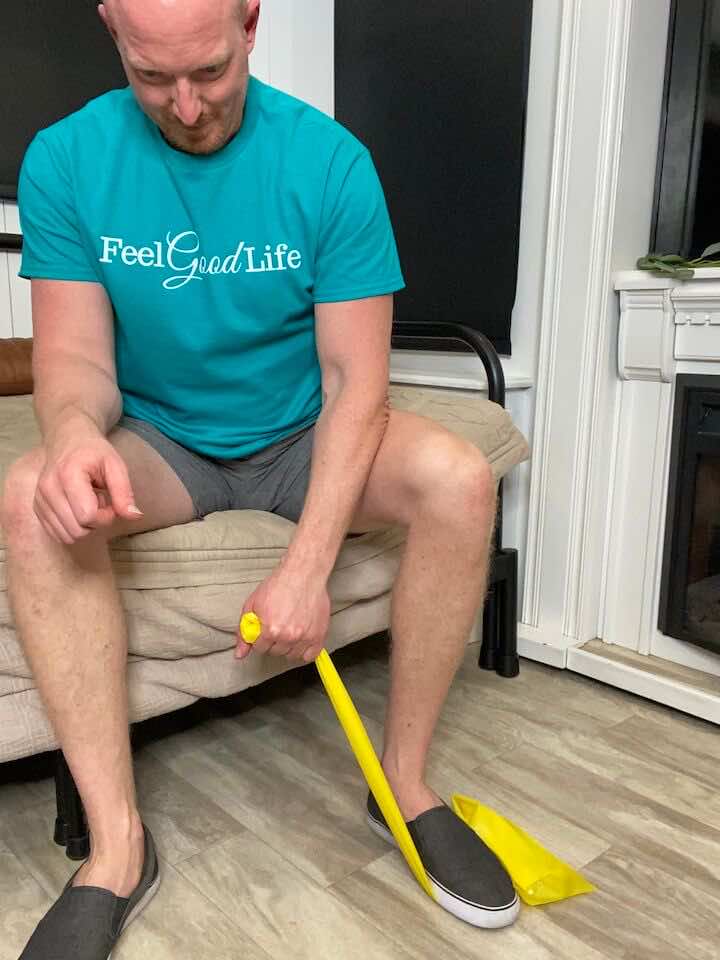
2. Tennis Ball Squeezes

- Sit at a table, leaning on the edge with your forearm. Grab a tennis ball in the palm of your hand.
- Squeeze your hand into the tennis ball and hold for 5 seconds. Release and repeat 10 times and 2 sets.
- If this becomes too easy, create a bigger gap between your fingers — the bigger the gap, the greater the challenge.
B. When Pain Improves
As your pain subsides and your wrist starts to feel better, it’s time to introduce more advanced exercises into your routine gradually. These exercises are designed to strengthen your wrist and increase its range of motion. Progress at a comfortable pace, and always pay attention to how your wrist feels during each exercise.
1. Wrist Lifts

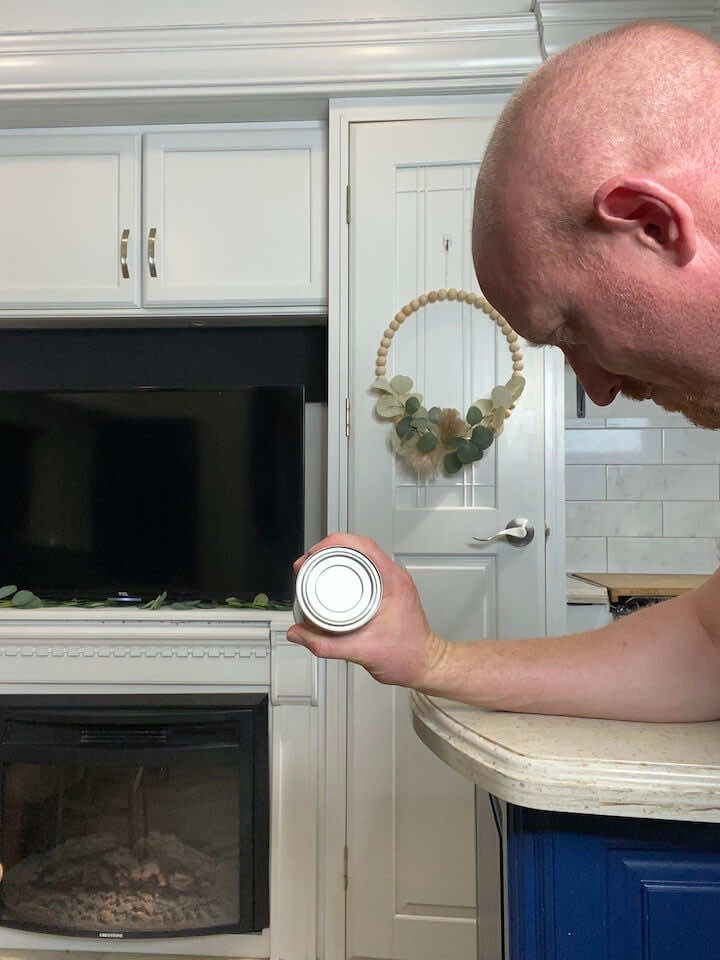
- Sit in a chair with a soup can or lightweight in your hand.
- Rest your forearm on a table or on your lap, with your palm facing downward and your wrist in a neutral position.
- Keep your elbow bent at a 90-degree angle.
- Lift the weight by flexing your wrist and raising your hand up toward your body.
- Hold the contraction for a few seconds, then slowly lower the weight back down to the starting position.
- Make sure to isolate the movement to your wrist and avoid using your forearm to lift the weight.
- Repeat the movement for 10 repetitions and 3 sets, and gradually increase the weight or resistance as you progress.
2. Wrist Curls
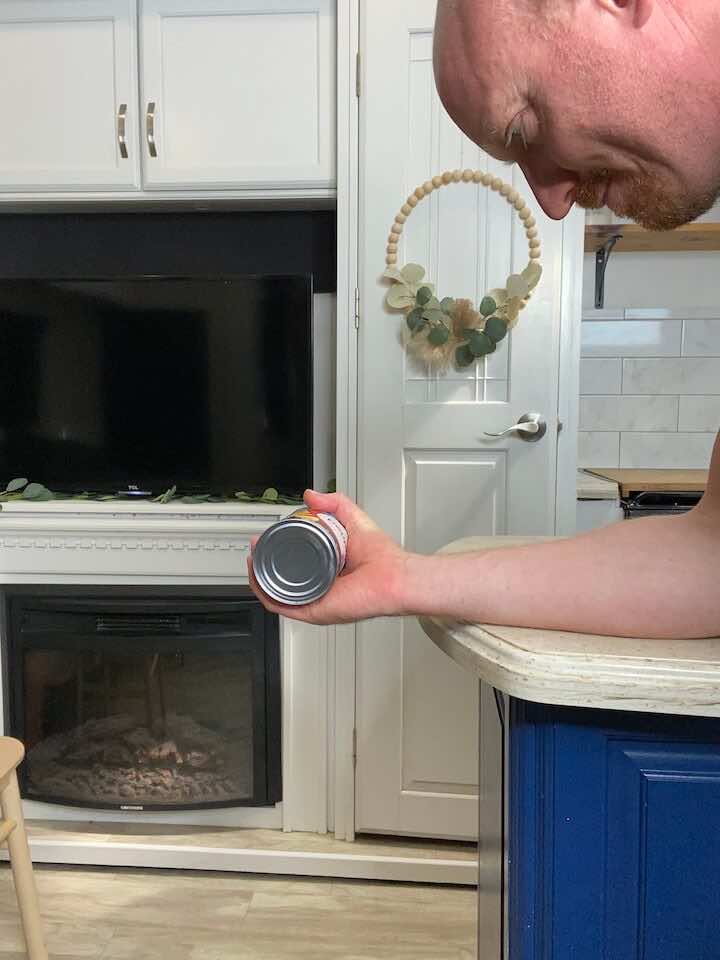

- Sit in a chair with a soup can or lightweight in your hand.
- Rest your elbow on a table, with your palm facing upward and your wrist in a neutral position.
- Keep your forearm still and isolated, and lift your wrist by curling it toward your body.
- Hold the contraction for a few seconds, then slowly return to the starting position.
- Remember to isolate the wrist and avoid using your forearm to lift the weight.
- Repeat the movement for 10 repetitions and 3 sets, and gradually increase the weight or resistance as you progress.
3. Wrist Ulnar Deviation with Resistance Band


- Place a resistance band under your foot (opposite side of your injured wrist) and hold on to the band with the injured hand.
- Hold the band with your hand so that your palm is facing the floor, and there is tension on the band.
- Keep your hand in a fist and move your wrist so that your pinky side it moving to the side. It’s not a big movement, so don’t try to force extra ROM if it’s painful!
4. Wrist Radial Deviation with Resistance Band

- Place a resistance band under your foot (same side of your injured wrist) and hold on to the band with the injured hand.
- Hold the band with your hand so that your thumb is facing the ceiling and there is tension on the band.
- keep your hand in a fist and move your wrist so that your fist moves up and down. It’s not a big movement from the wrist so don’t try to force extra ROM if it’s painful!
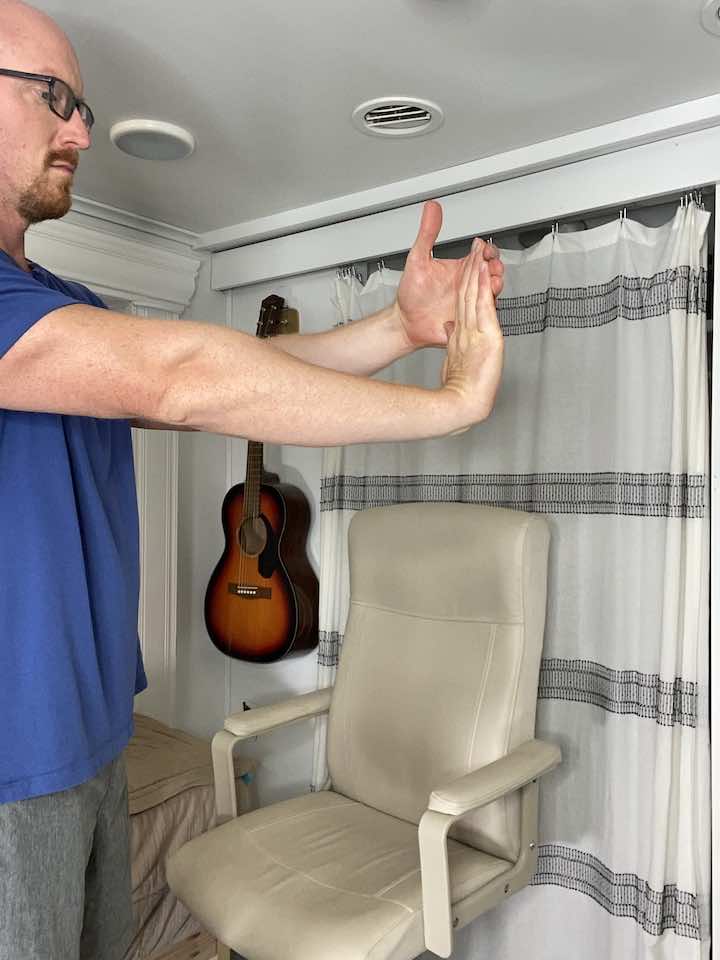
5. Wrist Flexion Stretch


- Straighten your arm and bend your wrist forward as if signaling someone to “come.”
- Use your opposite hand to gently apply pressure across the back of your hand and pull it towards you until you feel a stretch on the top of your forearm.
- Hold for 30 seconds.
- Repeat 5 times, then move to the other arm.
6. Wrist Extension Stretch

- Straighten your arm and bend your wrist as if signaling someone to “stop.”
- Use your opposite hand to gently apply pressure across the palm and pull it toward it until you feel a stretch inside your forearm.
- Hold for 30 seconds.
- Repeat 3 times, then move to the other arm.
Conclusion
In conclusion, wrist bursitis is common among older individuals but doesn’t have to be a deal-breaker. You can alleviate pain and enjoy improved wrist health with a better understanding of its causes and symptoms, along with the appropriate exercises.
Remember to consult a healthcare professional before starting any exercise program, and don’t forget to add a sprinkle of humor to your day. After all, laughter is the best medicine, and a happy wrist makes for a happy life!
Wondering What's Next?
Discover 11 Easy, At-Home “Stretch Exercises” for Stronger, Pain-Free Joints (click below)