Free download: Top 10 Natural & Easy Remedies for Joint Pain from Home. Learn these helpful remedies.
Estimated Reading Time: 8 minutes read
Hip dysplasia is a medical condition characterized by a misalignment in the ball and socket joint of the hip. While it is often diagnosed in infancy or childhood, it can continue to impact individuals throughout their lives.
In older adults, this misalignment can result in the hip joint wearing out faster than usual, leading to discomfort, pain, and a noticeable decrease in mobility, making even simple activities like walking or standing up from a seated position challenging.

In the context of older adults, the effects of hip dysplasia often become more pronounced due to age-related factors. As the body ages, bones become less dense, muscles lose strength, and the overall resilience of joints diminishes. Therefore, the impact of a misaligned hip joint can become more significant over time, making it a noteworthy concern for older people.
Table of Contents
Symptoms of Hip Dysplasia
The progression of hip dysplasia can bring about a range of symptoms that affect one’s daily life and mobility.
- Pain: Most people feel pain in the area near the groin. It can worsen when walking, going upstairs, or sitting for a long time. The pain can be a steady ache or a sudden sharp feeling.
- Stiffness: Sometimes, the hip feels stiff, making everyday things hard to do. Actions like bending or getting up from sitting might be challenging.
- Clicking Sound: Some people hear a clicking or popping noise from their hips when they move. This sound is because the hip parts are not moving smoothly together.
- Limping: Some people might start to limp due to pain or weak muscles. This limp is the body’s way of dealing with the pain or shakiness.
- Leg Length: For some, one leg might look shorter than the other because of hip problems. This can change the way they walk.
Causes of Hip Dysplasia
The reasons behind hip dysplasia in older adults are varied, pointing to its complex nature.
- Born with it: Some people have problems with their hip from birth where the hip socket doesn’t fit the thigh bone well.
- Getting Older: As we get older, our joints can wear out. A hip that was okay when young might have problems later because of this wearing out.
- Past Injuries: If someone had an injury before, even not on the hip, it might cause hip problems later. Walking differently or putting more weight on one side can hurt the hip.
- Hormone Changes: For older women, lower estrogen levels can worsen joint problems, including in the hip.
- Family History: If someone in the family had hip problems, there’s a bigger chance others in the family might have them too.
Managing Hip Dysplasia through Exercises
Integrating specific exercises into your routine can be beneficial if you’re an older adult diagnosed with hip dysplasia. These movements focus on enhancing mobility and strengthening the muscles around the hip, providing better support and potentially alleviating some of the discomfort.
A. Mobility Exercises
Optimal hip mobility is crucial in alleviating discomfort and maintaining a good range of motion. The following exercises focus on improving flexibility in and around the hip joint:
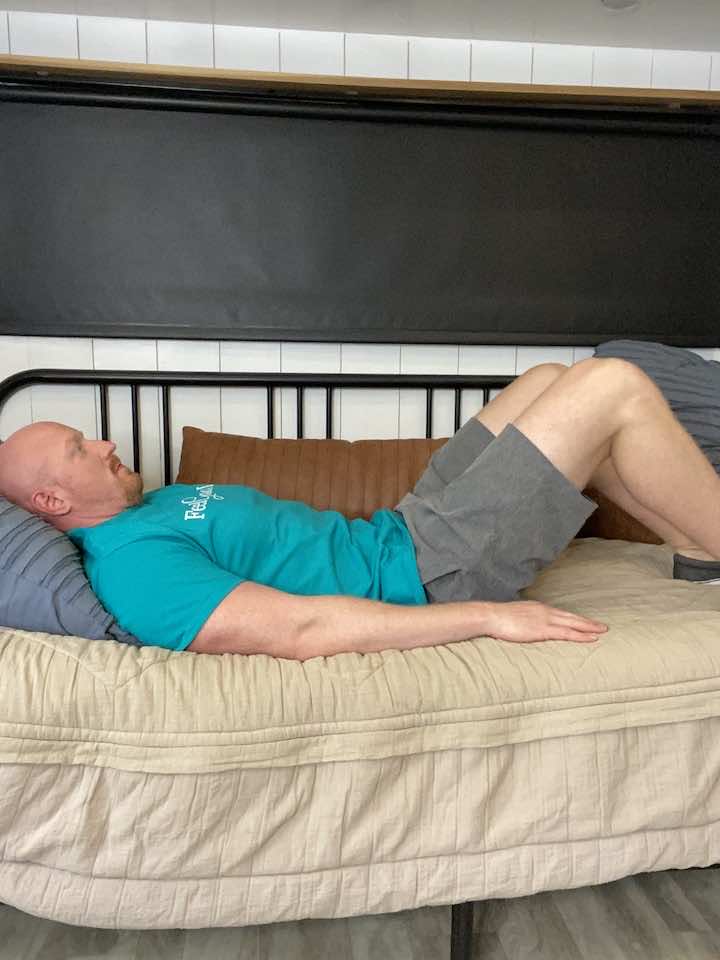
1. Posterior Pelvic Tilt
- Lying on your back (can be on the floor, your couch or bed), keep the knees bent and feet flat on the surface.
- Take a deep breath in and as you exhale, attempt to gently press the low back flat into the surface.
- Think of pressing the belly button directly down towards the floor.
- Hold for 2 seconds.
- Inhale as you return to your starting position.
- Continue with 10 repetitions for 3 sets.
- Make sure to keep breathing!
2. Seated Hamstring Stretch
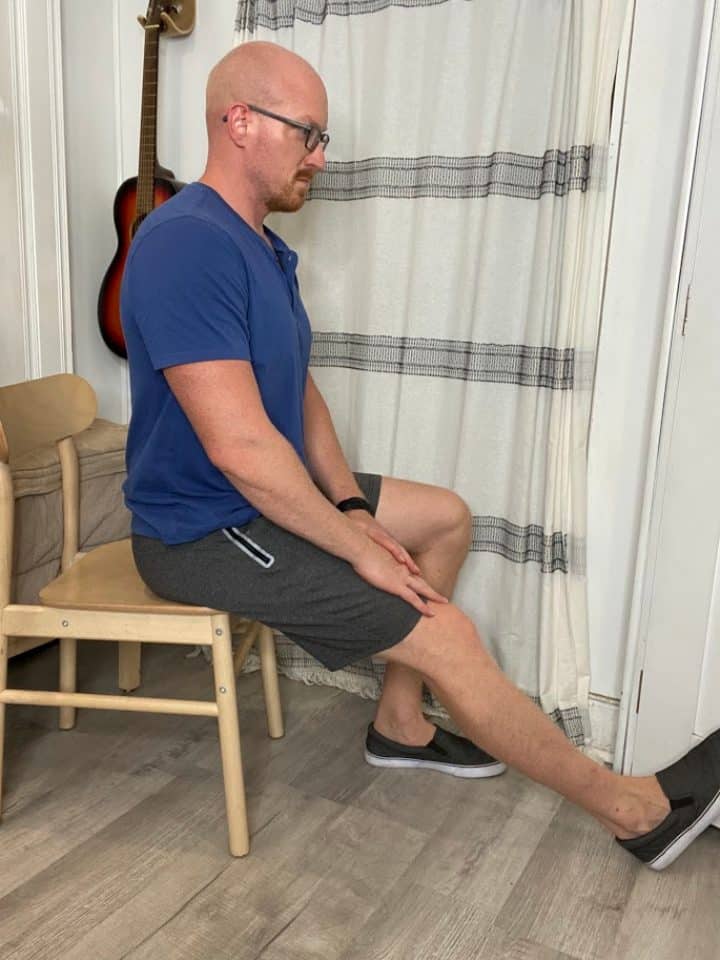
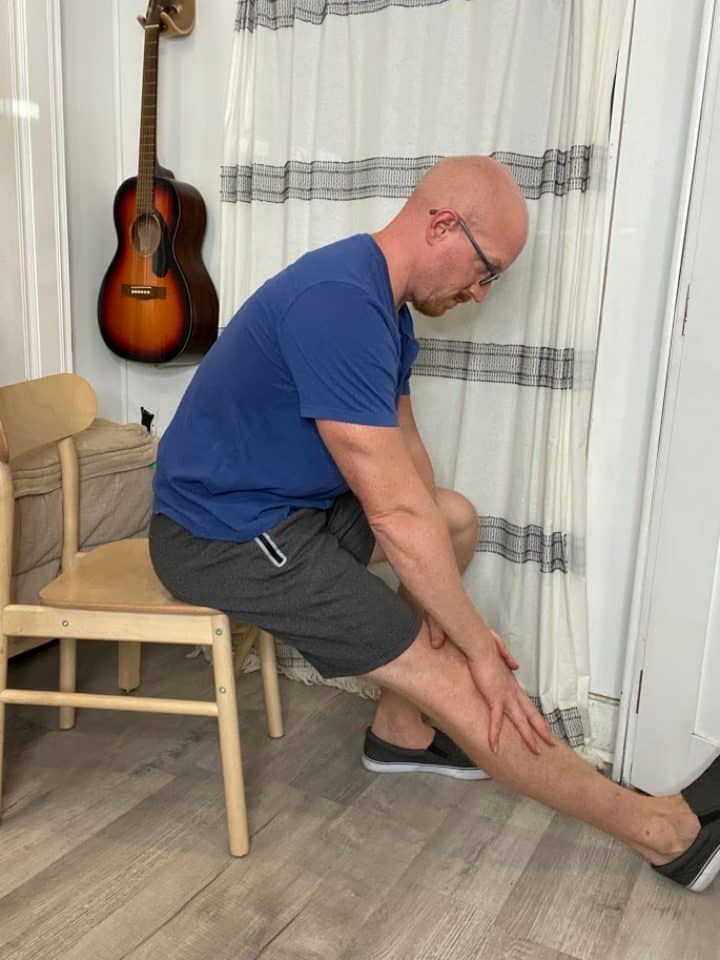
- Seated in a chair, place the leg to be stretched and extended in front of you (the knee should be straight).
- Keeping a straight back, bend forward via hinging at the hips.
- Once you feel a tolerable stretch behind the back of the leg, hold for at least 30 seconds.
- Repeat for 3 sets in total.
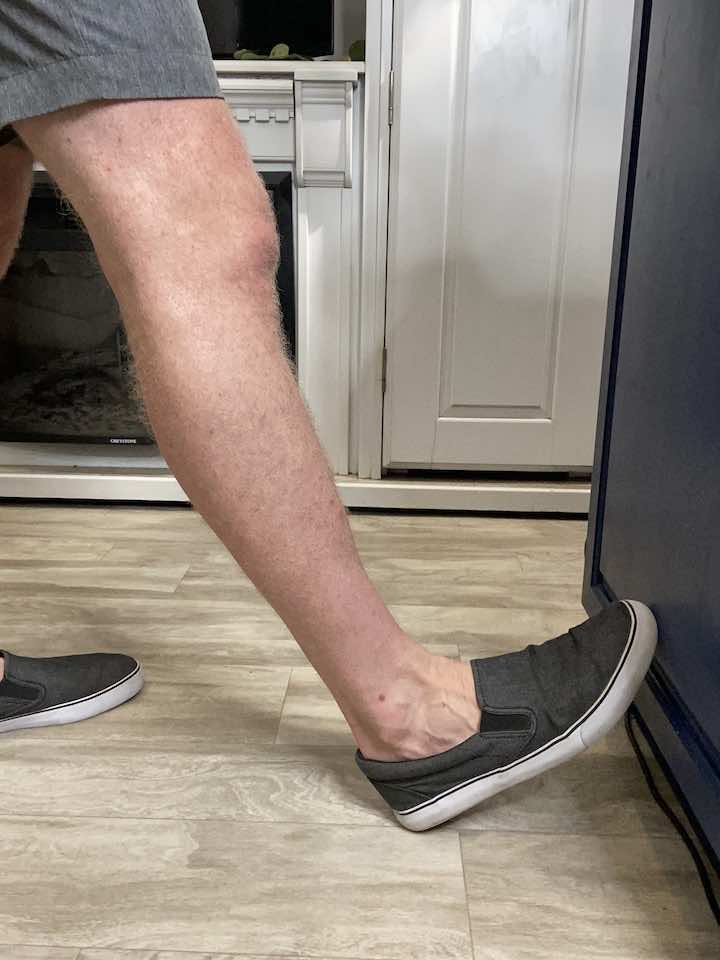
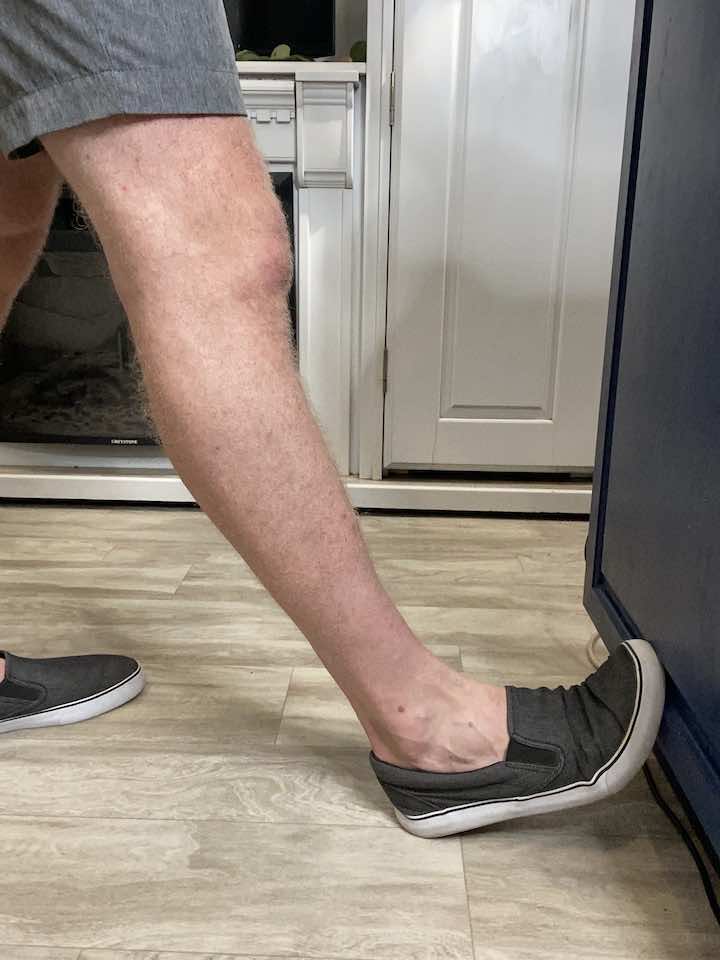
3. Standing Hip Flexor Stretch
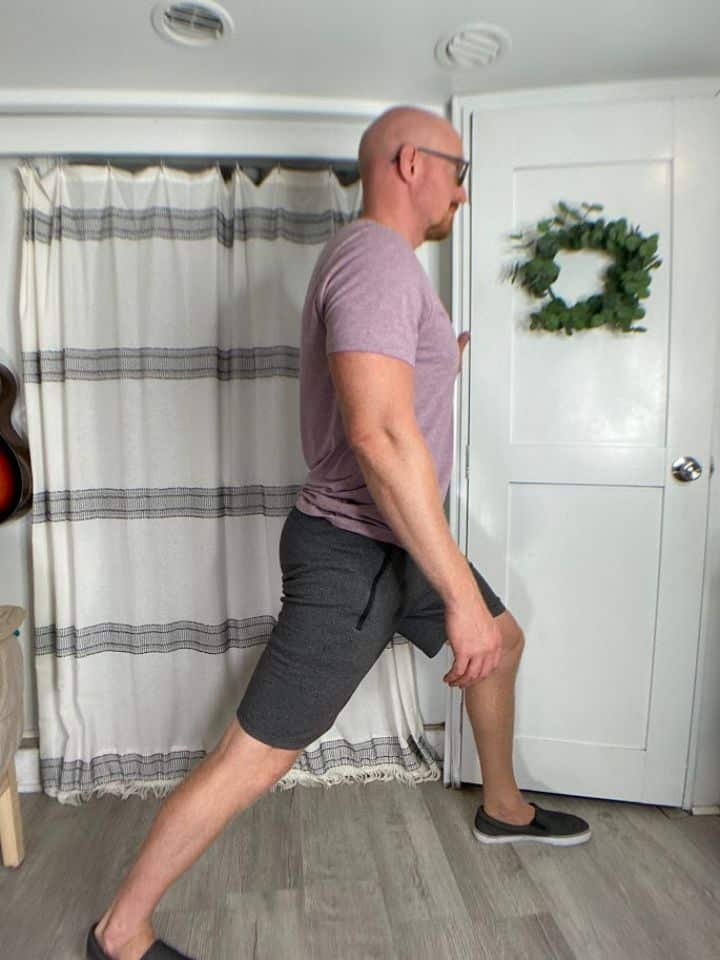
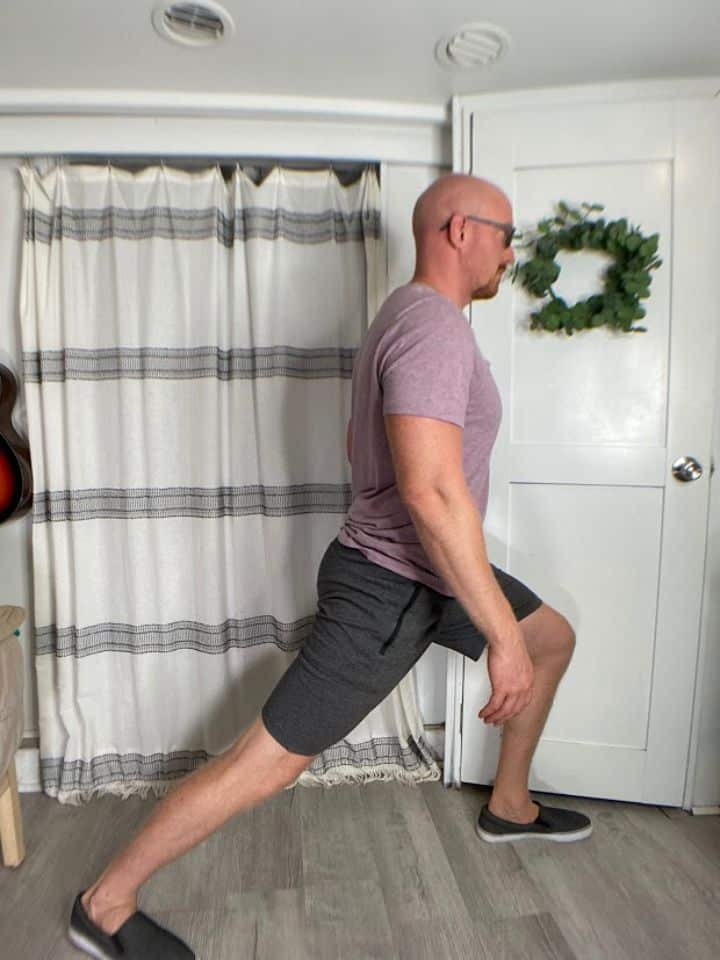
- Begin standing in front of a sturdy surface, such as the countertop, in case you need additional balance support.
- Position the unaffected leg forward and the painful leg back (the further apart the legs are, the stronger the stretch for the hip flexors).
- The front leg should have a bent knee, while the other knee in the back should be straight.
- Lean the body forward towards the front leg until a stretch is felt in the front of the hip in the back leg (make sure to keep both heels on the ground).
- Hold the stretch for at least 30 seconds.
- Repeat 3 times.
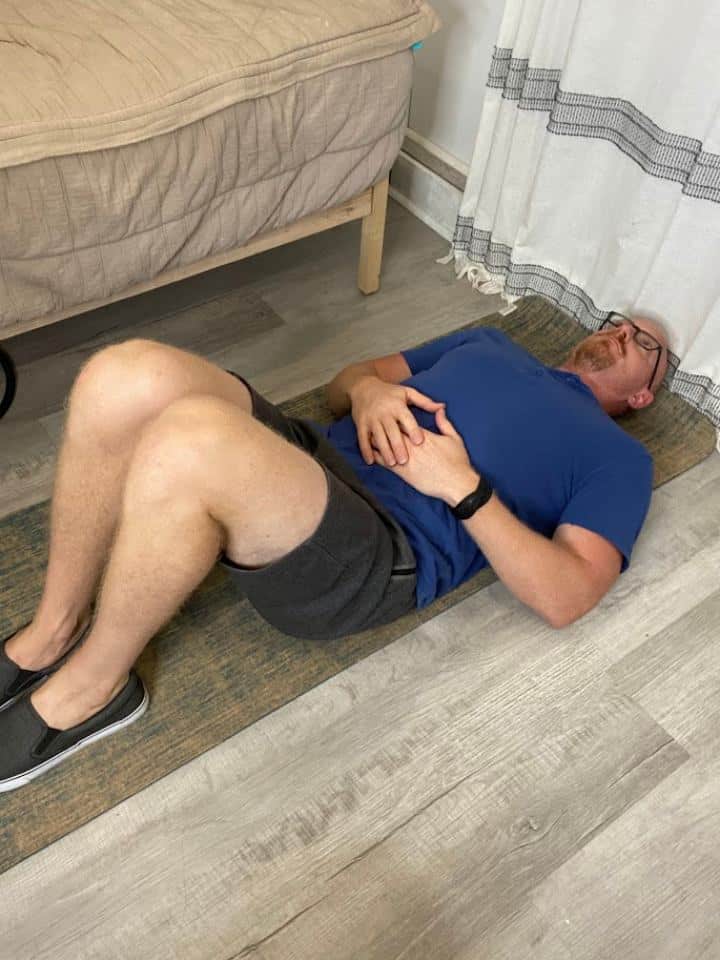
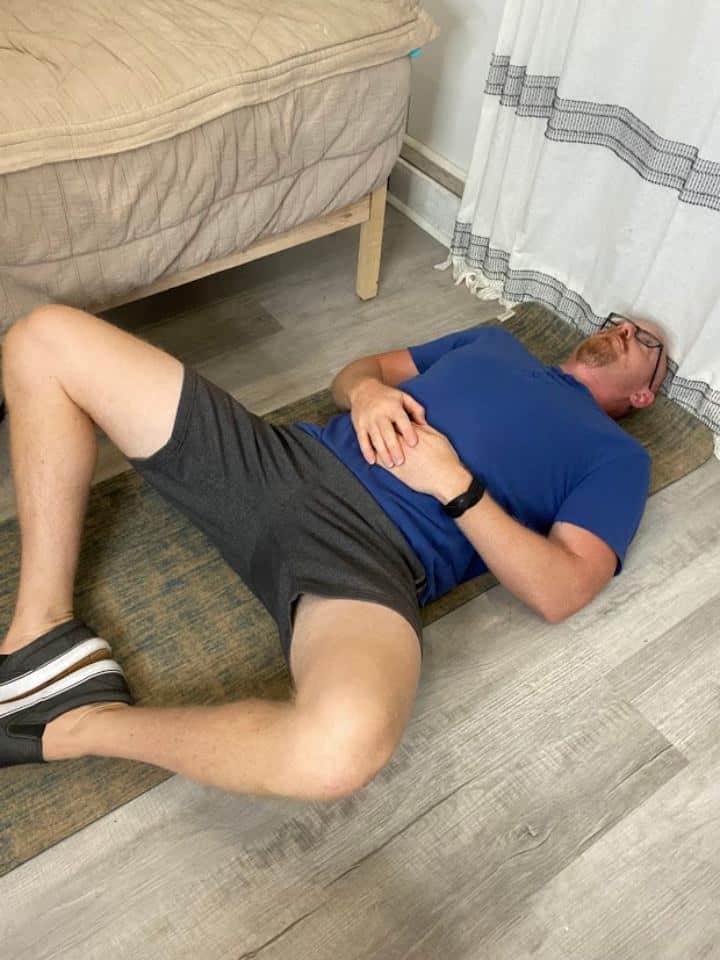
4. Piriformis Stretch
- Begin by lying on your back with both knees bent.
- Cross your left leg over your right, then using both arms gently pull your left knee towards your right shoulder.
- Hold for 30 seconds. Relax and repeat 3 sets on the each leg.
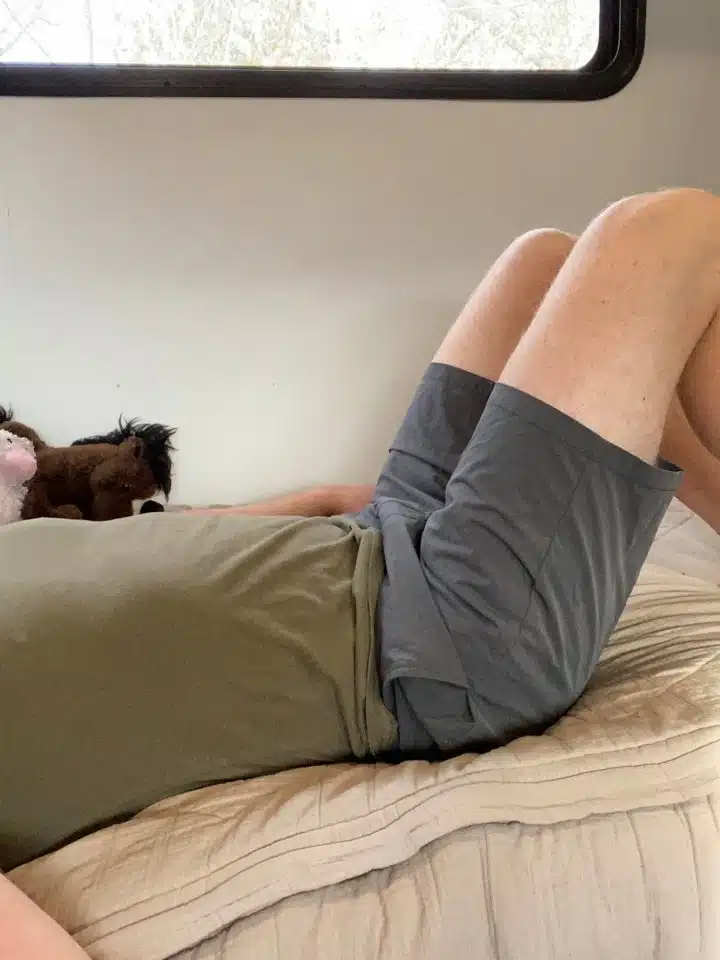
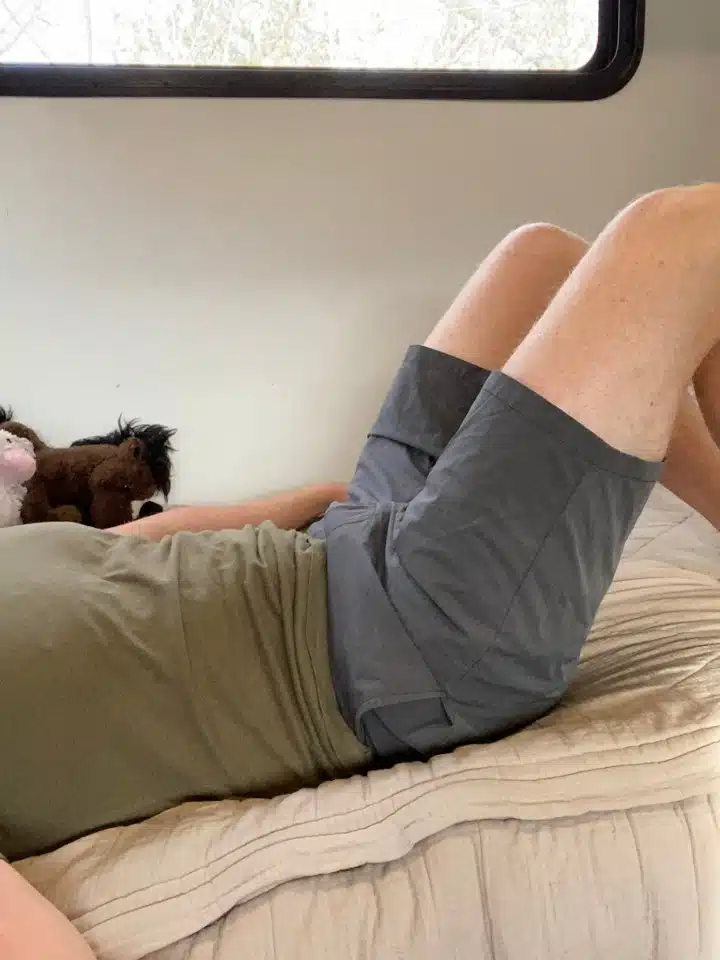
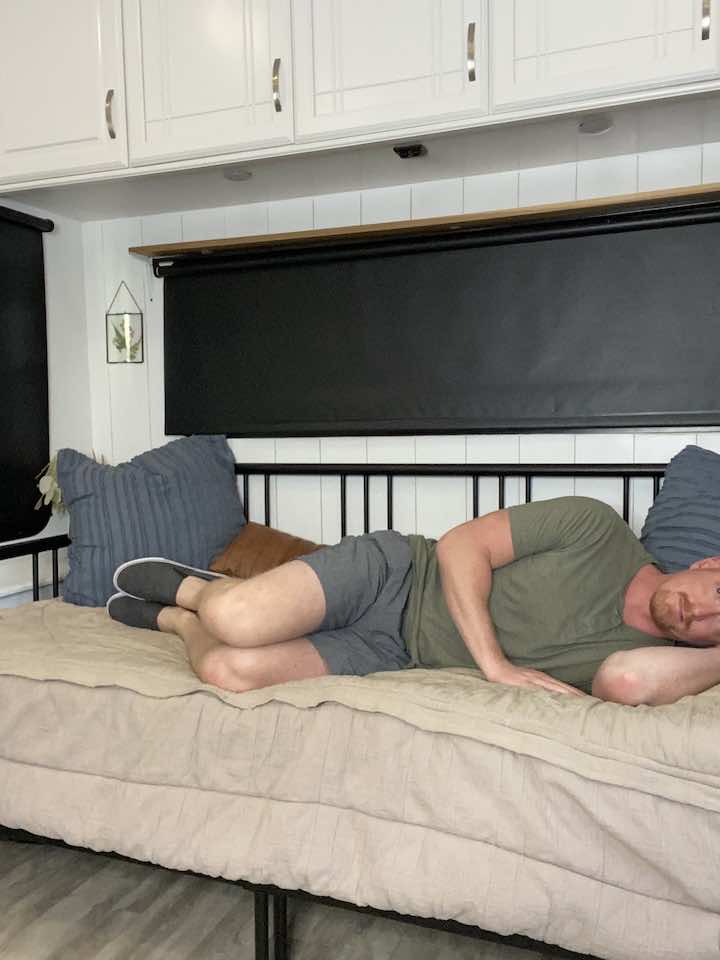
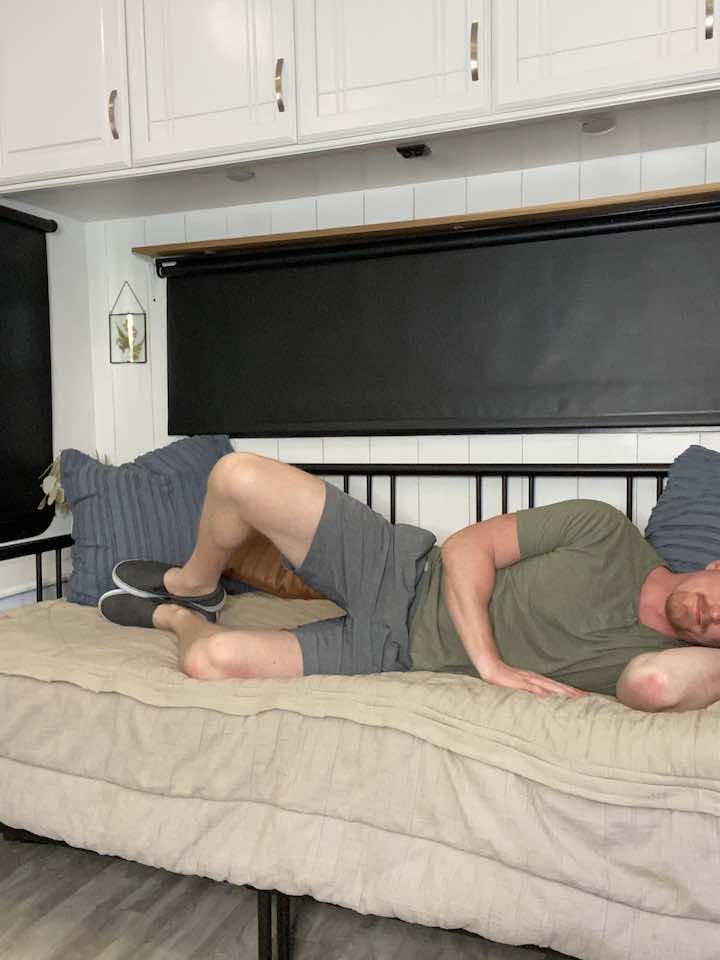
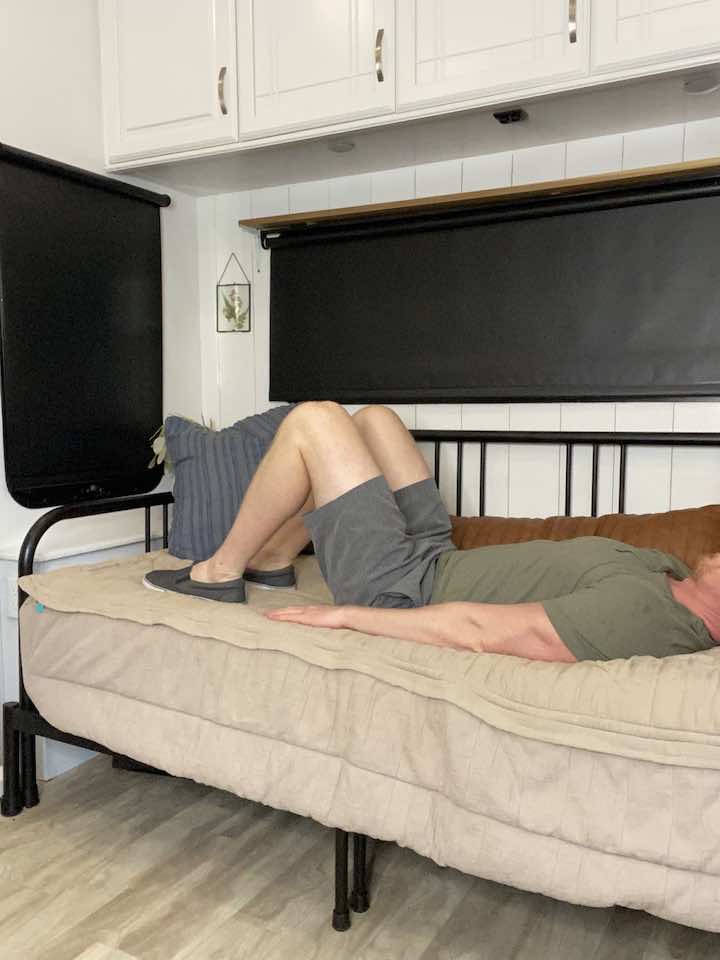
5. Butterfly Stretch
- Begin on your back with your knees bent and feet flat on the surface (you can lay on your bed, couch, or floor). The feet and knees should be together.
- Slowly allow the knees to open apart from each other. Allow the thighs to move towards the floor as far as the hips allow.
- Make sure to avoid arching in the low back.
- Try to hold the stretch anywhere from 30-60 seconds.
B. Strength Training
Strengthening the muscles around the hip joint can help support the hip, mitigate pain, and ensure a more stable movement. Additionally, a strong core can assist in stabilizing the hip joint and prevent further complications. Here are the exercises aimed at building strength in the hip and core:
1. Clamshells
- Start by laying on your side with both knees bent.
- Keep your feet in contact with each other, and then rotate your top leg up. Ensure you keep your spine aligned and your hips don’t rock back! The rule of thumb is to do a smaller range of motion if you think your back is moving.
- Rotate your top leg back down to the starting position.
- Do this exercise 10 times in each set.
- Complete 3 sets of the exercise.
2. Side-Lying Hip Lifts
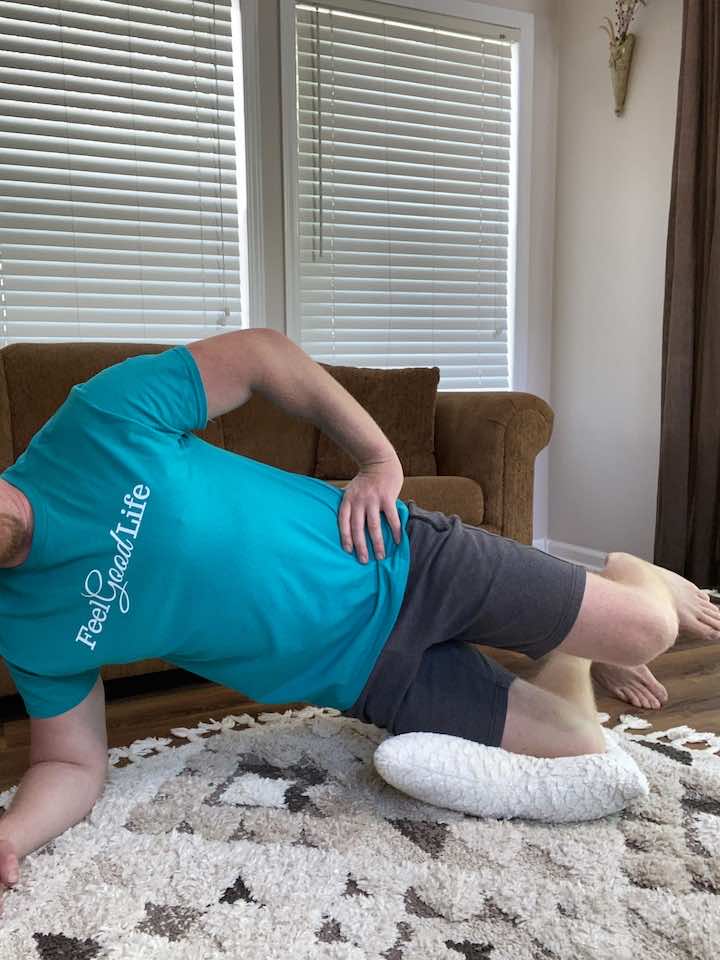
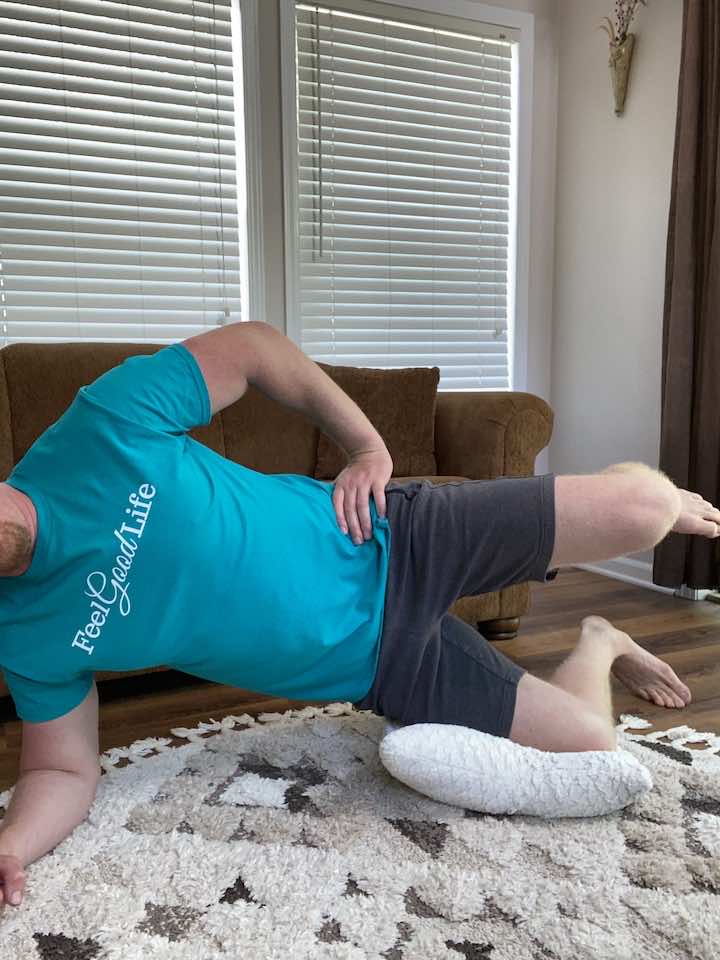
- Lay on your side with your bottom knee bent and your top leg straight. Look down your body to see if your top leg is in line with your trunk. It’s common for the top leg to swing forward a little, so you may have to bring your top leg back an inch or two so that your body is in a straight line from the tip of your head to the tip of the foot on your straight leg.
- Slowly lift your top leg towards the ceiling about 6-12 inches, keeping your leg in line with your body, don’t let it float forward. Then lower your leg back down.
- Keep your hips and shoulders square to the wall in front of you while your leg moves.
- Try to complete 3 sets of 10 on each side if you don’t feel increased pain.
3. Standing Hip Extension
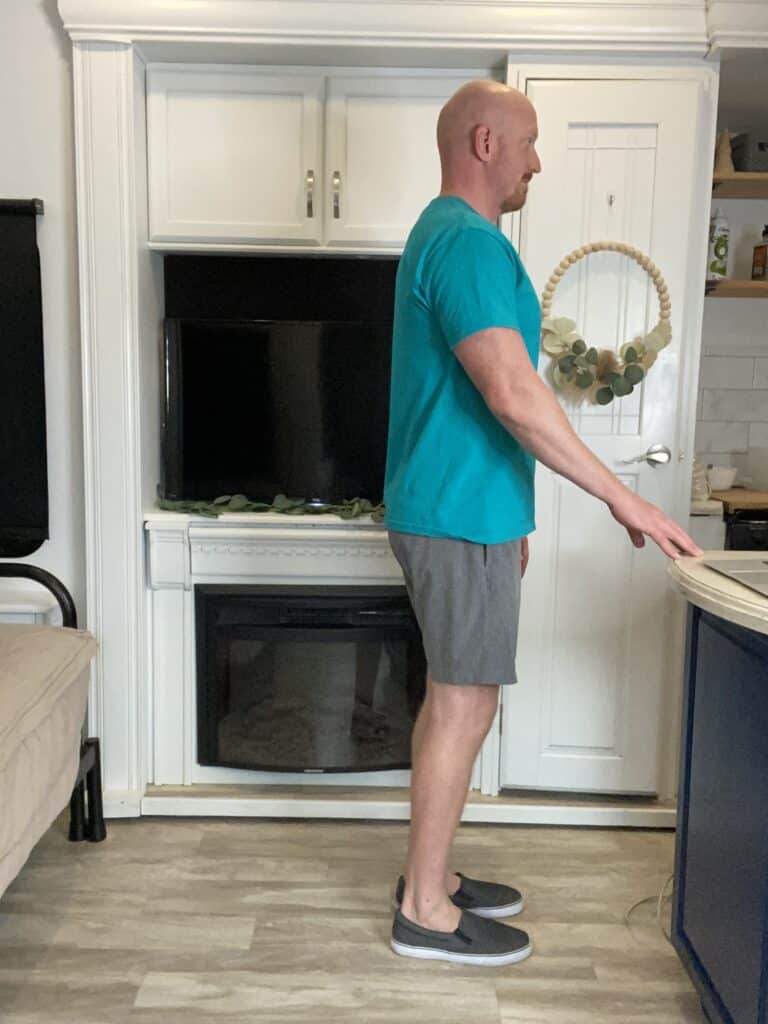
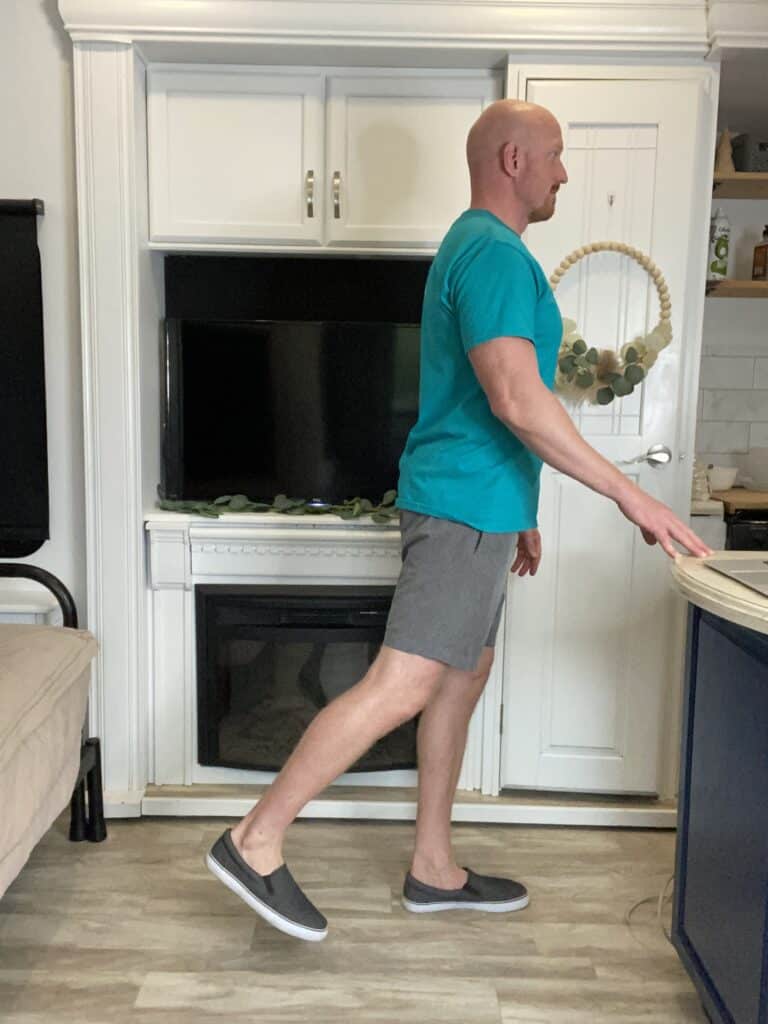
- Stand tall with your hands placed on a steady surface. You can use a counter, sink, or chair (no chairs with wheels) to hold on to for balance.
- Shift your weight onto your left leg, keeping a soft bend in your left knee to keep it from locking out.
- Then, keeping your toes pointed forward and your right leg straight, lift your right leg back a few inches, then lower back down.
- Repeat 10 times per leg for 3 sets.
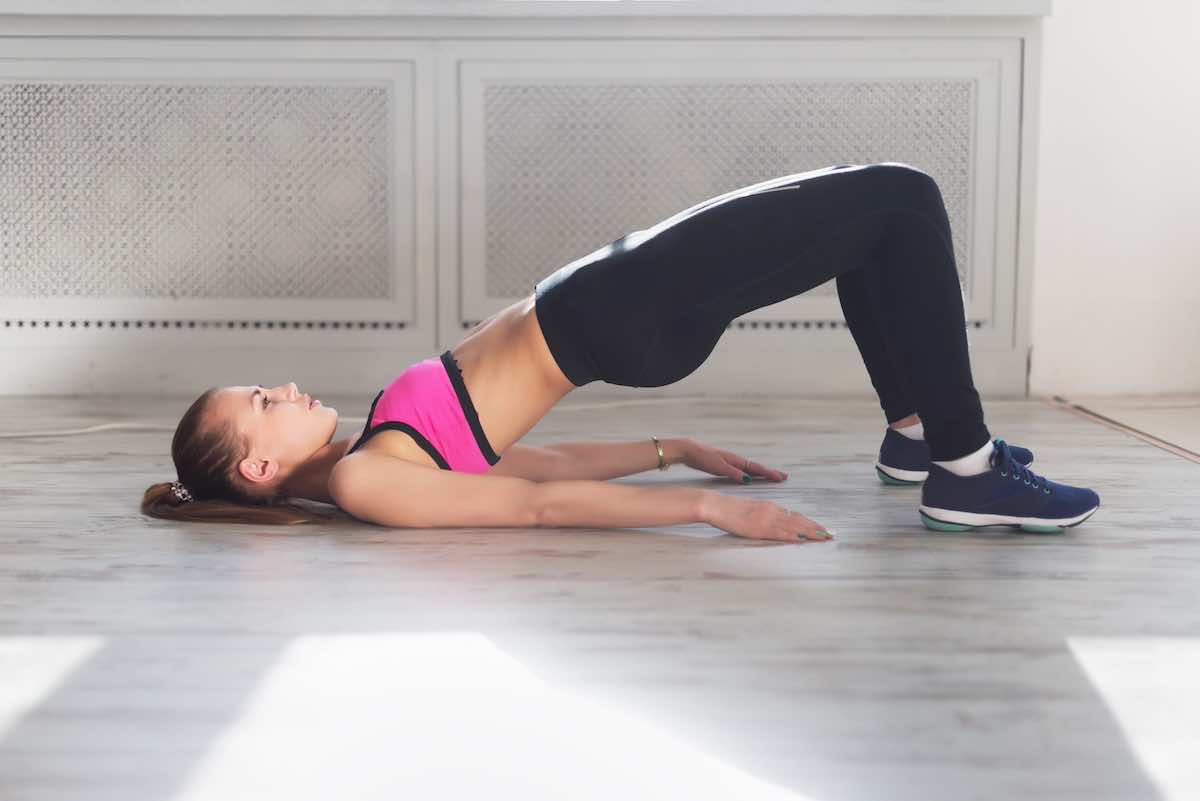
4. Bridges
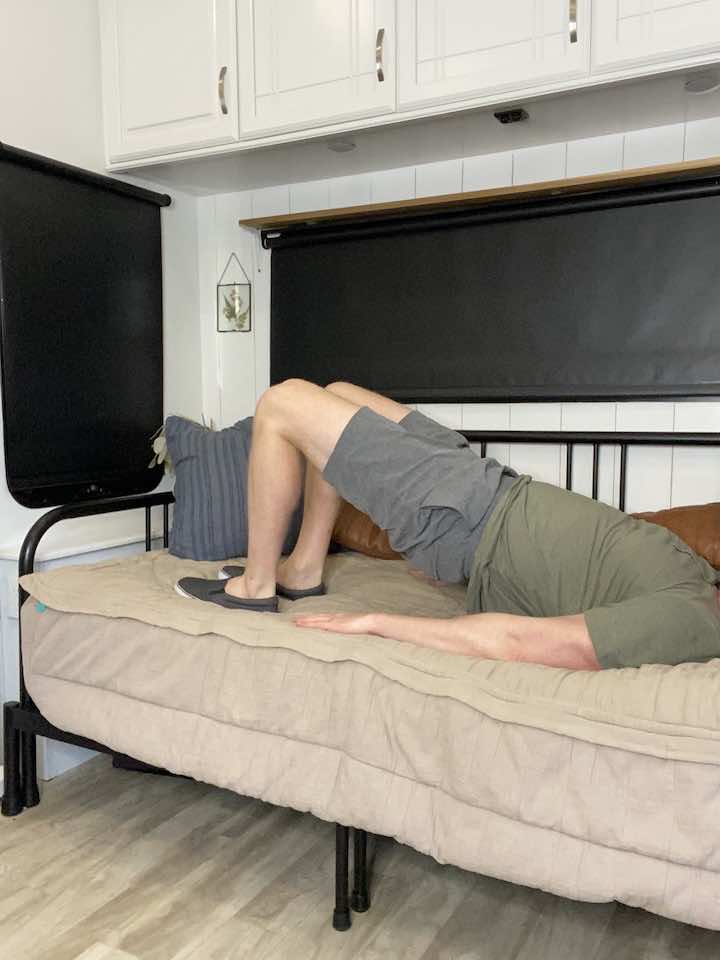
- Lie on your bed or floor (a bed is better if you have difficulty getting on the floor). Again, ensure your knees are bent at about 90 degrees and your feet are flat on the floor.
- Lift your hips off the ground, using your hands to help push your hips up if needed.
- Slowly lower your hips to the bed or floor and repeat 10 repetitions for 3 sets.
5. Abdominal Bracing
- Begin on your back, and knees bent, and feet flat on the floor.
- Exhale and draw your belly button towards your spine (as if a string was pulling on the inside of your belly button from the ground).
- Hold for 5 seconds before relaxing. Repeat 10 times.
Conclusion
Living with hip dysplasia can be challenging, but incorporating these exercises into a regular routine can be a game-changer. They not only help in reducing pain and discomfort but also in enhancing the overall function of the hip.
However, it’s essential to consult with a physical therapist or healthcare professional before starting any exercise regimen, especially if you have an underlying condition like hip dysplasia.
Wondering What's Next?
Discover 11 Easy, At-Home “Stretch Exercises” for Stronger, Pain-Free Joints (click below)