
Free download: Top 10 Natural & Easy Remedies for Joint Pain from Home. Learn these helpful remedies.
Estimated Reading Time: 6 minutes read
There’s a little adage that goes, “Laughter is the best medicine.” But when you’re dealing with groin pain, let’s be real; it’s not exactly a laughing matter. It might surprise you during a leisurely stroll, nudge you post an intense tennis match, or just decide to be an uninvited guest on a peaceful day. You can’t just brush it off with a chuckle and a shrug.
What you need is a plan – a roadmap to help you navigate through this tricky terrain. And that’s where we come in. This comprehensive guide is dedicated to offering you some simple, easy-to-do stretching exercises. These exercises are crafted with the goal of sending your groin pain packing.

The best part? You won’t need fancy equipment or a gym membership to get started. These exercises only require your commitment and a bit of your time each day. That’s all!
Table of Contents
Understanding Groin Pain: Know Your Nemesis!
Before we walk you through the exercises, it’s essential to understand what we’re dealing with. The groin area is a key junction in your body – it’s where your abdomen ends and your legs start. Think of it as the busiest intersection in the city. Naturally, such an important crossroads is open to a fair share of wear and tear.
Groin pain can be an outcome of various factors. Muscle, ligament, or tendon strains are usually the usual culprits. It can also be due to more complex issues like hernias or even certain health conditions like kidney stones. Key symptoms to look out for include sharp pain, swelling, tenderness, and occasionally, difficulty walking.
Don’t fret, though. Just like how every problem has a solution, every pain has a remedy. And in this case, it’s our carefully curated list of exercises.

The Magic of Exercise: Stretch and Strengthen
Exercising when you’re in pain? It sounds strange, doesn’t it? But here’s the thing: gentle stretching exercises can actually help alleviate groin pain. Regular exercise aids in improving flexibility, enhancing blood circulation, and speeding up the healing process. It’s almost like having your cake and eating it too.
With these benefits in mind, we’ve got a set of 7 exercises that aim to be your trusty allies in your battle against groin pain:
1. Butterfly Stretch


- Begin on your back with your knees bent and feet flat on the surface (you can lay on your bed, couch, or floor). The feet and knees should be together.
- Slowly allow the knees to open apart from each other. Allow the thighs to move towards the floor as far as the hips allow.
- Make sure to avoid arching in the low back.
- Try to hold the stretch anywhere from 30-60 seconds.
2. Sumo Squat Stretch


- Step out wide with your toes pointed out towards the corners of the room; your knees should be pointed in the same direction as your feet.
- Lower down into the squat.
- Push up through your heels to a standing position.
Tip: Tuck your hips in to keep your back neutral when performing this squat. We can tend to arch our back with this type of squat.
3. Side Lunge Stretch


- If you feel unsteady, stand tall with your hands on a steady surface. You can use a counter, sink, or chair (no chairs with wheels) to hold on to for balance.
- Step out to the side so that you’re in a wide stance.
- Shift your weight to your right side. Keep your right knee over your ankle, then bring your hips back.
- To sand, push through your right heel and straighten your right leg.
- Do this exercise 10 times in each set.
- Complete 3 sets of the exercise.
4. Standing Hip Openers


- Stand next to a counter or sturdy chair for support if needed.
- Bend your right knee, lifting your foot slightly off the ground.
- Make a big circle with your right hip, opening it out to the side.
- Then, reverse the movement and make a big circle in the opposite direction.
- Repeat this hip circle motion 10 times on your right side.
- Switch to your left side and repeat the same hip circles for 10 repetitions.
- Focus on maintaining your balance and control throughout the exercise.
- Complete 3 sets of the exercise.
5. Seated Hamstring Stretch
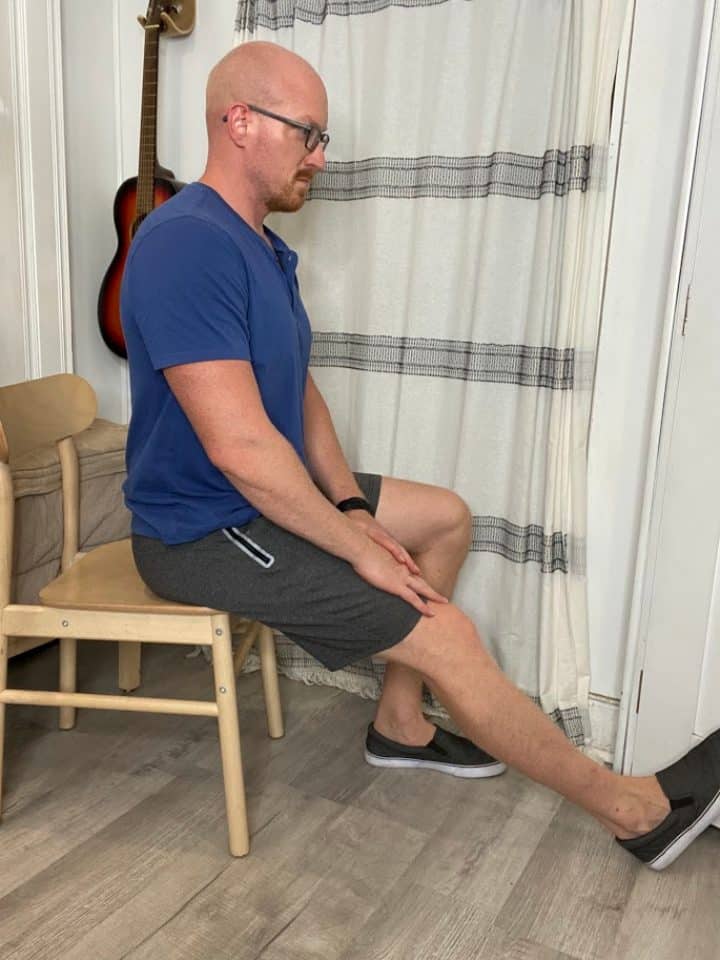
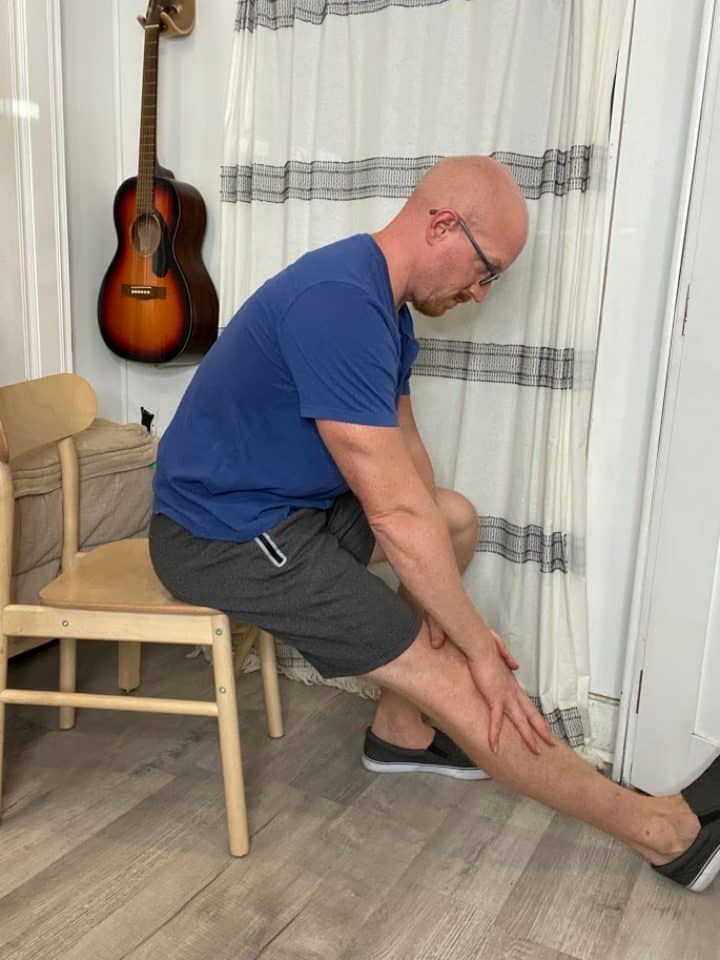
- Seated in a chair, place the leg to be stretched and extended in front of you (the knee should be straight).
- Keeping a straight back, bend forward via hinging at the hips.
- Once you feel a tolerable stretch behind the back of the leg,
- Hold for at least 30 seconds or up to 1 minute.
- Repeat 2 more times.
6. Hip Flexor Stretch
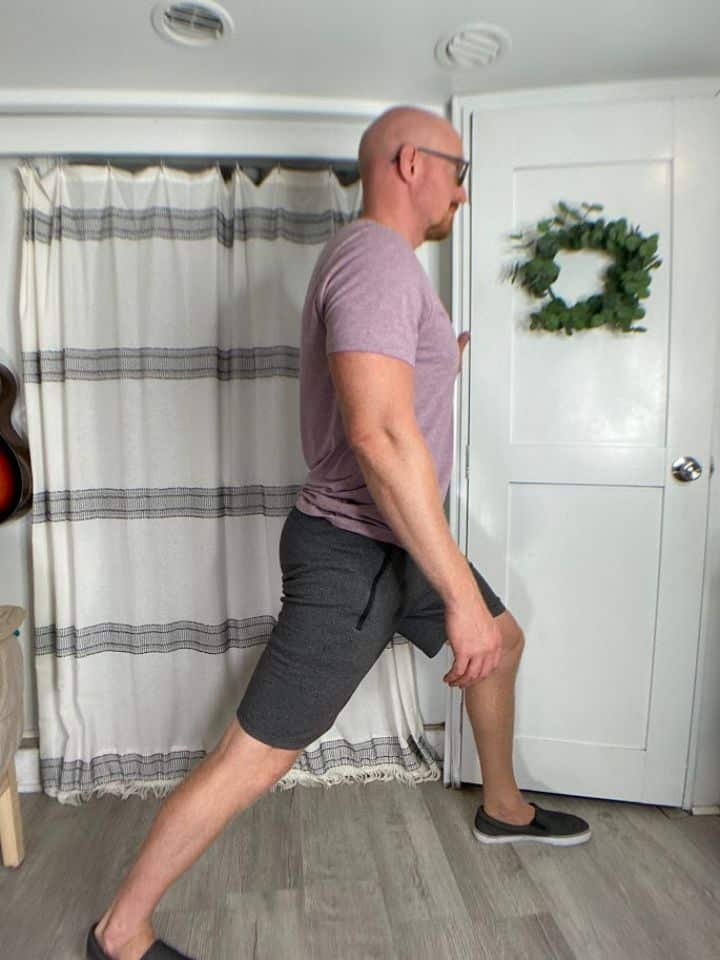
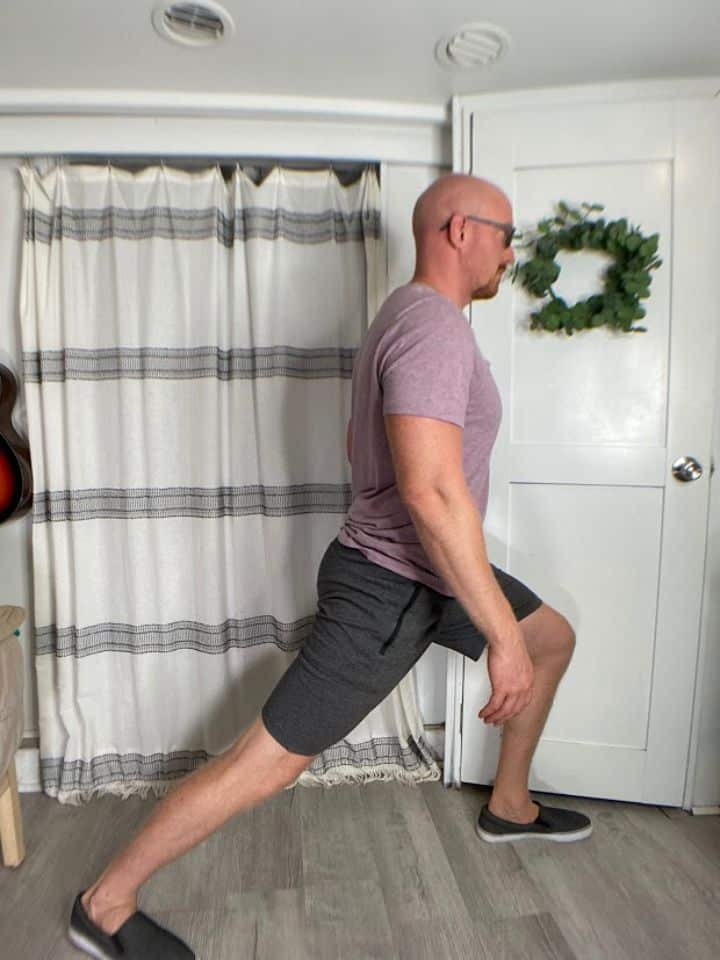
- Begin standing in front of a sturdy surface, such as the countertop, in case you need additional balance support.
- Position the unaffected leg forward and the painful leg back (the further apart the legs are, the stronger the stretch for the hip flexors).
- The front leg should have a bent knee, while the other knee in the back should be straight.
- Lean the body forward towards the front leg until a stretch is felt in the front of the hip in the back leg (make sure to keep both heels on the ground).
- Hold the stretch for at least 30 seconds.
- Repeat 3 times.
7. Quad Stretch

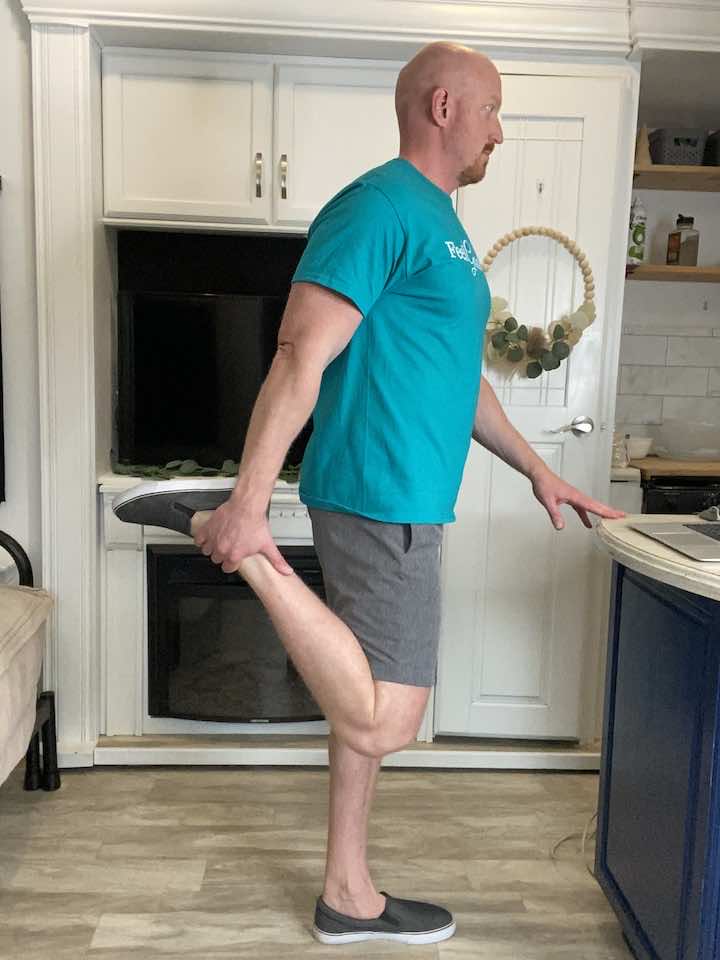
- Stand tall with your hands placed on a steady surface. You can use a counter, sink, or chair (no chairs with wheels) to hold on to for balance.
- Bend your knee and hold onto the top of your foot.
- Hold for 30 seconds, focusing on keeping your knees lined up.
- Repeat 2 more times.
- To make this exercise easier:
- You can always decrease the time you hold the stretch. The goal is to hold for 30 seconds, but you don’t have to do that on day one.
Consistency: Slow and Steady Wins the Race
Now that you’re armed with these exercises, you’re all set to reclaim your days from the clutches of groin pain. But remember, the key is consistency. Regular practice is the secret sauce that makes these exercises truly effective. It’s like watering a plant; it only grows after a period of time but flourishes with consistent care and patience.
So, commit to these stretches, and make them a part of your daily routine. Think of it as a gift to your future self – a future that’s free from the discomfort of groin pain.
Conclusion: Stepping Towards a Pain-Free Future
As we wrap up, it’s important to emphasize this: always listen to your body. If the pain persists or worsens, don’t hesitate to consult a healthcare professional. While these exercises are potent tools to manage and alleviate symptoms, addressing the root cause is crucial if the pain continues.
Just remember, every little stretch is a step towards comfort, a step away from pain. So embrace these exercises, make them your daily companions, and confidently stride towards a future where groin pain is a thing of the past.

It’s time to take charge and reclaim your comfort. You’re not just surviving the pain – you’re taking steps to kick it out. Remember, you’re not just dealing with groin pain. You’re on a journey to defeating it!
Wondering What's Next?
Discover 11 Easy, At-Home “Stretch Exercises” for Stronger, Pain-Free Joints (click below)