Free download: Top 10 Natural & Easy Remedies for Joint Pain from Home. Learn these helpful remedies.
Estimated Reading Time: 7 minutes read
Dealing with hypermobility means having joints that are more flexible than usual. While this extra flexibility can be great for certain sports or activities, it can also lead to joint pain or problems if not appropriately managed. People with hypermobility need to find it’s the right way to take care of their joints, keeping them strong and healthy.
In this article, we’re going to talk about the best exercises for people with hypermobility. These exercises focus on making your core and upper body stronger and keeping your hips in good shape. Doing these exercises can help stabilize your joints, make them more robust, and reduce the chances of pain or injury. Plus, these exercises are easy to do at home and don’t need a lot of equipment.
Table of Contents
Strengthening Exercises to Manage Hypermobility
A: Core Strength Exercises
A strong core is the foundation for a stable body. It helps maintain good posture and reduces the strain on your joints. Here are some exercises to strengthen your core:
1. Abdominal Brace
- Begin on your back; knees bent, and feet flat on the floor.
- Exhale and draw your belly button towards your spine (as if a string was pulling on the inside of your belly button from the ground).
- Hold for 5 seconds before relaxing.
- Do this 10 times for one set, and complete 2 sets.
2. Pelvic Tilt
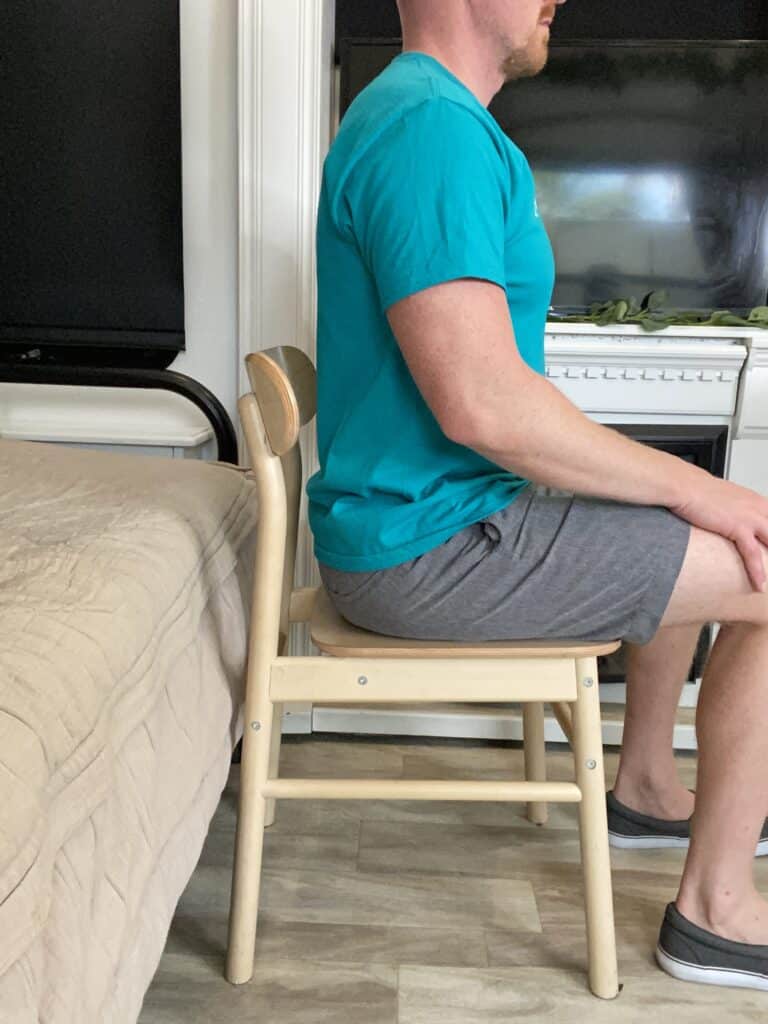

- Sit upright in a chair with your shoulders relaxed. Take a deep inhale and expand your belly.
- As you exhale, contract your abdominal muscles by pulling your belly button in towards your spine and flattening your low back against the chair.
- Hold this position for 5 seconds and then slowly relax.
- Perform 10 repetitions for a total of 3 sets.
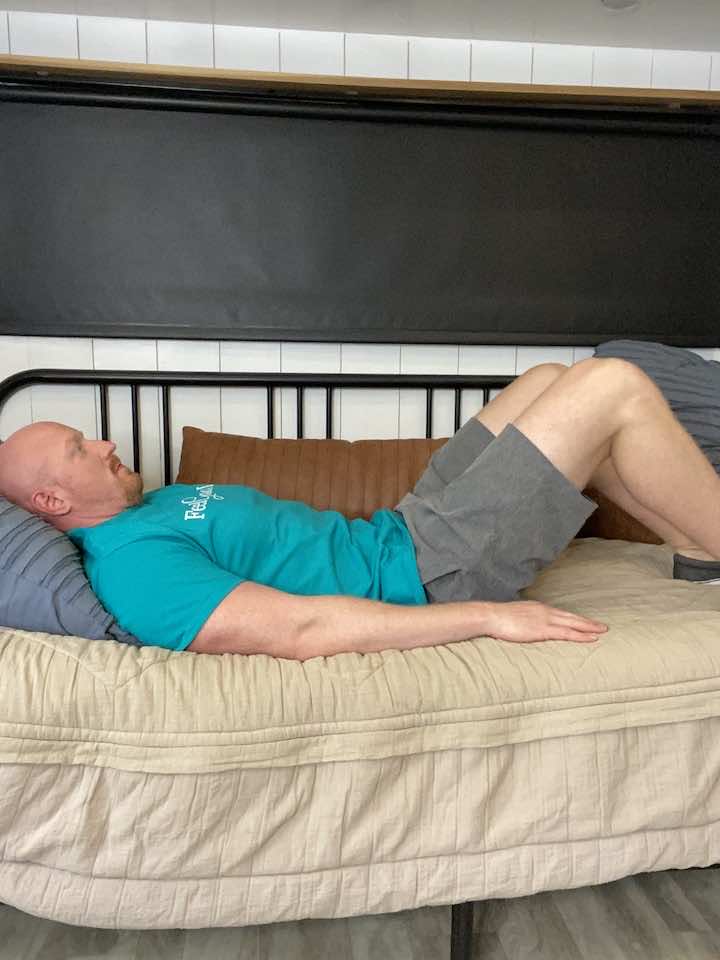
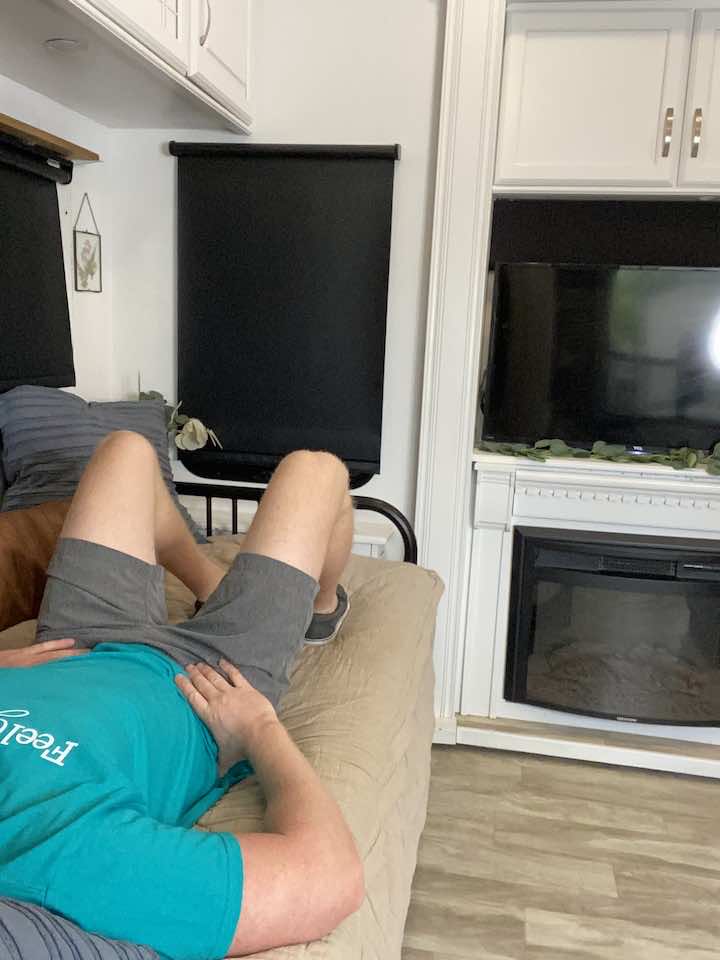
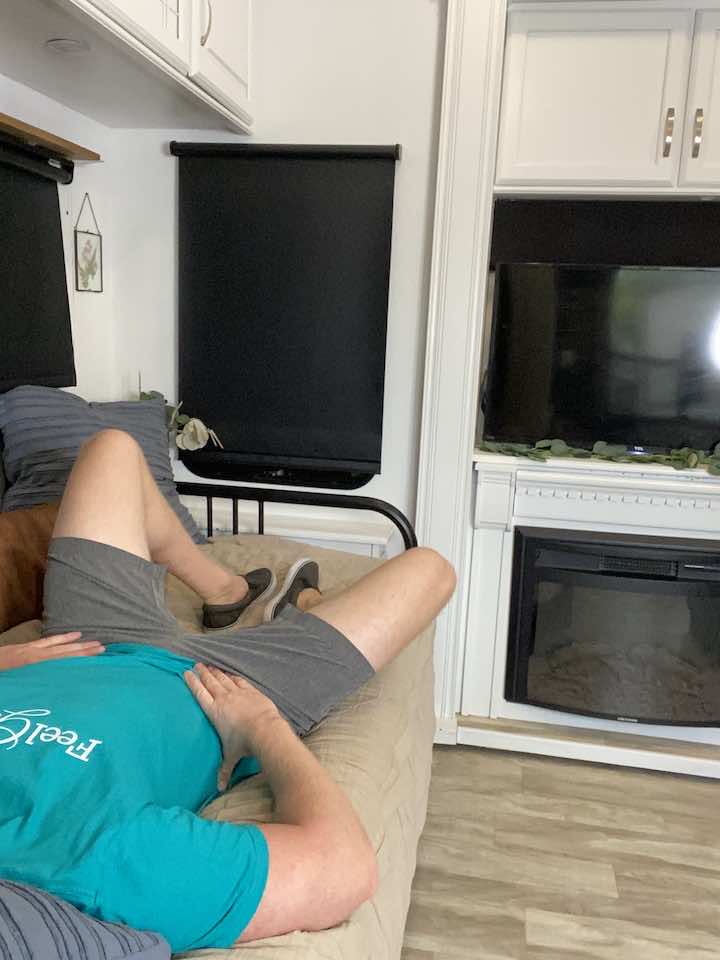
3. Supine Marching


- Starting position: Laying flat on your back (on your bed, couch, or floor), with your knees bent and feet flat on the surface.
- To activate your transverse abdominis, try to pull the belly button down towards the surface, gently flattening the back simultaneously. This will help to brace the core.
- While keeping this braced core (don’t forget to breathe!), lift one knee towards your chest, like a march, then lower back down to the surface.
- Repeat 10 repetitions for 3 sets. Perform on the opposite leg.
- You can perform all repetitions on one side, switch to the other or perform alternatingly between the legs.
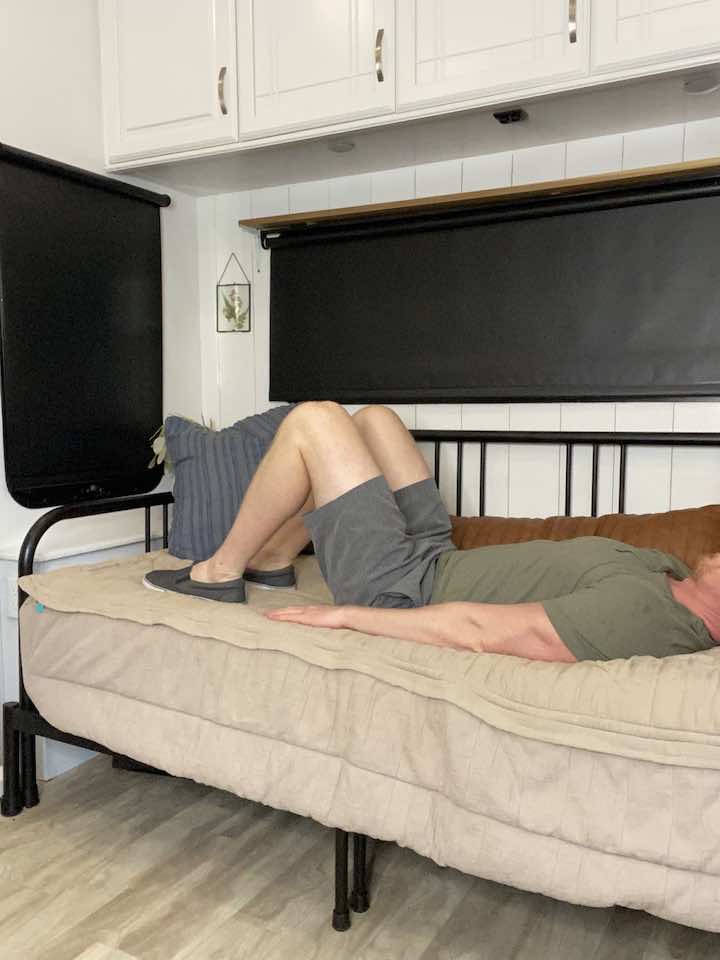
4. Bent Knee Fallouts
- Lie on your back with both knees bent and your hands on your hips.
- Engage your core by bracing your muscles like a trampoline surface. It’s a subtle movement and shouldn’t feel like you’re pushing your core up or sucking your core in. Just a gentle brace as though someone was about to place a weight on your belly.
- Keep your left knee frozen where it is, then let your right knee lower to the side 45 degrees and come back to the center. Keep your core engaged the whole time. You can monitor for control by using your hands on your hips. If your hip drops to the right side as the right leg moves, you’re not keeping your core engaged. The goal is for your hips to stay perfectly still while you perform this asymmetrical movement.
- Perform sets on the right side, then repeat on the left.
B: Hip Strength Exercises
Strong hips are crucial for lower body stability. These exercises will help in building hip strength:
1. Bridge
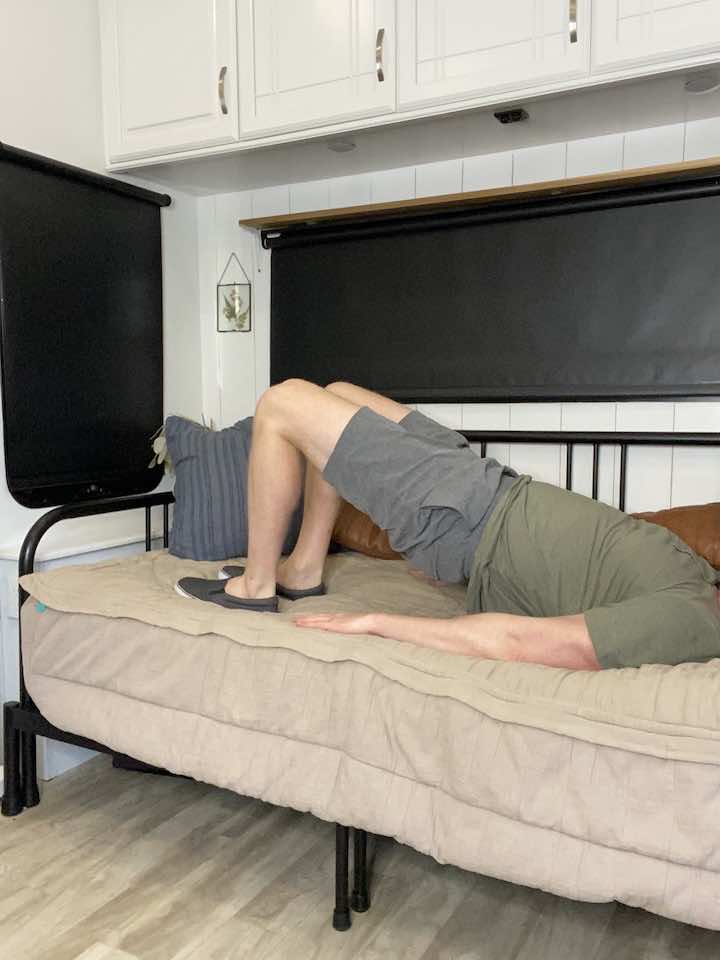
- Lie on the floor or bed with your legs bent and feet flat on the floor/bed.
- Gently squeeze your butt muscles to lift your hips off the ground, feeling a nice stretch in your front thigh and a contraction in the back of your thigh.
- Lower your hips back down to the starting position.
- Repeat 10 times.
2. Clamshells
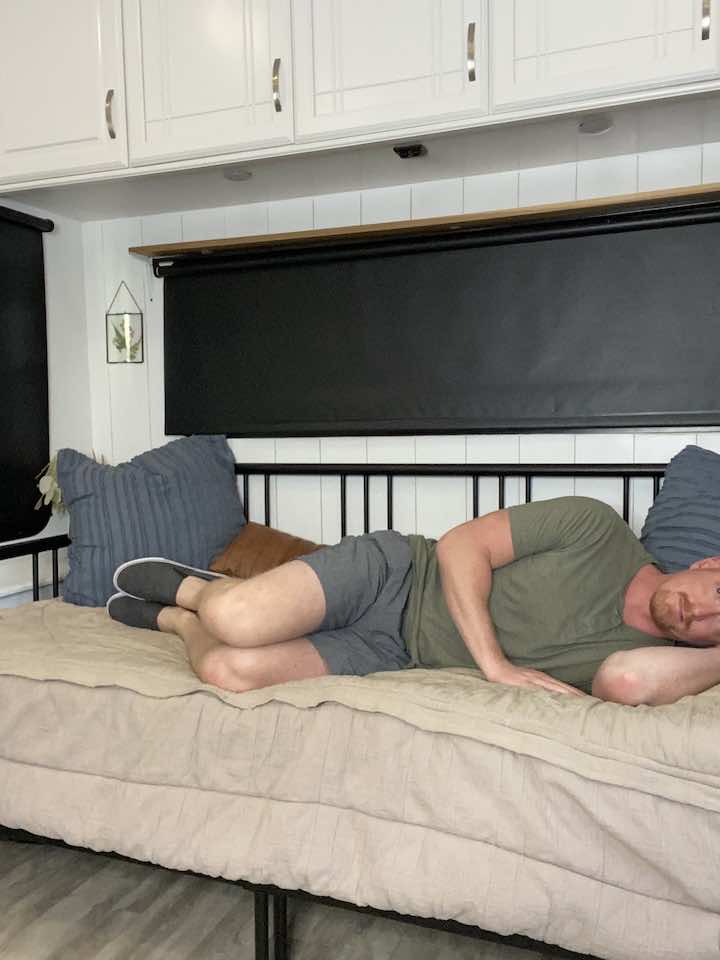
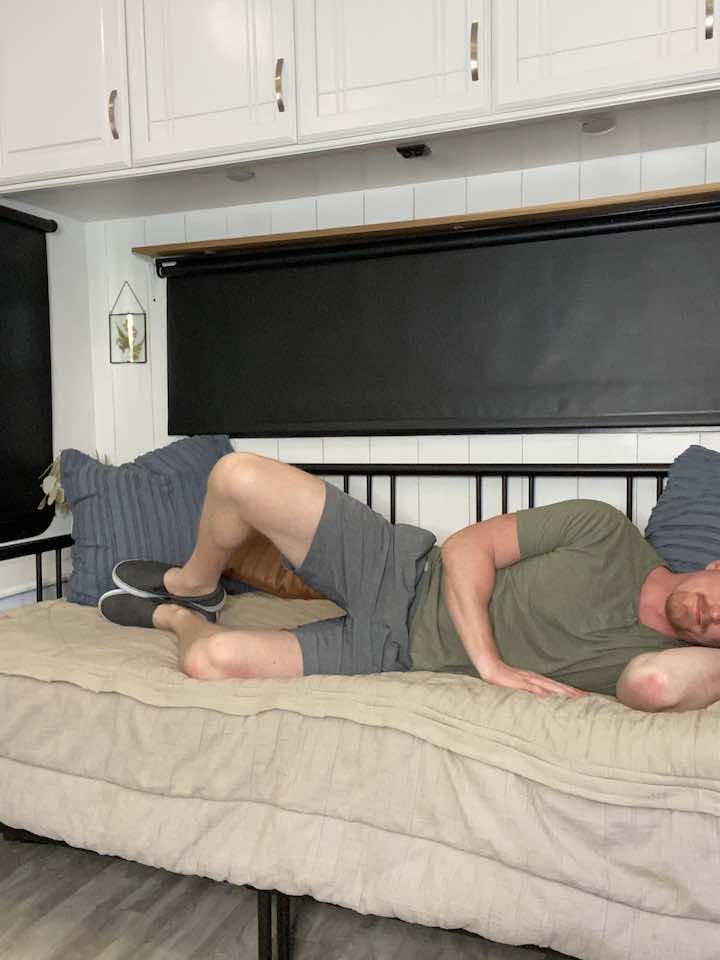
- Start by paying on your side with both knees bent.
- Keep your feet in contact with each other, and then rotate your top leg up.
- Make sure you keep your spine in alignment and your hips don’t rock back! Rule of thumb is to do a smaller range of motion if you think your back is moving.
- Rotate your top leg back down to the starting position.
- Do this 10 times for one set, and complete 3 sets.
3. Standing Hip Lifts
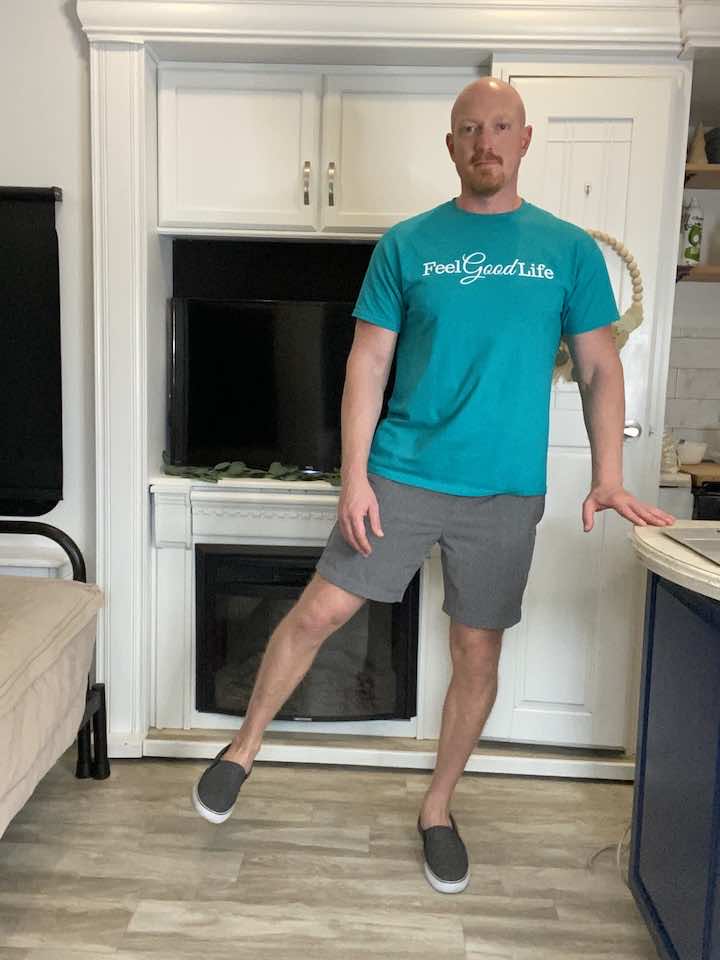
- Stand tall with one hand placed on a bed or chair. Balance on your left leg, keeping a soft bend in your knee to keep from locking out.
- Leading with your heel, lift your right leg out to the side. Be sure not to lean to the left.
- Repeat 10 times per leg.
- Complete 3 sets of the exercise.
4. Standing Hip Extension
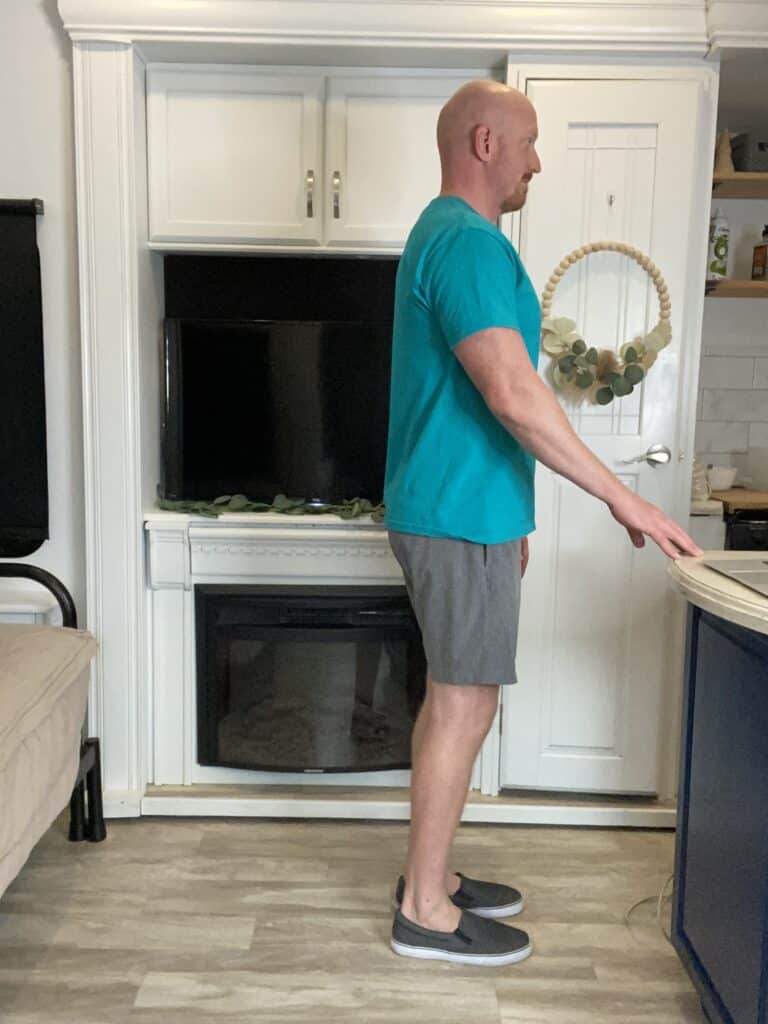
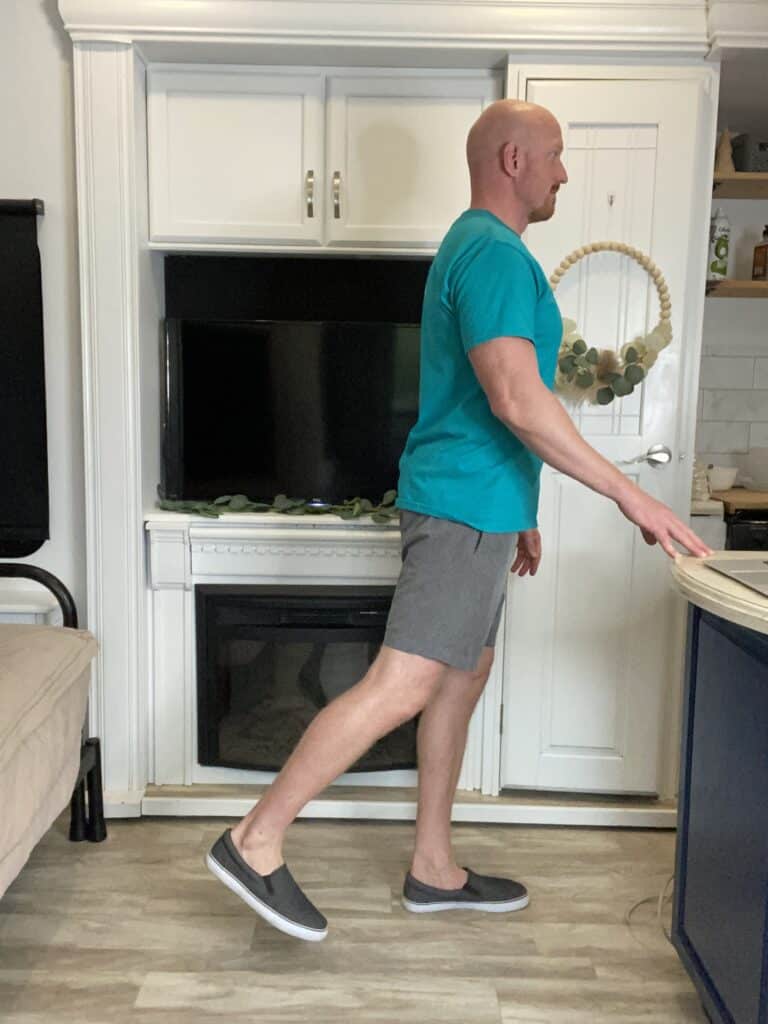
- Stand tall with your hands placed on a steady surface. You can use a counter, sink, or chair (no chairs with wheels) to hold on to for balance.
- Shift your weight onto your left leg, keeping a soft bend in your left knee to keep it from locking out.
- Then, keeping your toes pointed forward and your right leg straight, lift your right leg back a few inches, then lower back down.
- Repeat 10 times per leg for 3 sets.
C: Upper Body Strengthening Exercises
The upper body often gets overlooked when managing hypermobility. However, strengthening the upper body is just as important as focusing on the core and hips.
Here are some effective exercises to strengthen your upper body:
1. Rows with Resistance Band
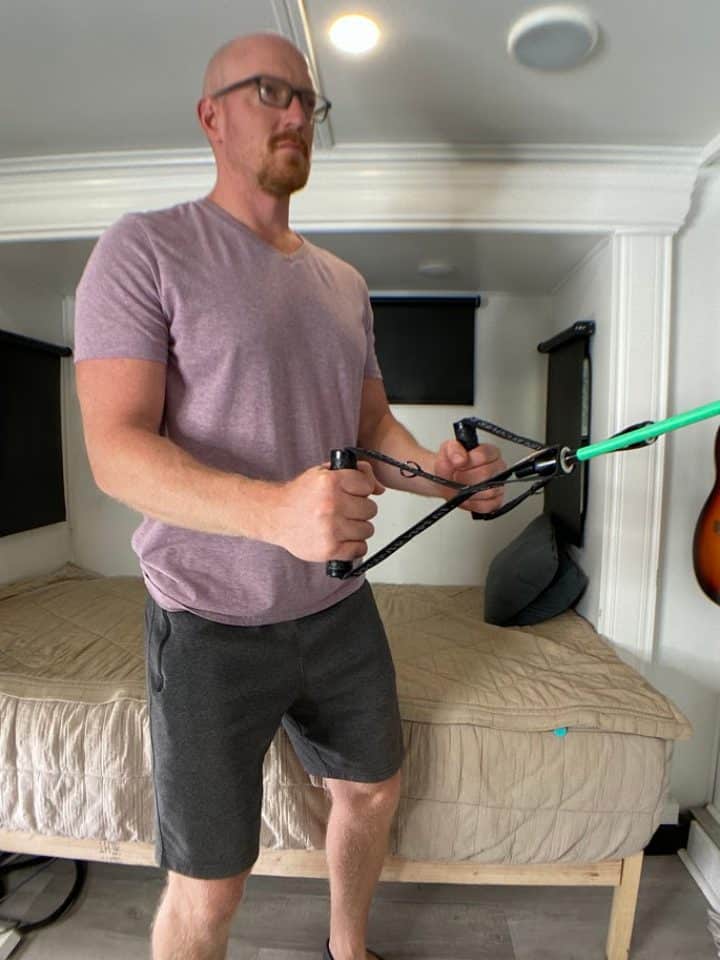
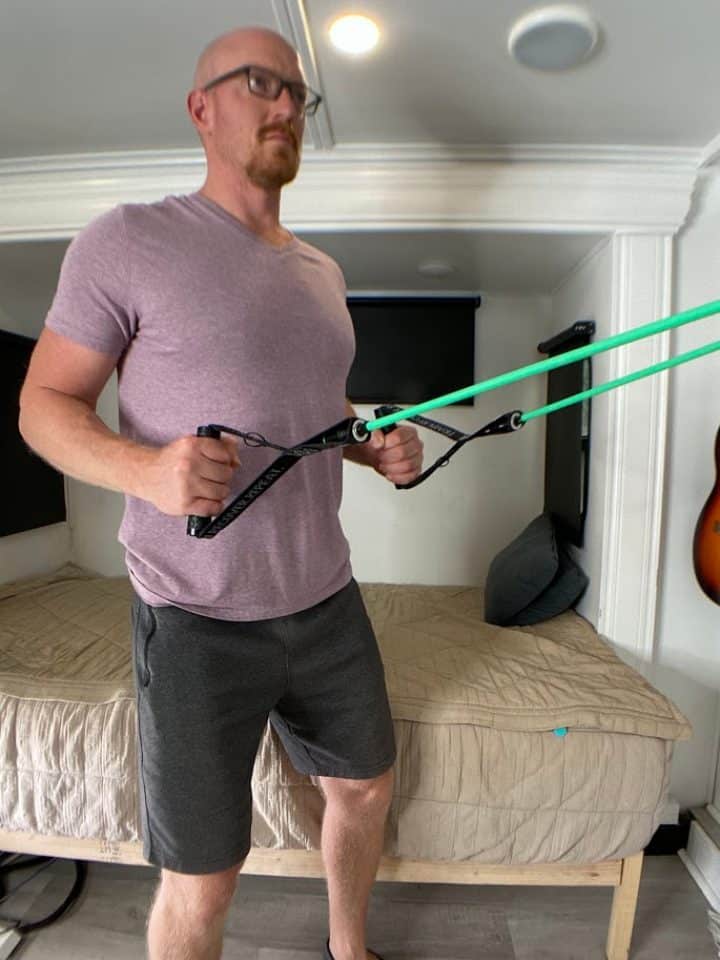
- Hold on to the ends of a resistance band (light, medium or heavy), which you can attach to a door knob.
- Begin with the arms elevated in front of you to shoulder height and the palms facing each other.
- Step back far enough that the resistance bend has a little tension.
- Pull back on the band by bending the elbows and swinging the arms back next to you. Make sure to squeeze the shoulder blades together.
- Hold for 2 seconds, then return to your starting position.
- Repeat 10 repetitions for 3 sets.
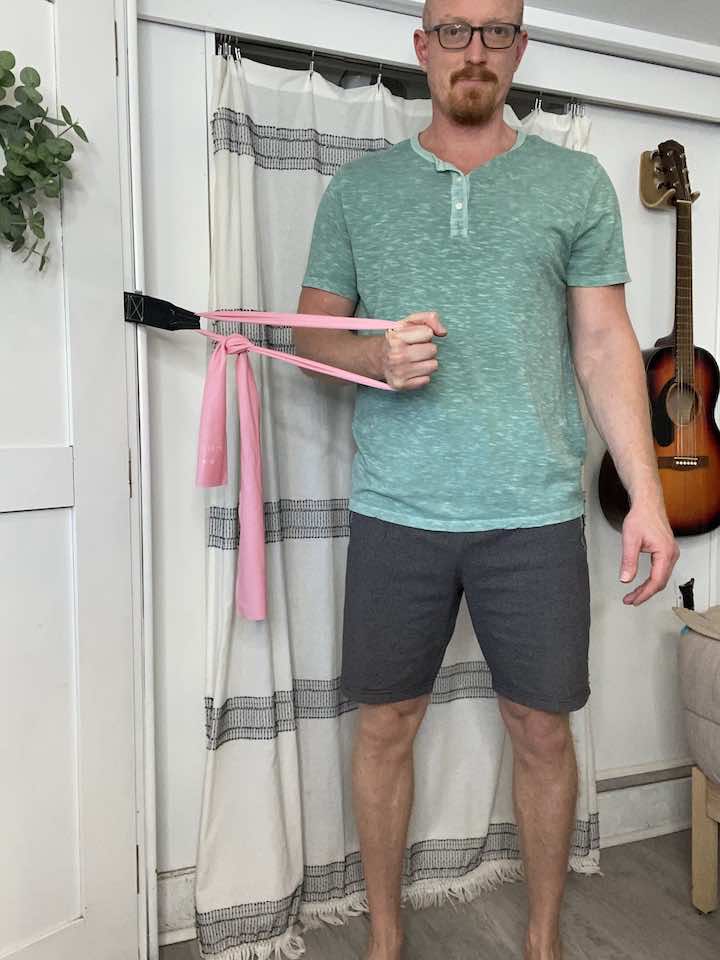
2. External Shoulder Rotation with a Resistance Band

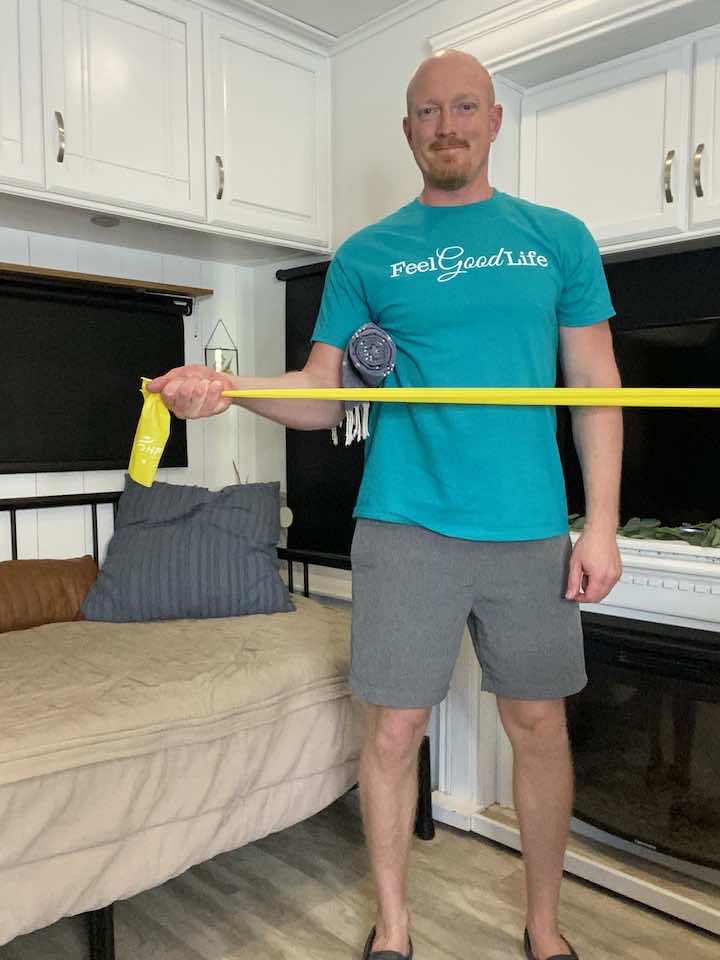
- Attach one end of the resistance band to a secure location, such as a doorknob or post, at the height of your elbow to perform the correct motion.
- Stand facing the band and hold the other end with your hand on the same side, elbow bent at a 90-degree angle and tucked by your side, and palm facing towards your body.
- Keeping an upright posture, slowly pull the band away from your body, rotating your arm outward and away from your torso while maintaining the 90-degree angle of your elbow.
- Hold this position for 2 seconds, then return to your starting position.
- Repeat the movement for 10 repetitions, then switch to the other arm.
- Aim for 3 sets of this exercise.
3. Internal Shoulder Rotation with a Resistance Band
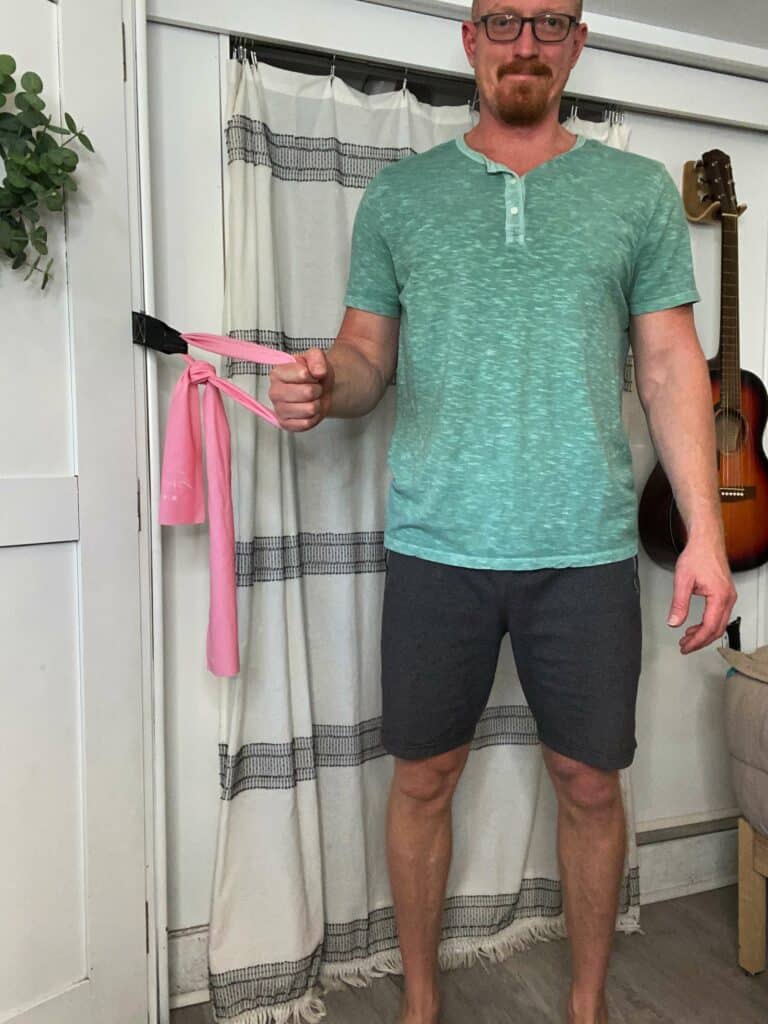
- To perform this exercise, you will need to attach one end of the band to a secure location, such as a doorknob or post, at the height of your elbow to perform the correct motion.
- Keeping an upright posture, slowly pull the band towards your stomach while maintaining the 90-degree angle of your elbow.
- Hold for 2 seconds, then return to your starting position.
- Repeat the movement for 10 repetitions, then switch to the other arm.
- Aim for 3 sets of this exercise.
These exercises target the key muscles in the upper body, improving stability and reducing the risk of joint pain and injury.
Hypermobility Care Tips
Maintaining joint health and managing hypermobility requires more than exercise. Here are some additional care tips:
- Consistent Exercise Routine: Regular exercise helps maintain joint stability.
- Balanced Diet: A diet rich in nutrients supports connective tissue health.
- Adequate Hydration: Essential for overall joint and muscle function.
- Proper Warm-Up and Cool-Down: Prepares your body for exercise and aids in recovery.
- Mindful Movement: Be aware of your body’s limits to avoid overextending joints.
- Professional Guidance: Consult a physical therapist for personalized advice.
Implementing these tips can significantly enhance the effectiveness of your exercise routine and overall management of hypermobility.
Conclusion
Managing hypermobility effectively requires a holistic approach that includes targeted exercises and lifestyle adjustments. By focusing on strengthening the core, hips, and upper body, you can improve joint stability and reduce the risk of pain and injury.
Remember, consistency is key in managing hypermobility. Regular exercise, coupled with mindful movement and a healthy lifestyle, can lead to significant improvements in your overall well-being. If you experience any persistent pain or discomfort, consulting a healthcare professional is essential for tailored advice. Stay active, stay mindful, and take care of your body!
Wondering What's Next?
Discover 11 Easy, At-Home “Stretch Exercises” for Stronger, Pain-Free Joints (click below)