Free download: Top 10 Natural & Easy Remedies for Joint Pain from Home. Learn these helpful remedies.
Estimated Reading Time: 7 minutes read
Having a quadriceps strain is indeed a hurdle. This condition can limit your activities and mobility for a while but is not insurmountable. With the right recovery plan that includes targeted exercises and adequate rest, improvement and healing are within reach.
Quadriceps strain is more common than you might think, and many people have successfully navigated their way back to full health and activity after this setback. In this context, it’s important to understand what a quad strain is, how it impacts your body, and the steps you can take toward recovery.
Table of Contents
All About Quad Strains
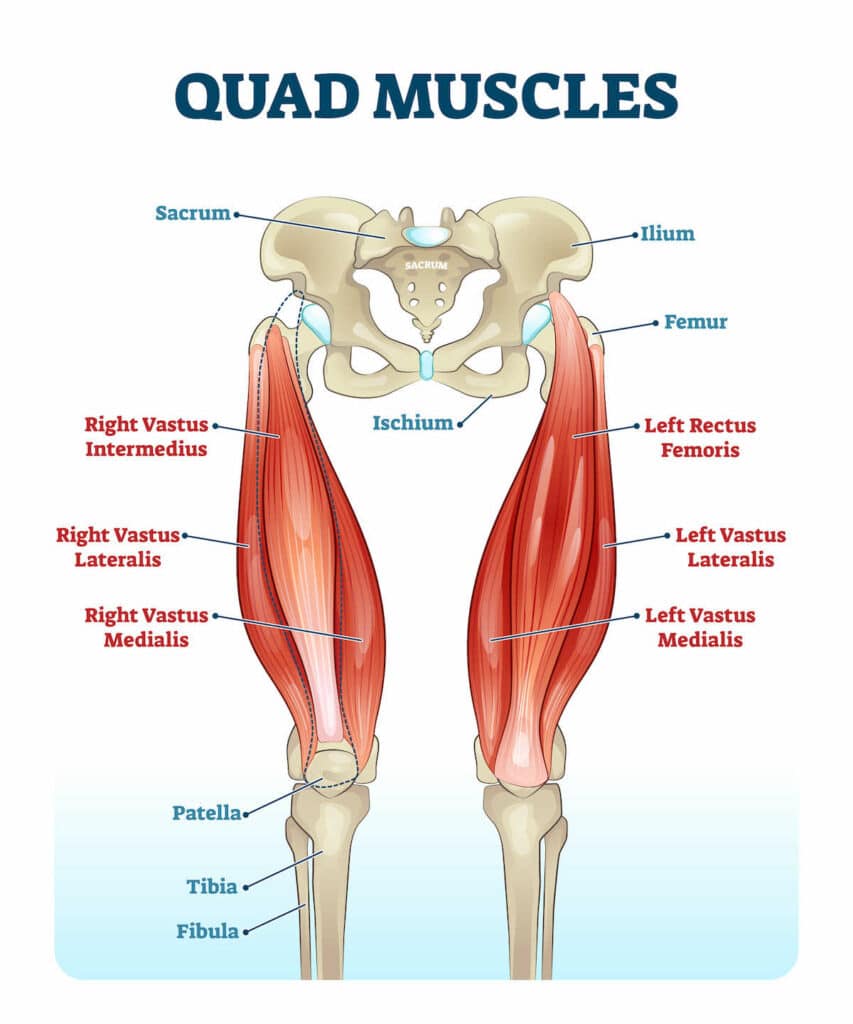
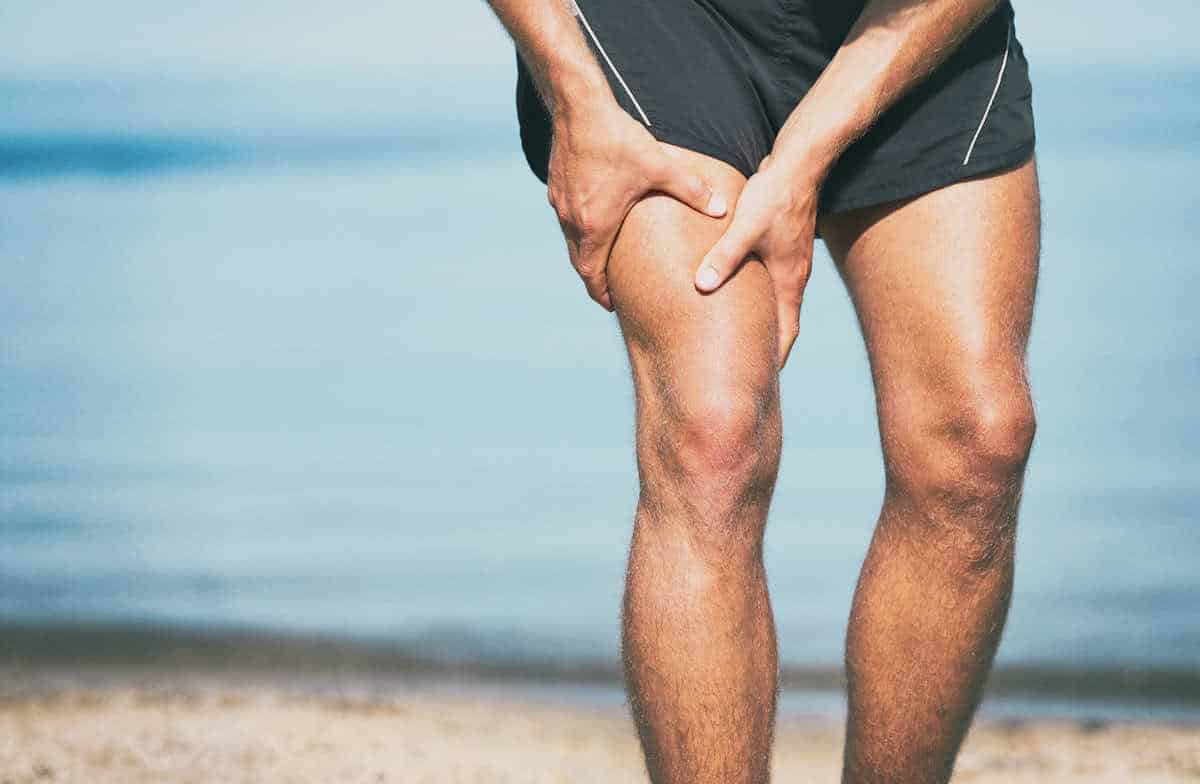
Ah, the infamous quad strain, the unwelcome gatecrasher at life’s party. Your quadriceps, the muscle group that holds the fort at the front of your thigh, are currently staging a sit-in protest against overstretching. It’s your body’s dramatic way of waving the white flag and saying, “Hey, time out; let’s cool down and heal for a while!” This is not a message to discard or, even worse, sweep under the carpet. It’s your golden ticket to some well-deserved downtime.
Now, before your eyes light up at the lineup of exercise delights in store (we know you’re raring to go), your recovery journey begins with the ‘less exciting’ yet absolutely vital step: rest. Yes, you heard right! As crucial as the exercise regime that lies ahead, rest is your body’s way of recharging and resetting. Along with some quality rest, remember to ice the affected area. Think of it as the chill session after a strenuous workout, helping to reduce inflammation and soothe the pain.
Ice and Heat: The Dynamic Duo of Therapy
Shifting gears, let’s highlight the unsung heroes of your recovery journey – Ice and Heat! They’re like your body’s very own dynamic duo, always on standby to swoop in and save the day.
Ice takes the role of your frontline defense. Just like your favorite comic book hero, ice charges in during the initial stages of your injury, tackling inflammation head-on and numbing the pain. But how does this chilly hero work? Applying ice to the strained area constricts the blood vessels, reducing blood flow to the area and alleviating swelling and inflammation. It’s quite the superhero, wouldn’t you agree?
Then comes our second superhero, heat therapy. Once the ice has worked its magic and the initial inflammation and swelling have subsided, it’s time for heat to take center stage. The heat helps to relax and loosen tissues, promoting blood flow to the affected area and speeding up the healing process. Just imagine it as a mini spa session for your muscles, without the fancy cucumber slices over the eyes!
Together, this dynamic duo of ice and heat play an invaluable role in your recovery journey, offering relief, promoting healing, and paving the way for the next stage: exercises.
Initial Rehab Exercises: Baby Steps to Recovery
Feeling better? Great! Now that you’ve eased your recovery routine, it’s time to reintroduce movement gradually. But don’t worry; we’re not going to throw you into the deep end just yet. We’re starting with gentle, low-impact exercises that’ll help your quad regain strength without causing undue stress.
1. Gentle Quad Stretch
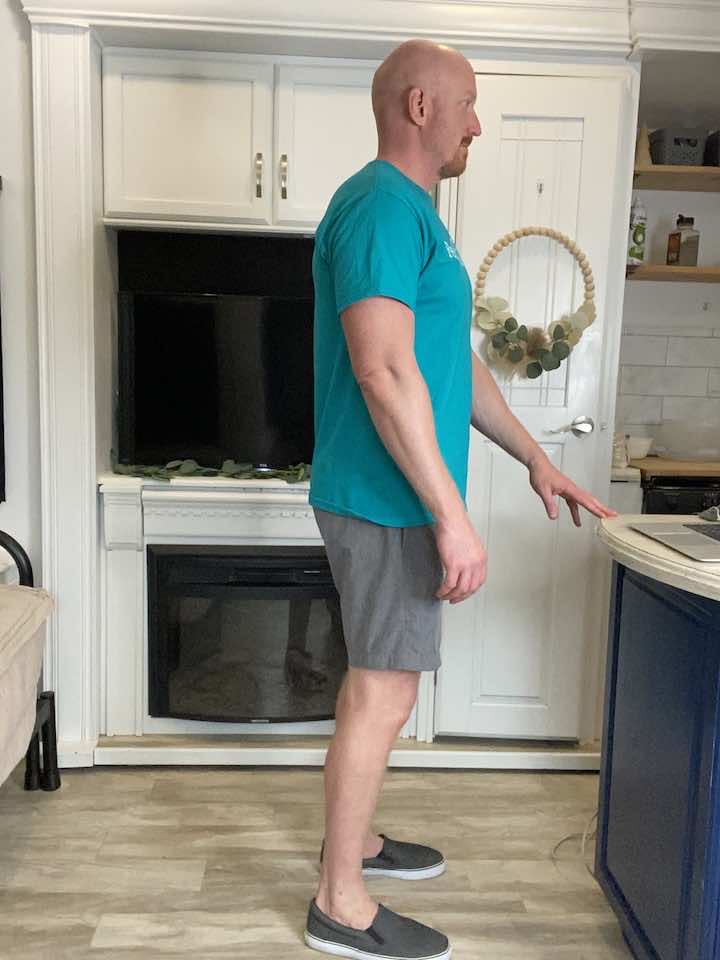
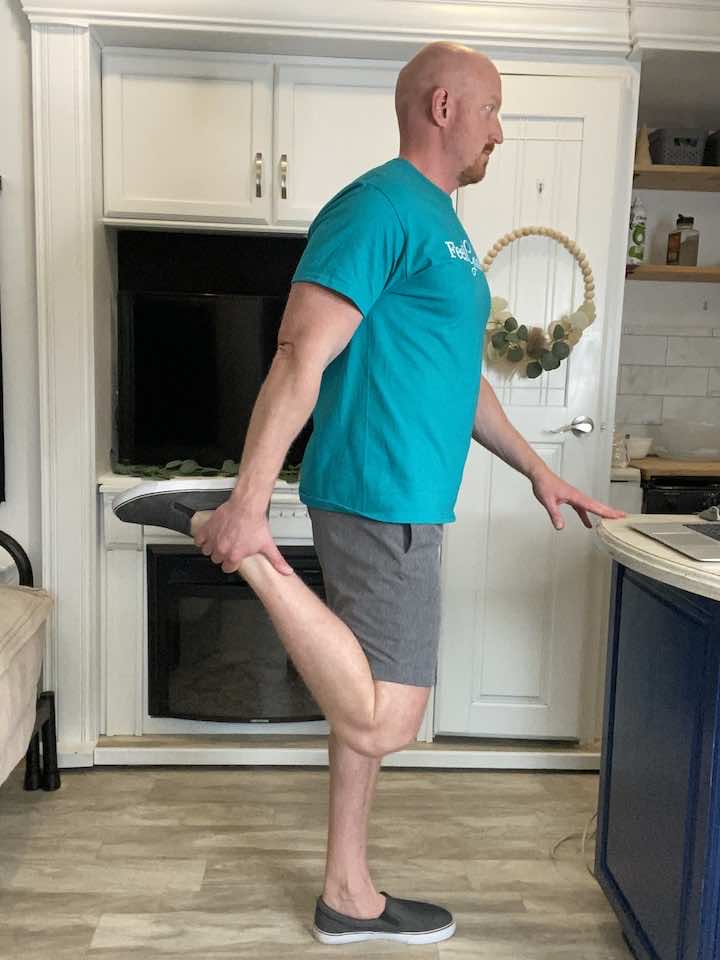
- Stand tall with your hands placed on a steady surface. You can use a counter, sink, or chair (no chairs with wheels) to hold on to for balance.
- Bend your knee and hold onto the top of your foot.
- Hold for 30 seconds, focusing on keeping your knees lined up.
- Repeat 2 more times.
- To make this exercise easier:
- You can always decrease the time you hold the stretch. The goal is to hold for 30 seconds, but you don’t have to do that on day one.
2. Quad Sets
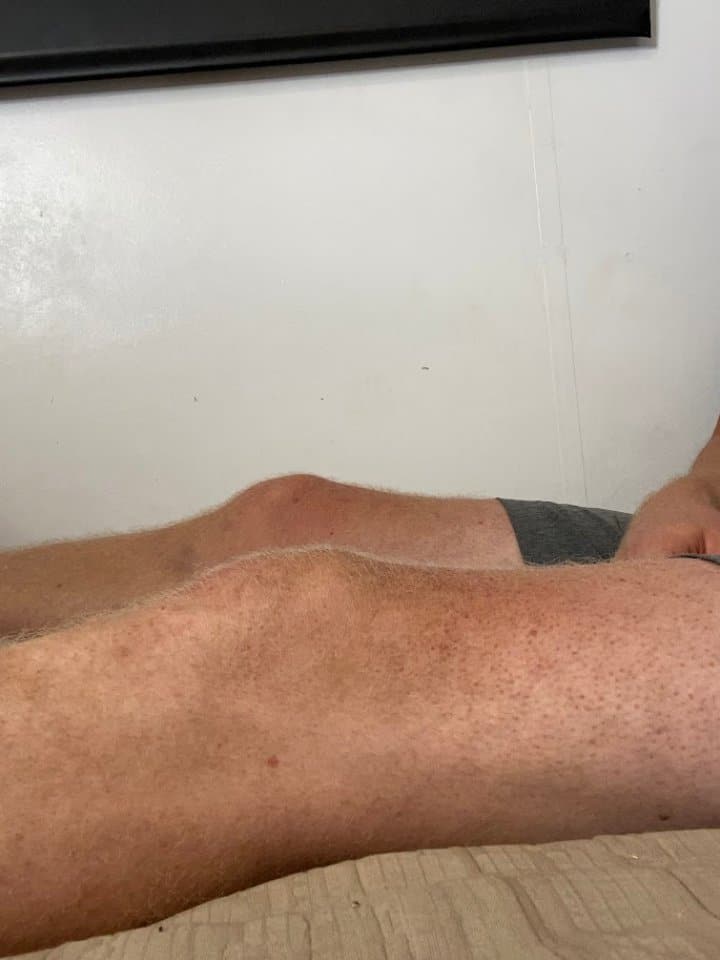
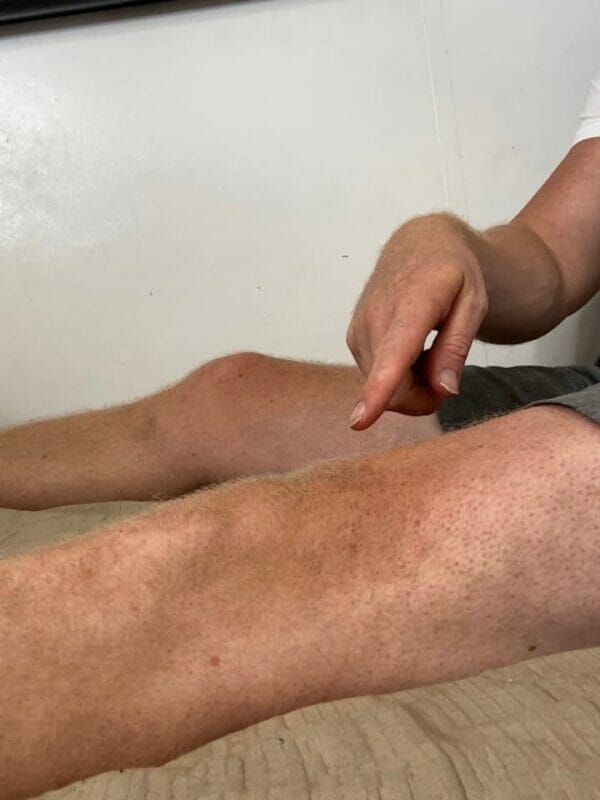
- Starting position: Seated with the injured leg stretched in front of you (can be on the floor, couch, or bed).
- Squeeze the quadriceps (the muscles on the top of the thigh) and try to press the back of the injured knee down toward the surface.
- Hold for 5 seconds, then relax.
- Repeat 10 repetitions for 3 sets.
3. Short Arc Quad
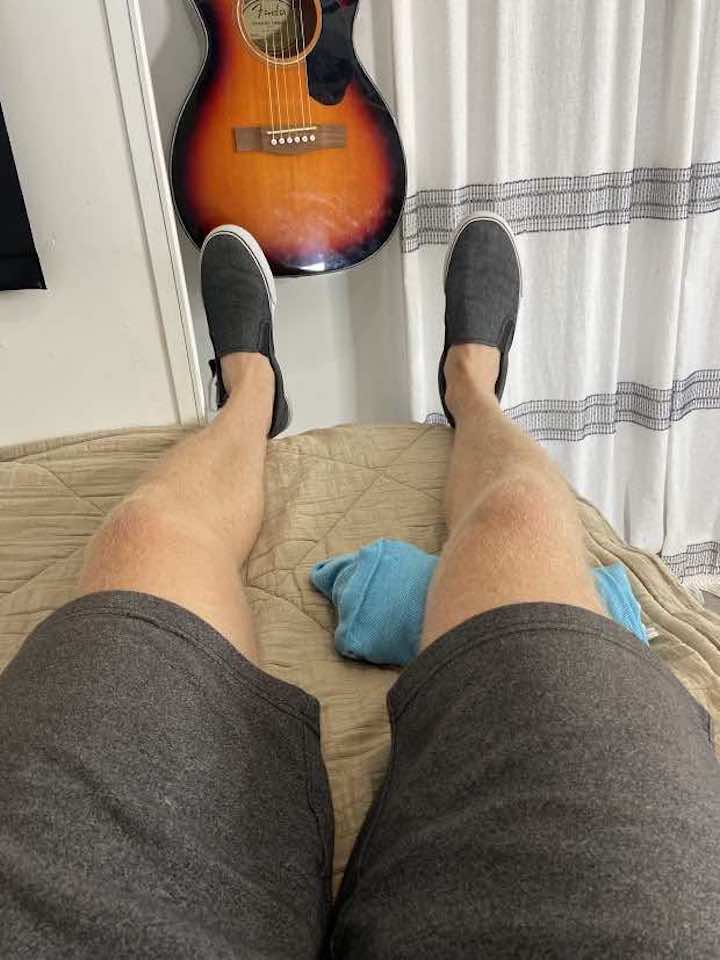
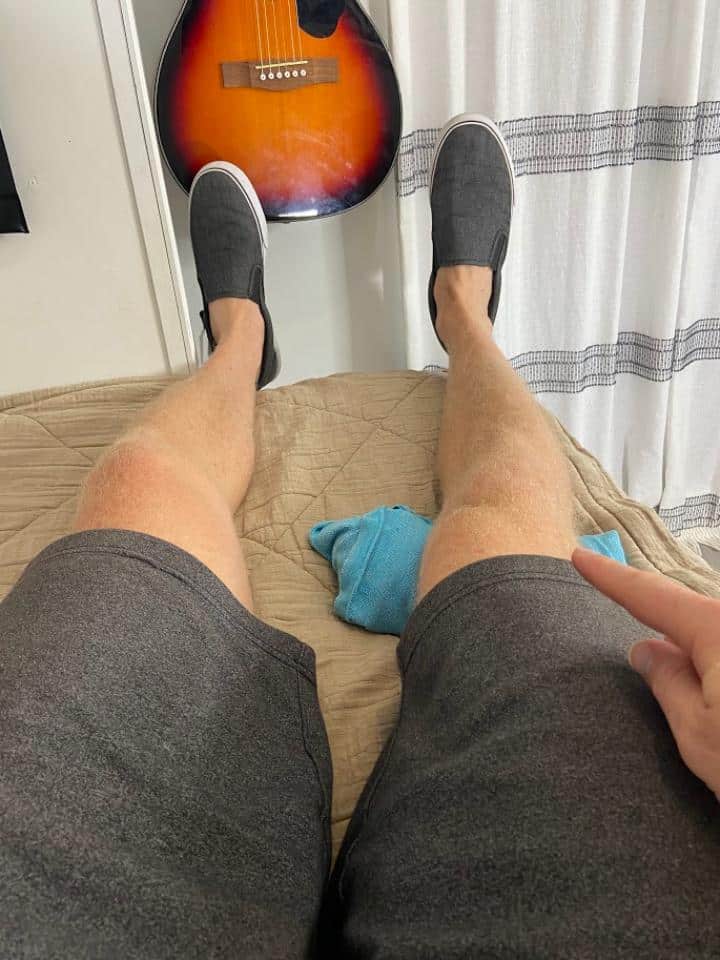
- Begin either laying on your back or in a long sitting position with the injured leg straight out in front of you. You can do this on your bed, couch, or the floor, depending on what is safest and easiest for you to use.
- Place a rolled towel under the back of the knee so that the knee is now bent.
- Similar to the quad set, squeeze the top of the thigh (your quadricep muscles), pressing the back of the knee into the towel as the foot kicks up from the surface.
- Hold up to 5 seconds, then lower the foot back down and relax the muscles.
- Repeat 10-15 repetitions for 2-3 sets.
4. Long Arc Quad
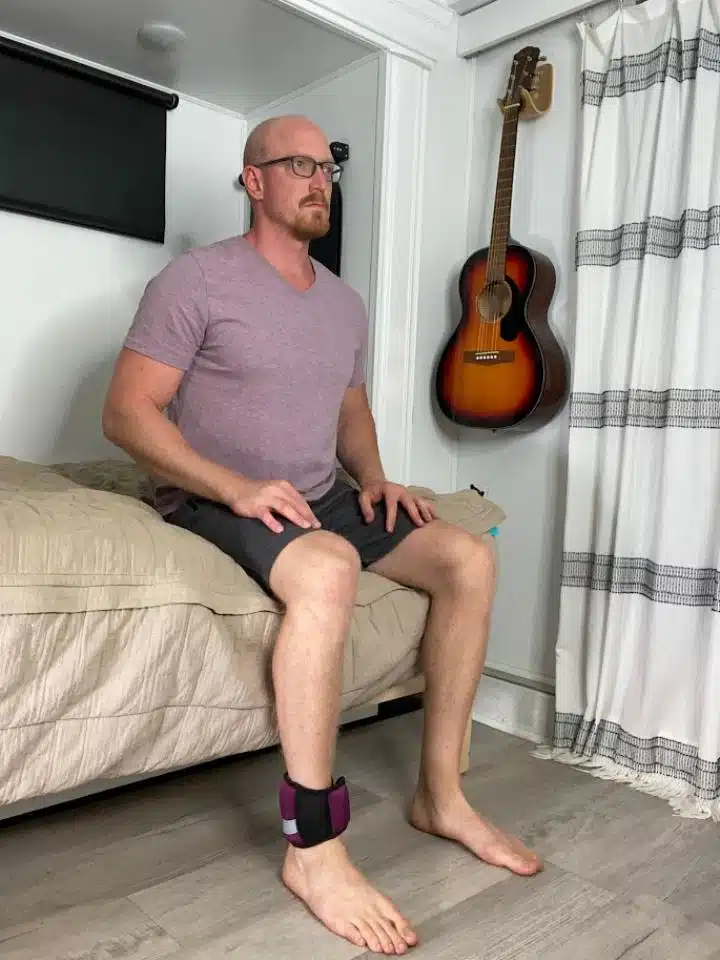
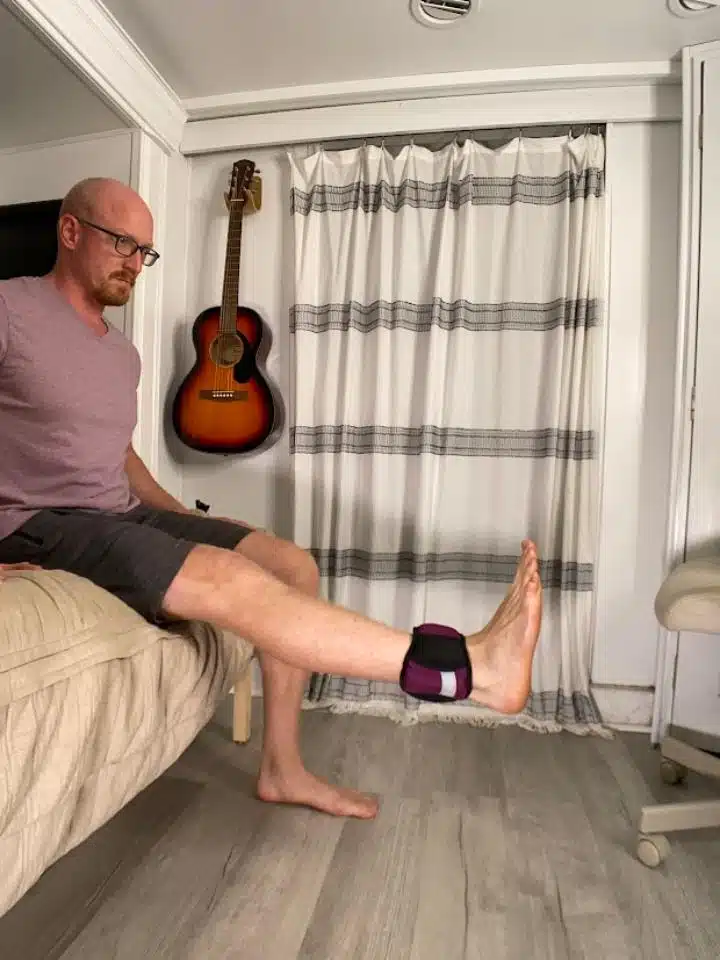
- You can perform this at home using an ankle weight (2-5 lb., as tolerated) or a resistance band tied around the ankles (light, medium, or heavy resistance).
- Begin seated in a chair with the feet flat on the floor.
- Kick the foot up off the floor and allow the knee to straighten fully.
- Hold for 2 seconds, then slowly return to your starting position.
- Repeat 10-15 repetitions for 2 sets.
- Perform on the opposite leg for even symmetry.
Think of these exercises as the warm-up act, gently preparing your muscles for the headliners. A balanced recovery regimen also includes general hip and knee strengthening and stretching exercises. The ultimate goal here is comprehensive recovery.
Progressive Rehab Exercises: Let’s Step It Up
Once the initial pain starts to fade and you’re feeling a bit more like your old self, it’s time to up the ante. Welcome to the progressive stage of your recovery journey!
1. Squats
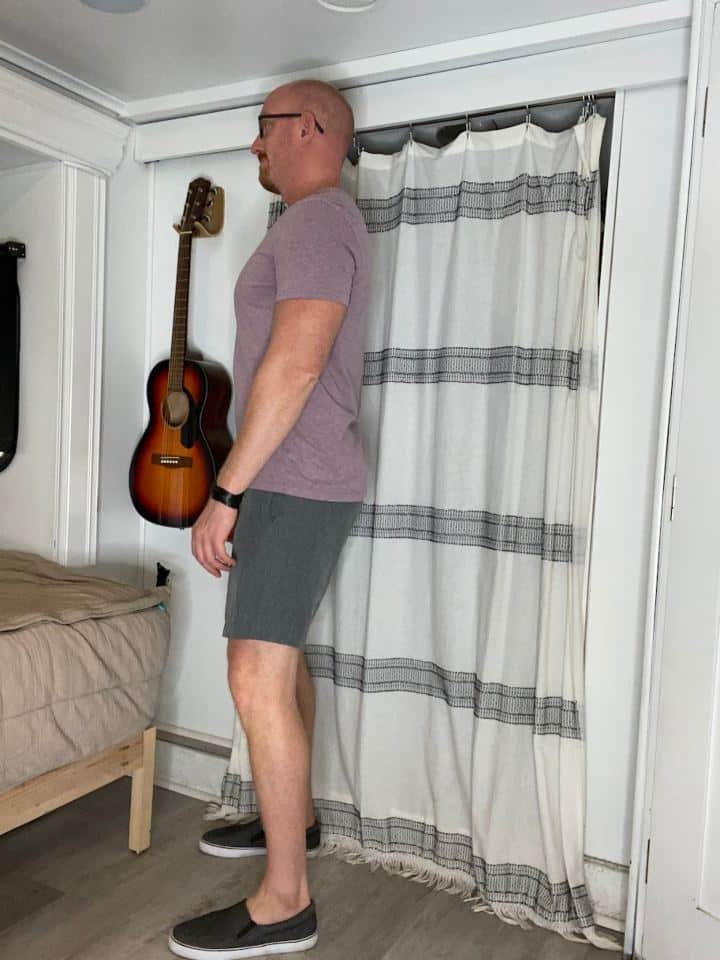
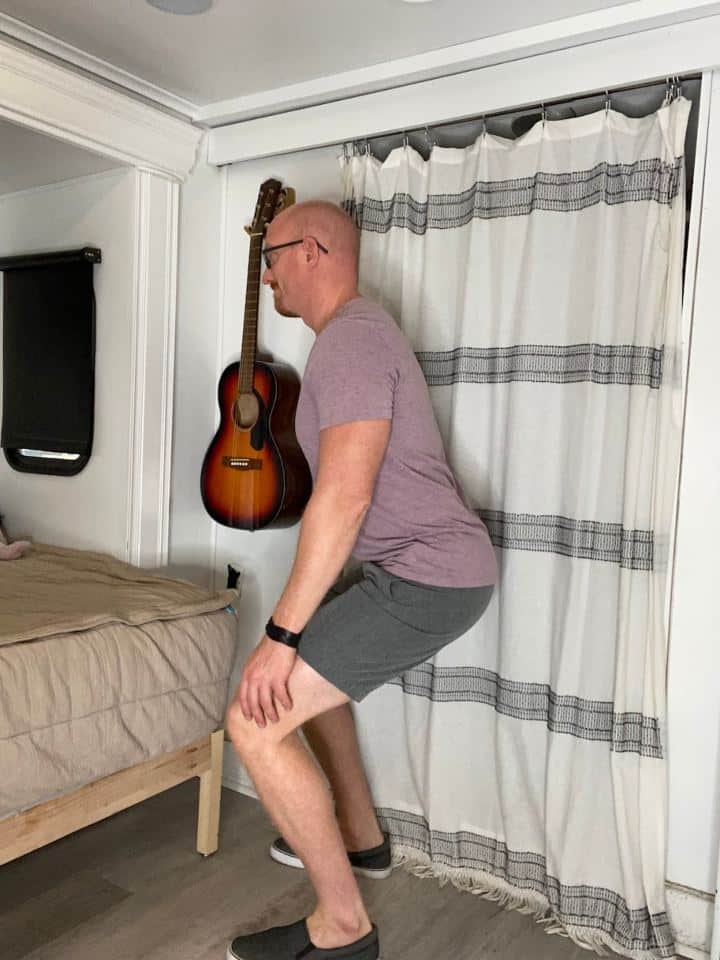
- Position the feet about hip-width apart for a proper squat, with the toes pointing forward.
- Slowly sit the hips back towards the heels as the knees bend. Your torso should hinge forward to counterbalance your hips, sitting back towards the heels.
- Bend the knees as far as you’re comfortable, hold for 2 seconds, then return to your starting position.
- Repeat 10-15x for 2-3 sets.
2. Step-ups
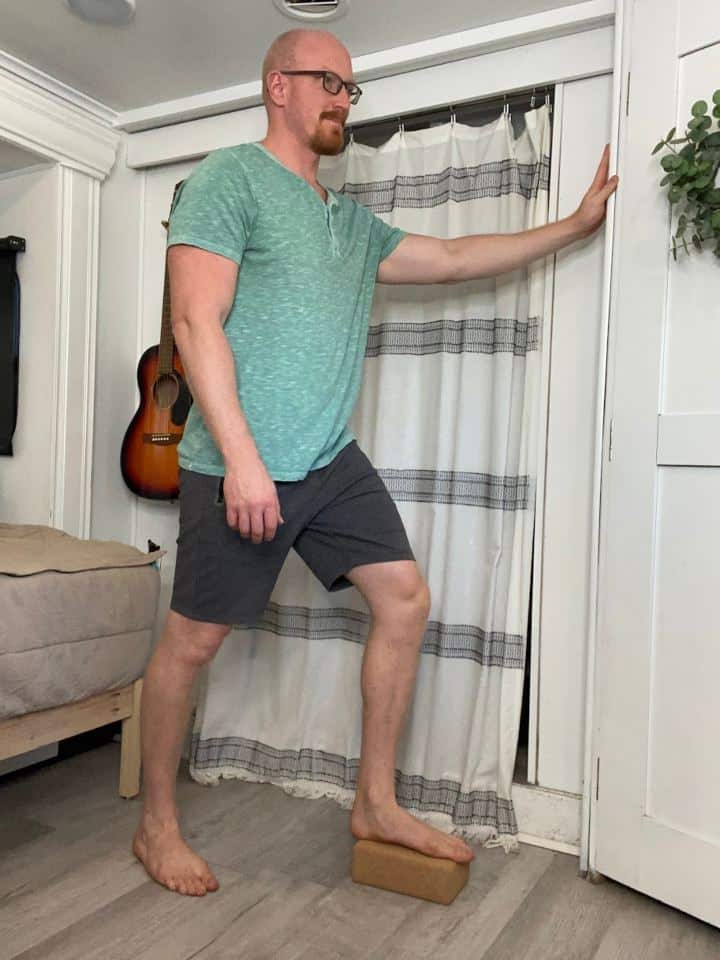
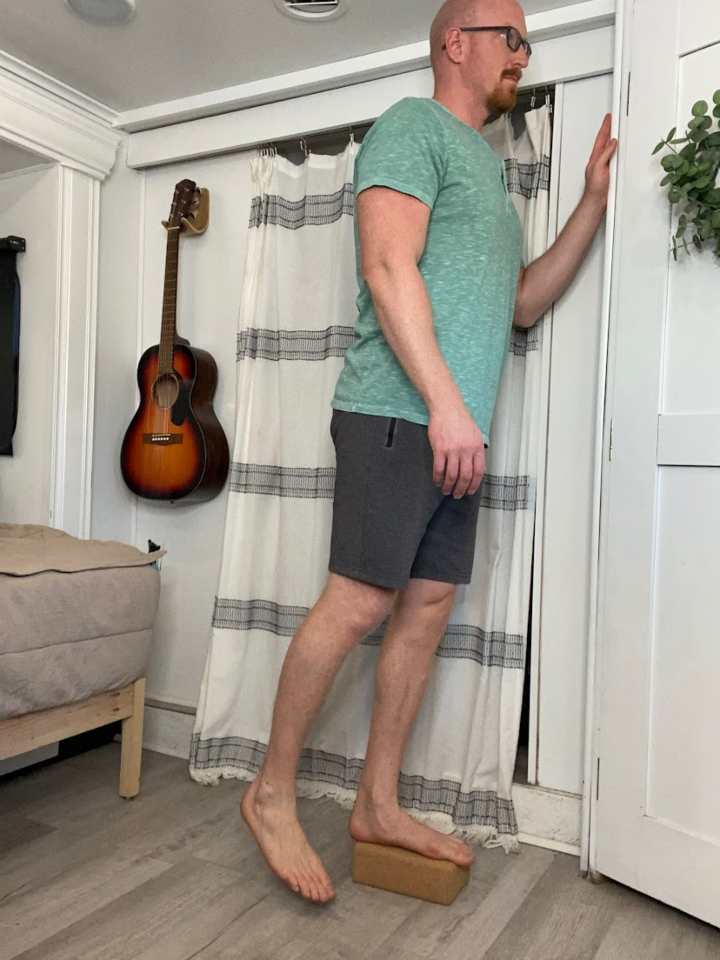
- Place the foot flat on the step using a single step about 4-6 inches high (if you don’t have a step, you can use a firm book as a substitute of equal height). Ensure the opposite leg is flat on the floor but close to the step.
- Ensure the knee and thigh are pointing straight forward. If you have handrails or can position the item you’re using next to your countertop for support, this can be helpful to hold on to.
- When ready, straighten the knee and squeeze the glutes to step all the way up on the step, then lower back down. You should end up in the same position you started in.
- Try to go up with a little more of a quick speed, but slow and controlled on the way back down.
- Repeat 10x for 2-3 sets.
3. Lunges
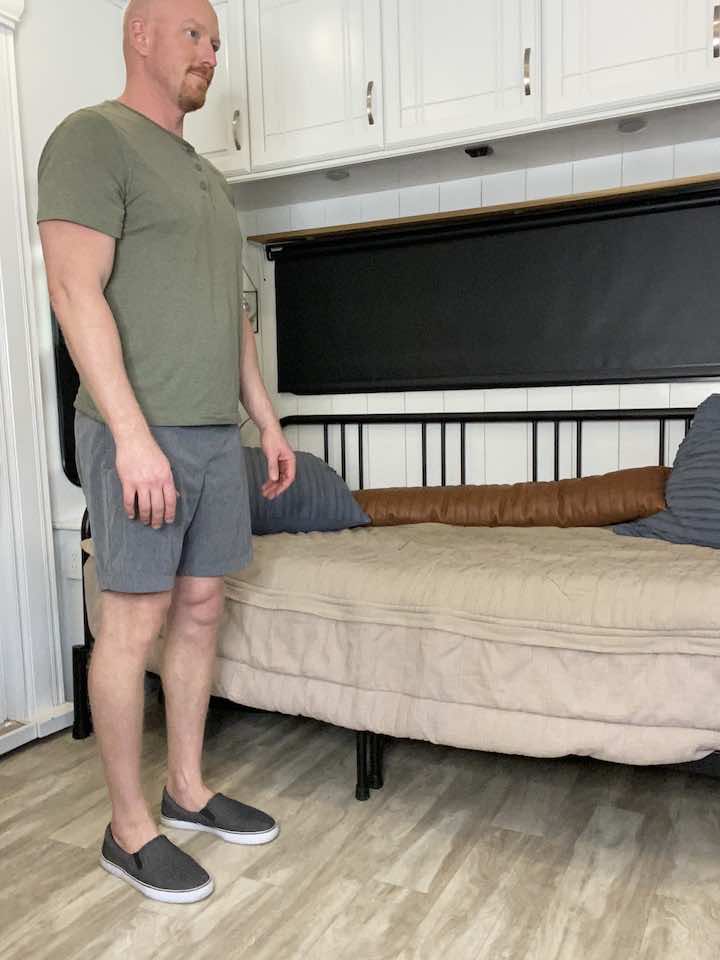
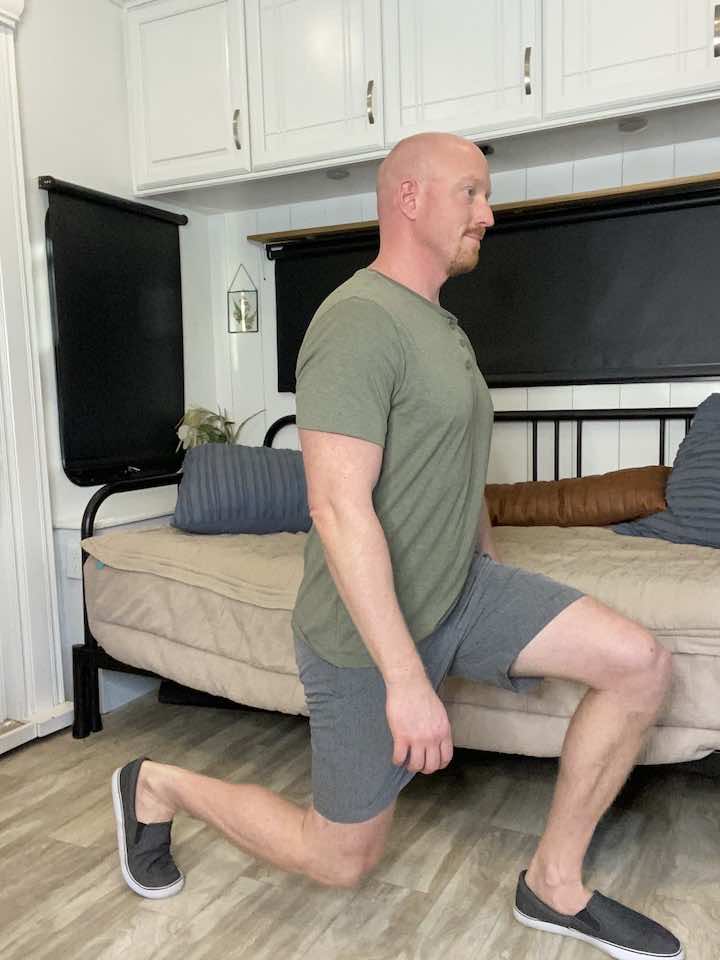
- First, stand with your feet hip-width apart and your arms at your sides.
- Step forward with one leg, dropping your back knee towards the floor as you bend both legs.
- Make sure to keep your front knee in line with your ankle and your weight on your heel.
- Make sure to keep your core and glutes tight.
- Push off your front heel to return to the starting position.
With this progressive set of exercises, you’re on the fast track to making a full and robust recovery. Remember, it’s not a race but a journey. So, take it one step at a time, listen to your body, and you’ll be back doing the things you love before you know it. Now, who’s ready to conquer that quad strain?


