Free download: Top 10 Natural & Easy Remedies for Joint Pain from Home. Learn these helpful remedies.
Estimated Reading Time: 5 minutes read
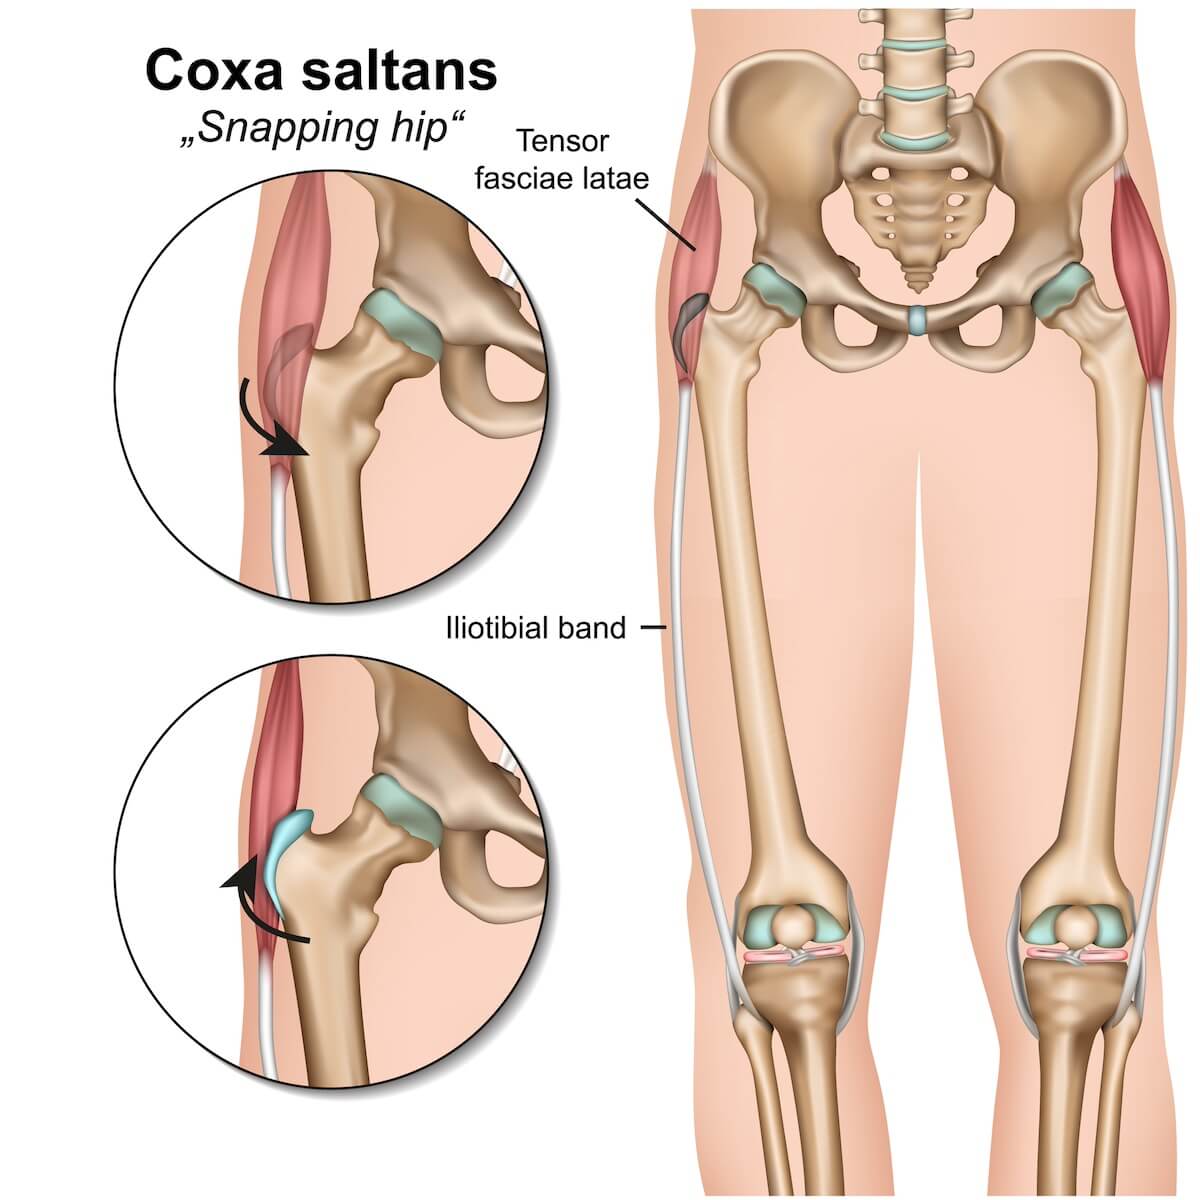
If you’ve ever experienced a popping sound or sensation in your hip during movement, you might be dealing with Snapping Hip Syndrome. While this might seem concerning, there are straightforward exercises that can help ease this condition. This article will delve into the reasons behind hip snapping and provide some easy-to-follow exercises aimed at relief.
Snapping Hip Syndrome is when your hip makes a pop sound or feels like it’s snapping during movement. It’s something that can happen to anyone but is more common among people who are active in sports. Let’s explore why this occurs and the symptoms it brings, followed by exercises designed for improvement.

Table of Contents
Understanding Why Your Hip Snaps and Its Symptoms
Before we discuss the exercises, it’s beneficial to gain insight into the causes and symptoms of this hip issue.
Reasons for hip snapping
- Muscle tightness: This is often seen in athletes or those who are very active.
- Repetitive movement: Certain movements in sports or activities can strain the hip.
- Hip structure: The way some hips are shaped might lead to snapping.
- Tight thigh band: A tight band of tissue can rub against the hip.
- Cartilage tear in the hip: This injury can create a snapping feeling.
- Loose bone or cartilage: Small pieces moving within the hip joint might cause snapping.
Symptoms you might notice
- Popping sound or sensation: This is felt during certain hip movements.
- Pain: Some might feel pain, though not everyone does.
- Movement difficulty: There could be a limited range of movement.
- Stiffness or swelling: These might occur around the hip area.
Effective Exercises to Alleviate Snapping Hip Syndrome
A: Strengthening for Stability
Building muscle strength around the hip can support the joint and help reduce snapping sensations. Here are some simple exercises:
1. Clamshells

- Start by paying on your side with both knees bent.
- Keep your feet in contact with each other, and then rotate your top leg up.
- Make sure you keep your spine in alignment and your hips don’t rock back! Rule of thumb is to do a smaller range of motion if you think your back is moving.
- Rotate your top leg back down to the starting position.
- Do this 10 times for one set, and complete 3 sets.
2. Standing Hip Lifts

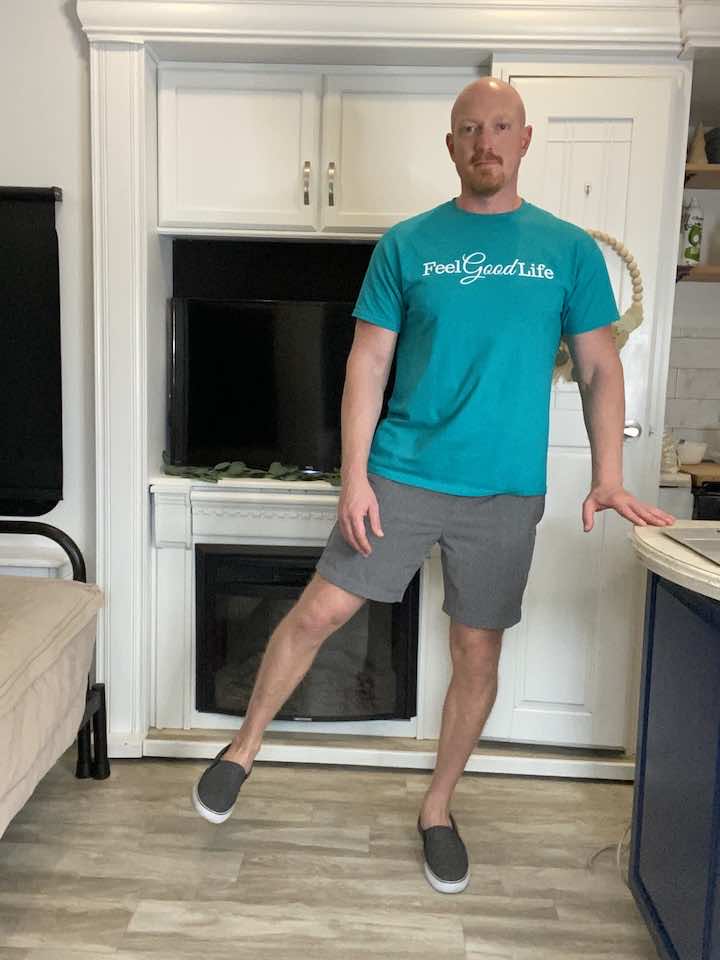
- Stand tall with one hand placed on a bed or chair. Balance on your left leg, keeping a soft bend in your knee to keep from locking out.
- Leading with your heel, lift your right leg out to the side. Be sure not to lean to the left.
- Repeat 10 times per leg.
- Complete 3 sets of the exercise.
3. Standing Hip Extension
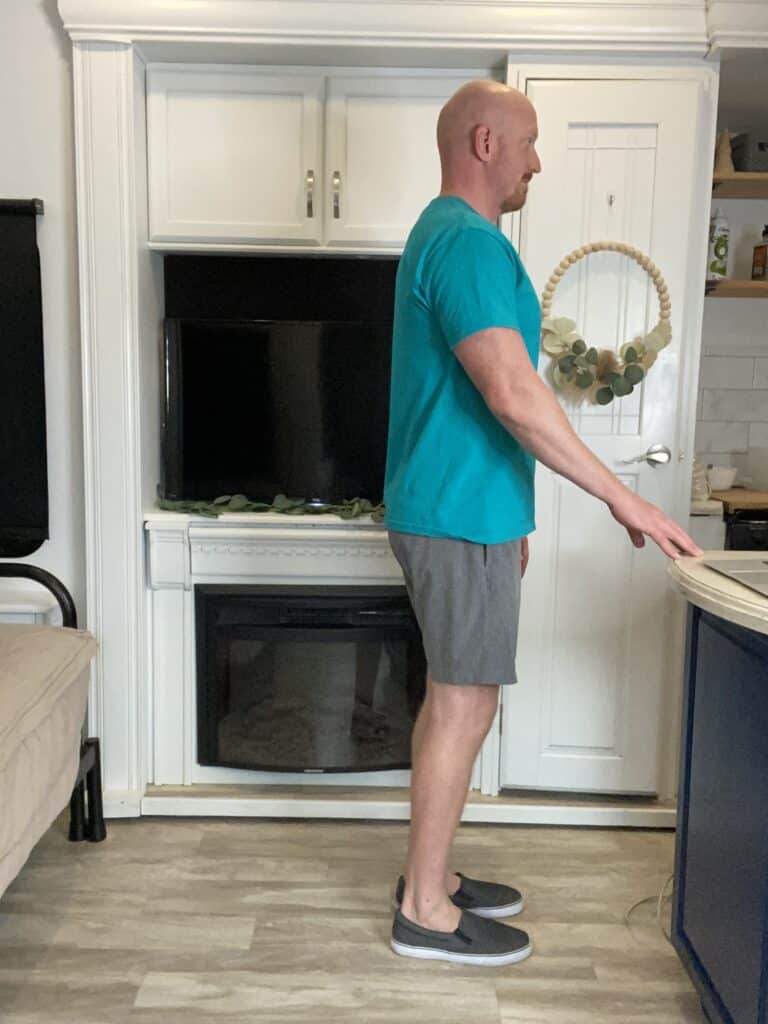
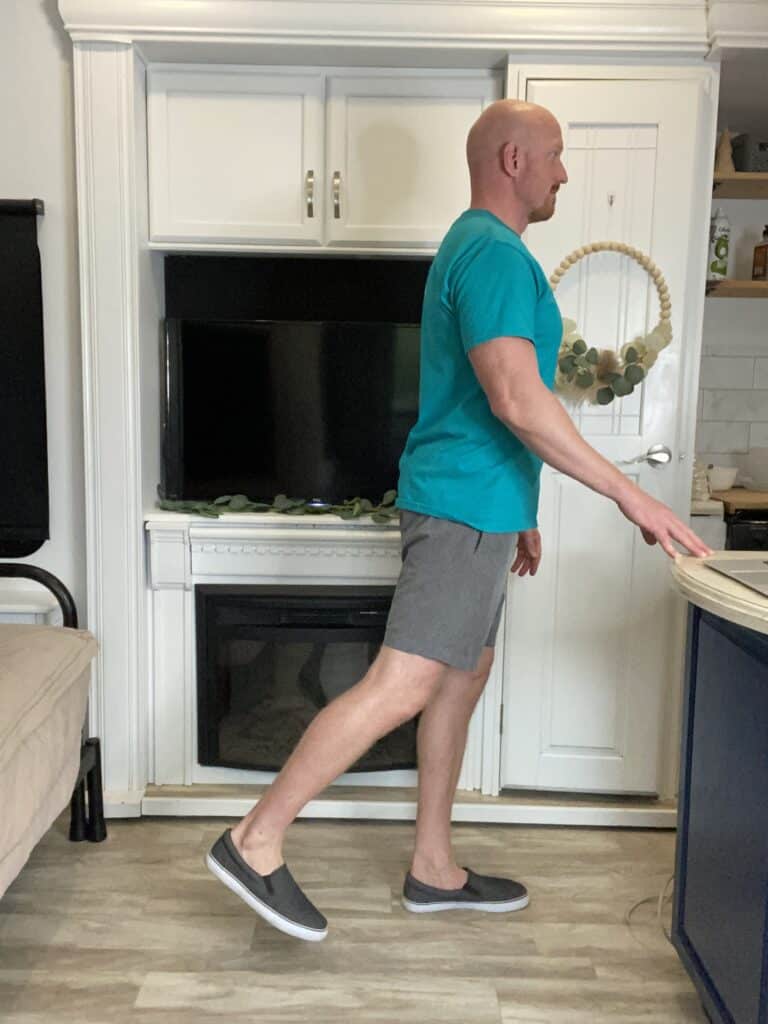
- Stand tall with your hands placed on a steady surface. You can use a counter, sink, or chair (no chairs with wheels) to hold on to for balance.
- Shift your weight onto your left leg, keeping a soft bend in your left knee to keep it from locking out.
- Then, keeping your toes pointed forward and your right leg straight, lift your right leg back a few inches, then lower back down.
- Repeat 10 times per leg for 3 sets.
4. Bridges
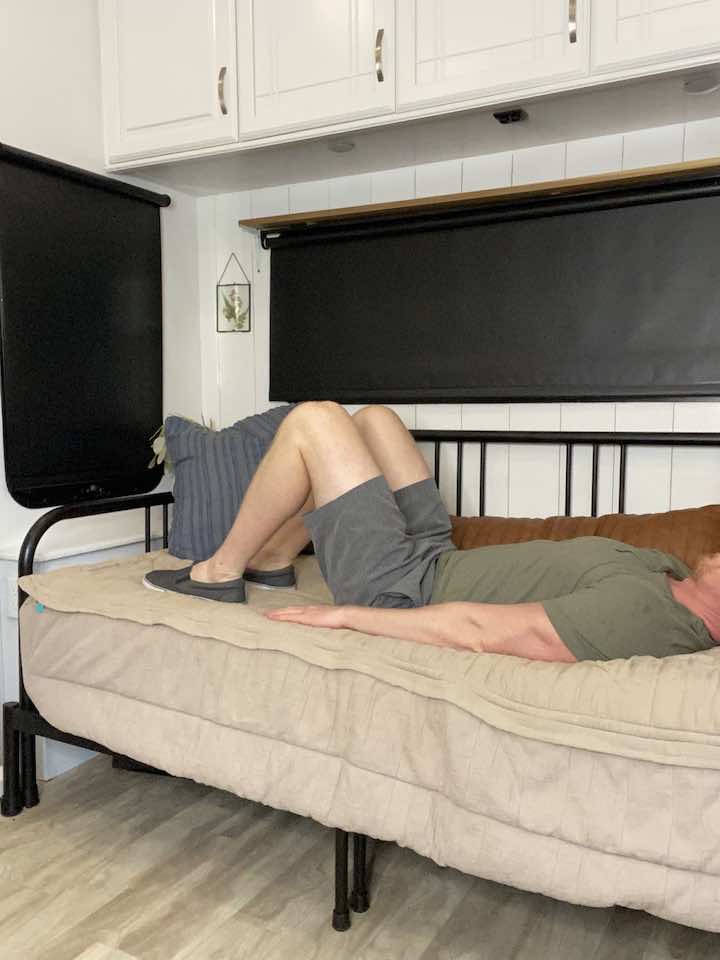
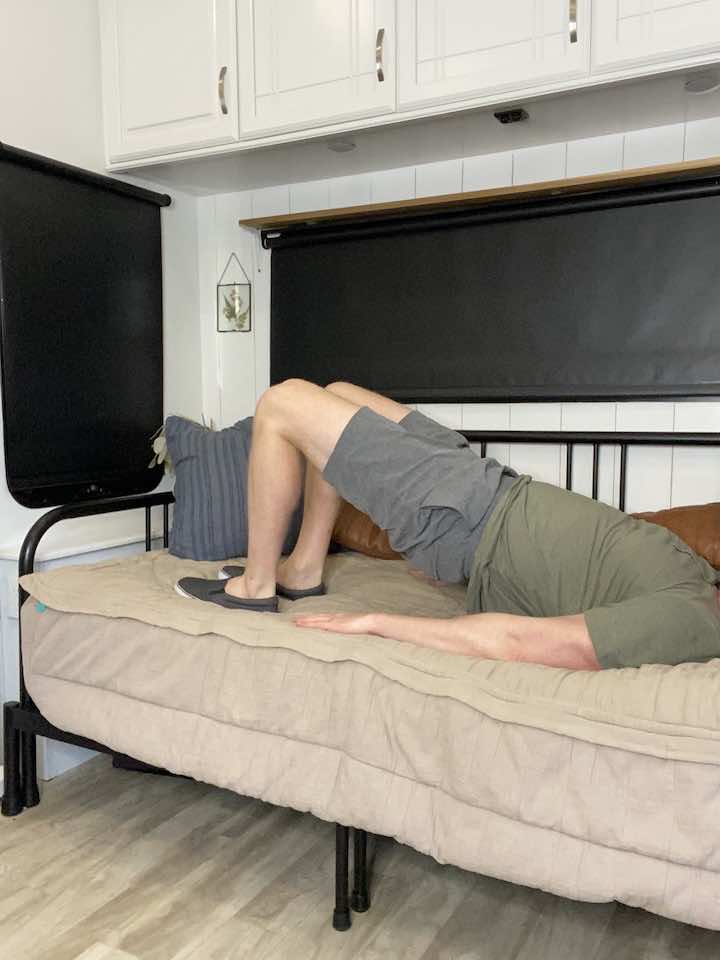
- Lie on your bed or floor (a bed is better if you have difficulty getting on the floor). Again, ensure your knees are bent at about 90 degrees and your feet are flat on the floor.
- Lift your hips off the ground, using your hands to help push your hips up if needed.
- Slowly lower your hips to the bed or floor and repeat 10 repetitions for 3 sets.
B: Stretching for Flexibility
Stretching can help ease muscle and tissue tightness around the hip, potentially decreasing snapping. Consider these stretches:
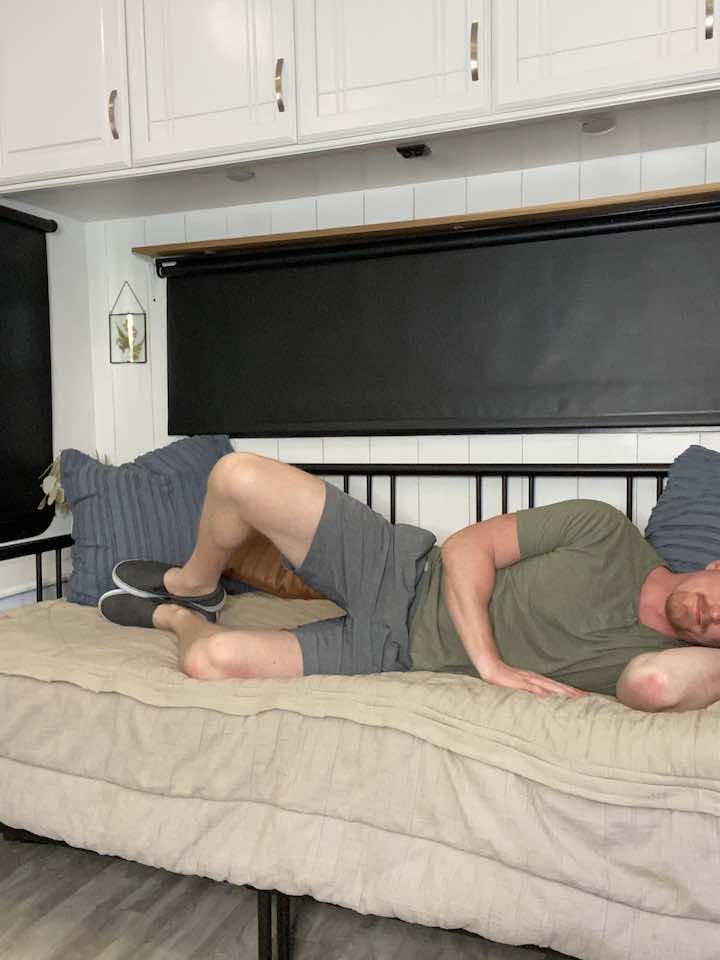
1. Piriformis Stretch

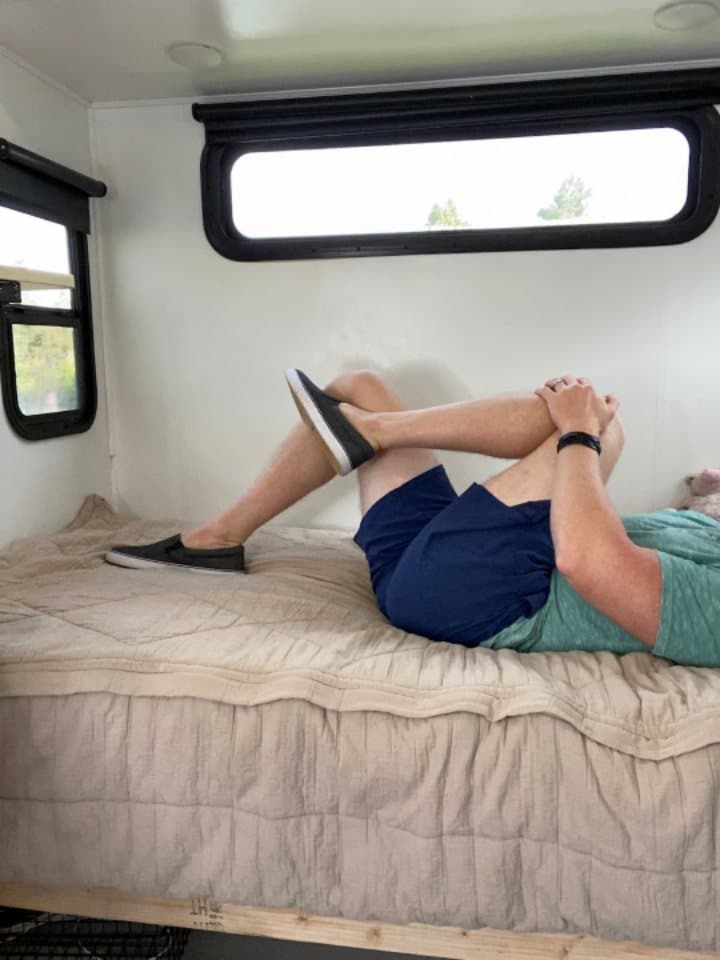
- Lay on your back on your floor, bed, or couch.
- Bend both knees so the feet are flat on the surface.
- Cross the leg to be stretched over the opposite thigh so that it’s fully resting on that leg.
- Take the opposite hand and place it on the outside of the thigh on the leg to be stretched.
- Gently pull the thigh towards the opposite hip (avoid allowing the hip and/or back to lift off the surface).
- Hold for at least 30 seconds.
- Repeat for 3 sets in total.
2. Seated Hamstring Stretch
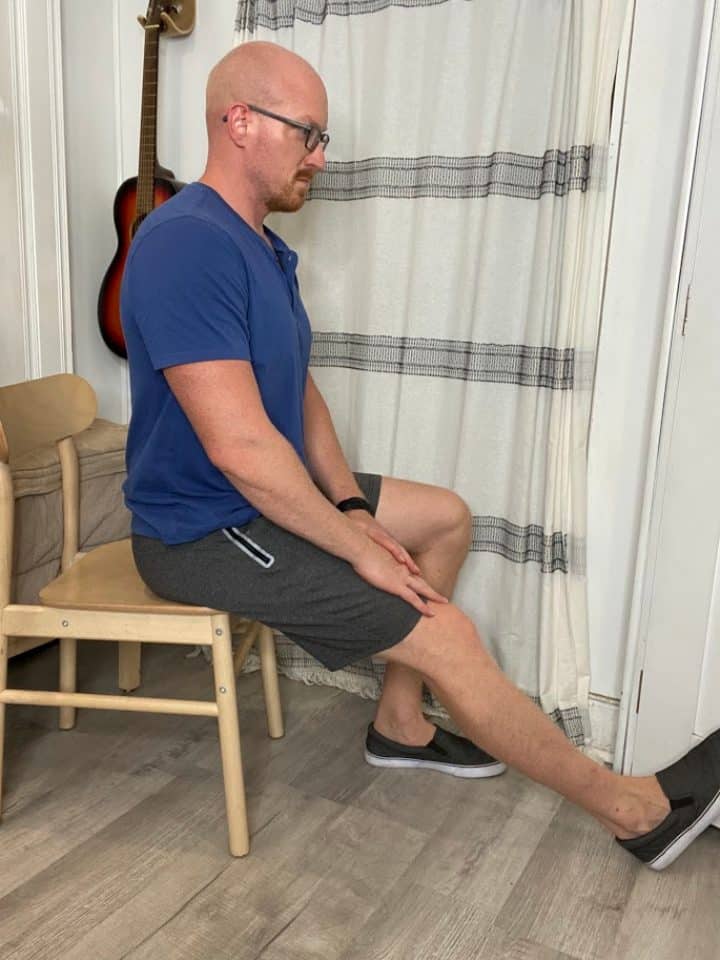
- Seated in a chair, place the leg to be stretched and extended in front of you (the knee should be straight).
- Keeping a straight back, bend forward via hinging at the hips.
- Once you feel a tolerable stretch behind the back of the leg, hold for at least 30 seconds.
- Repeat for 3 sets in total.
3. Standing Hip Flexor Stretch
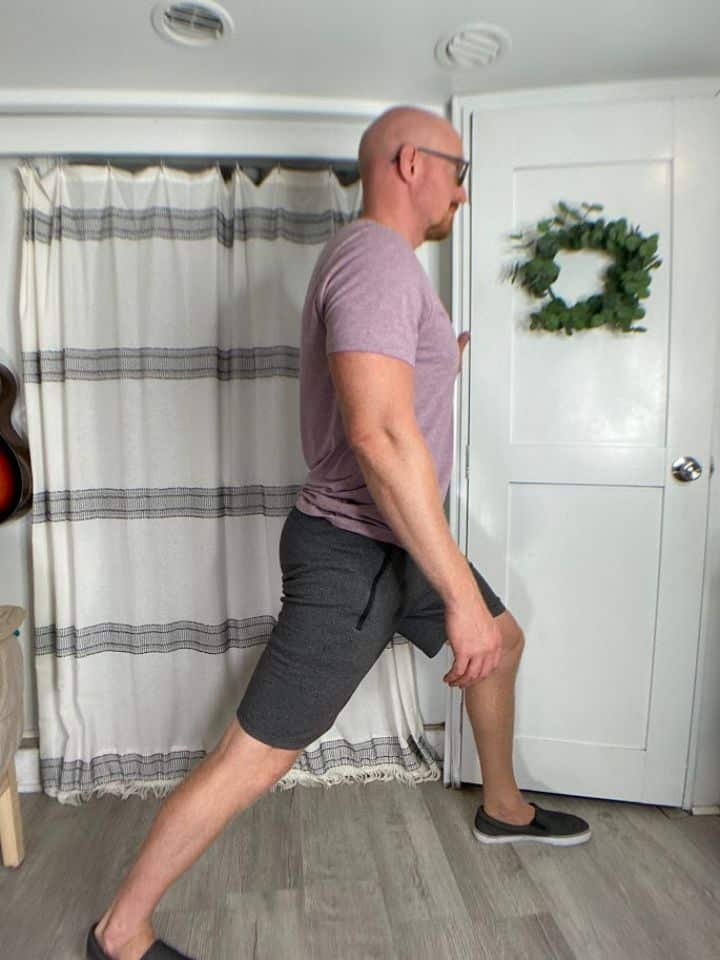
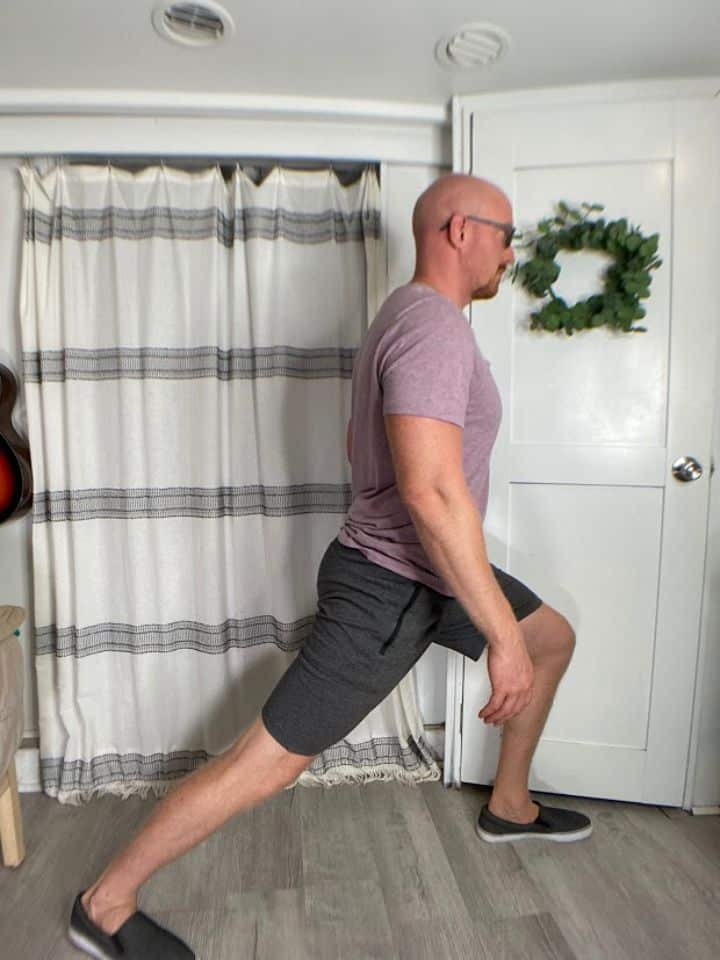
- Begin standing in front of a sturdy surface, such as the countertop, in case you need additional balance support.
- Position the unaffected leg forward and the painful leg back (the further apart the legs are, the stronger the stretch for the hip flexors).
- The front leg should have a bent knee, while the other knee in the back should be straight.
- Lean the body forward towards the front leg until a stretch is felt in the front of the hip in the back leg (make sure to keep both heels on the ground).
- Hold the stretch for at least 30 seconds.
- Repeat 3 times.
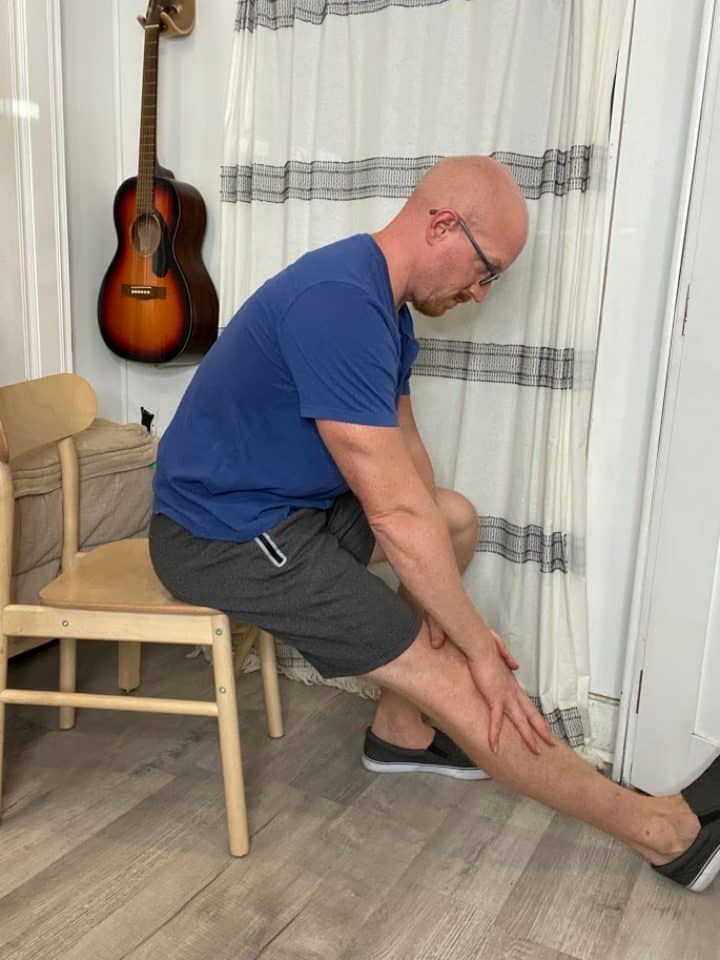
4. Standing Quad Stretch
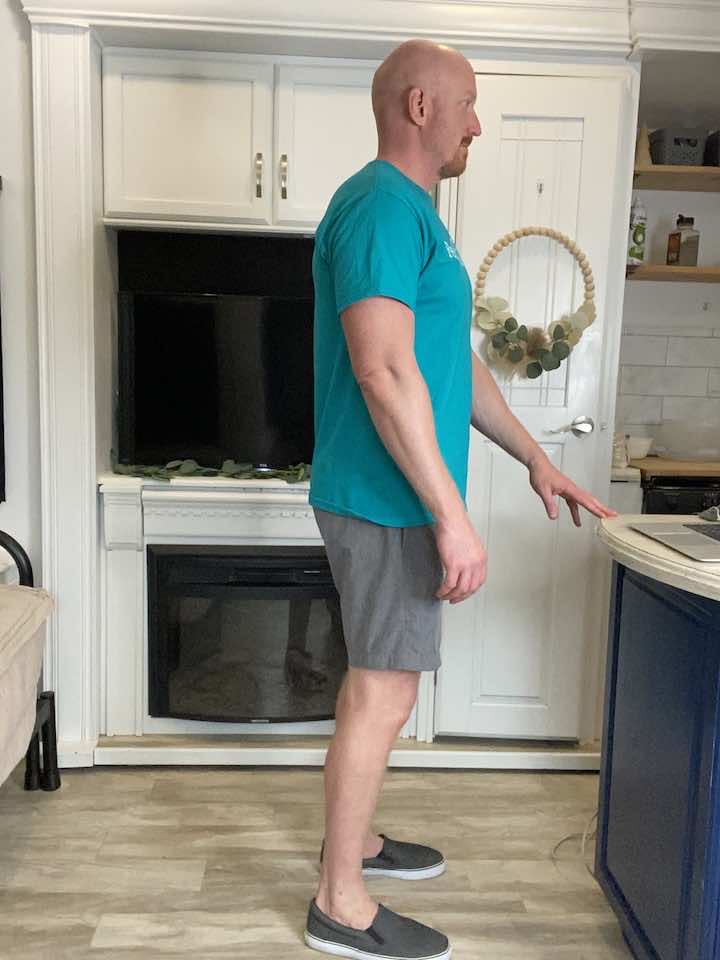
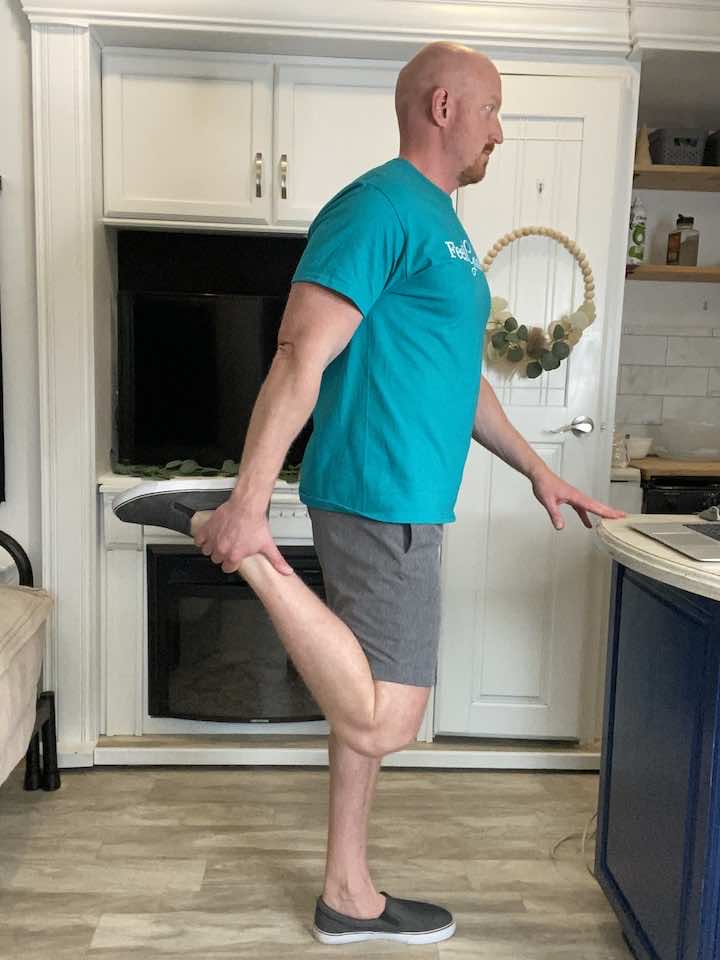
- Stand tall with your hands placed on a steady surface. You can use a counter, sink, or chair (no chairs with wheels) to hold on to for balance.
- Bend your knee and hold onto the top of your foot.
- Hold for 30 seconds, focusing on keeping your knees lined up.
- Repeat 2 more times.
- To make this exercise easier:
- You can always decrease the time you hold the stretch. The goal is to hold for 30 seconds, but you don’t have to do that on day one.
Incorporating these exercises into your daily routine can lead to improvements in hip comfort and mobility.
Wondering What's Next?
Discover 11 Easy, At-Home “Stretch Exercises” for Stronger, Pain-Free Joints (click below)