Free download: Top 10 Natural & Easy Remedies for Joint Pain from Home. Learn these helpful remedies.
Estimated Reading Time: 3 minutes read
If you’ve ever felt a strange, lingering pain or discomfort in your hip area, you’re not alone. I, too, experienced the same kind of tension and was surprised at how such a minor discomfort could significantly impact my daily activities. As I learned, the source of this discomfort can often be traced back to a small muscle deep within the hip and glute region, the piriformis.
The piriformis muscle, though small, plays a pivotal role in our movements, such as walking, shifting our weight, and maintaining balance. However, stress can make this muscle tighten and cause what is known as piriformis syndrome, leading to symptoms like hip pain, tingling, or numbness extending down your leg. But here’s the reassuring news for you – a series of targeted exercises can help you release this tension and reclaim your hip mobility.

Table of Contents
The Exercise Routine
My path to relieving piriformis-induced hip tension involved a blend of muscle release and stretching exercises. Here are the four exercises that worked wonders for me, and I believe they can help you too:
1. Piriformis Release

- Stand facing away from a wall.
- Position a ball between your painful hip and the wall.
- Gently roll your hip against the ball, searching for tender spots and massaging the right muscles.
- Continue rolling for 1 to 5 minutes, adjusting pressure as needed for comfort and relief.
2. Piriformis Stretch


- Lay on your back on your floor, bed, or couch.
- Bend both knees so the feet are flat on the surface.
- Cross the leg to be stretched over the opposite thigh so that it’s fully resting on that leg.
- Take the opposite hand and place it on the outside of the thigh on the leg to be stretched.
- Gently pull the thigh towards the opposite hip (avoid allowing the hip and/or back to lift off the surface).
- Hold for at least 30 seconds.
- Repeat for 3 sets in total.
3. Isometric Clamshells


- Start by laying on your side with both knees bent.
- Keep your feet in contact with each other, and then rotate your top leg up. Ensure you keep your spine aligned and your hips don’t rock back! The rule of thumb is to do a smaller range of motion if you think your back is moving.
- Rotate your top leg back down to the starting position.
- Do this exercise 10 times in each set.
- Complete 3 sets of the exercise.
4. Prone Hip Windshield Wipers
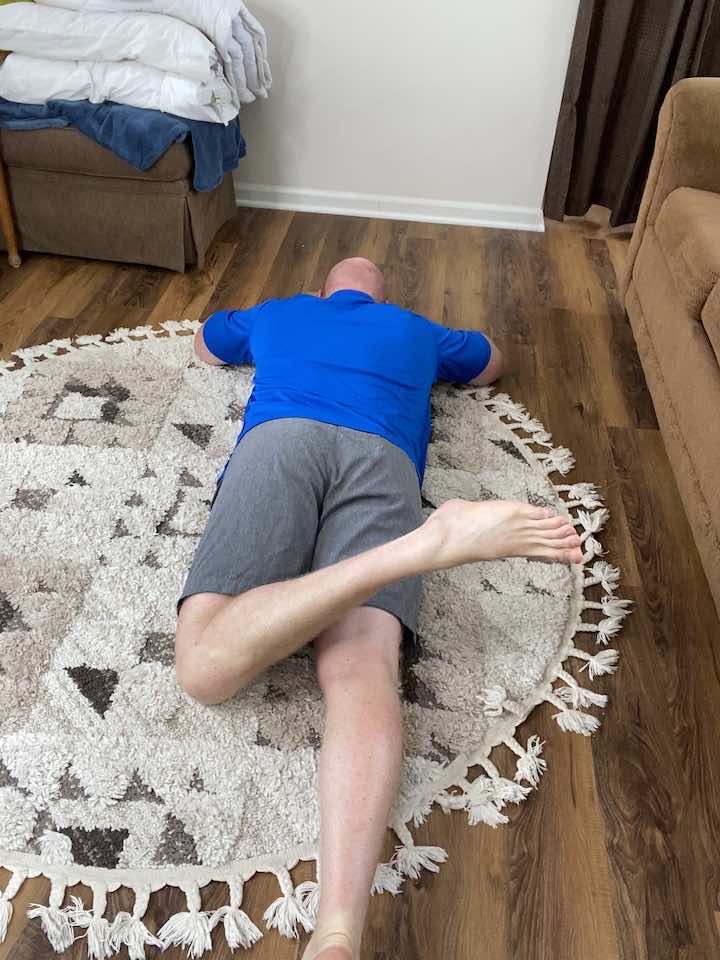

- Lie on your stomach with the knee of your painful hip bent.
- Rotate through your hip, allowing your foot to drop to one side and then the other, resembling the motion of a windshield wiper.
- Repeat this movement for a total of 3 sets, with 10 repetitions in each set.
In Conclusion: Your Journey to Releasing Hip Tension
Hip tension, especially from a tight piriformis, can be quite disruptive. However, by incorporating these four simple exercises into your daily routine, you can start to alleviate discomfort and enhance your hip flexibility.
If your pain persists despite these exercises, don’t hesitate to seek advice from a healthcare professional for other treatment options. Remember, your journey to a pain-free life may require patience and consistent effort, but it’s undoubtedly worth it. So, here’s to you moving towards a healthier, more flexible you!
Wondering What's Next?
Discover 11 Easy, At-Home “Stretch Exercises” for Stronger, Pain-Free Joints (click below)