Free download: Top 10 Natural & Easy Remedies for Joint Pain from Home. Learn these helpful remedies.
Estimated Reading Time: 7 minutes read
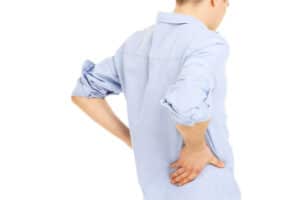
Do you know what’s worse than a headache? A backache. Yes, those persistent, gnawing pains in your back that seem to suck the joy out of your day. If you’re tired of battling those pains, we have just the remedy for you – the humble foam roller. These simple yet effective tools can help alleviate your back pain through stretching and massaging techniques.
But hey, you might be wondering, “How long should my foam roller be?” Well, the answer to that largely depends on what you’re comfortable with and what you intend to use it for. Generally, foam rollers range from about 12 to 36 inches long. A longer roller provides more area for support and stability, which is particularly beneficial for exercises involving your whole body, like the ones we’re about to delve into.

Foam rollers have gained popularity in recent years, and it’s not just because they’re a trendy gym accessory. Their magic lies in the method of self-myofascial release – that’s just a fancy way of saying self-massage that releases muscle tension. So you see, these nifty devices are more than just a fad – they’re here to provide a whole bunch of benefits!
Table of Contents
Benefits of Foam Roller Exercises
Foam roller exercises are more than just a remedy for back pain, they’re an investment in your overall health. When you use a foam roller regularly, you’re not only releasing tension from your muscles but also improving your blood circulation. This increased blood flow brings more oxygen and nutrients to your muscles, aiding in faster recovery and better performance.
And it doesn’t stop there. Foam rolling can also help increase your flexibility and range of motion. This is especially beneficial if you’re into sports or any physical activity, as it helps you move better and reduces the risk of injury. Furthermore, foam rolling can help reduce stress by releasing tension from your body. Think of it like giving yourself a relaxing massage at the end of a long day.
Your 7-Step Foam Rolling Routine to Alleviate Back Pain
Exercise 1: Foam Roll Glutes
Your glutes are powerful muscles supporting your lower back, so let’s stretch them well.

- Starting position: Sit directly on the foam roll. Keep the knees bent, feet flat on the floor, arms reaching behind you, and hands planted on the floor.
- Extend one leg (the leg you plan to target the foam roll on) in front of you as you shift the majority of your weight onto that glute area.
- Using the other leg and arms to assist in pushing yourself back and forth on the foam roller.
- Continue rolling, as tolerated, aiming for at least 30 seconds of rolling or up to 1 minute, if able.
Exercise 2: Foam Roll Hip Flexors
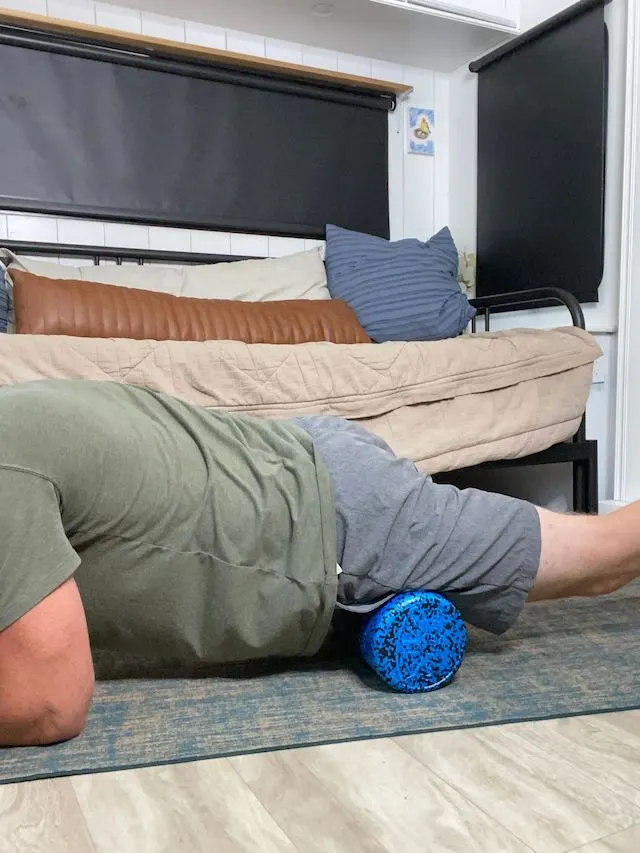
- Starting position: Lay over the foam roller with the stomach to the floor; however, instead of the thighs laying over the foam roll, it will be the front of the hips instead. Support yourself on the elbows (like a plank).
- Gently use your upper body to rock the body forward and back in a straight line on the foam roller.
- Continue rolling for at least 30 seconds or up to 1 minute, as tolerated.
Exercise 3: Foam Roll Piriformis
- Starting position: Sit on the floor and place the foam roller beneath your glutes. Cross one leg over the other, placing the ankle of the crossed leg on the opposite knee.
- Lean slightly towards the crossed leg side to apply pressure on the foam roller.
- Roll back and forth along the buttocks area, targeting the piriformis muscle.
- Use your hands and supporting leg to control the intensity and adjust the pressure as needed.
- Roll for about 30 to 60 seconds, focusing on any tight or tender areas.
- To provide additional relief, pause and hold the foam roller on specific tight spots for five seconds.
- Switch sides and repeat the process for the other leg.

Exercise 4: Foam Roll Hamstrings
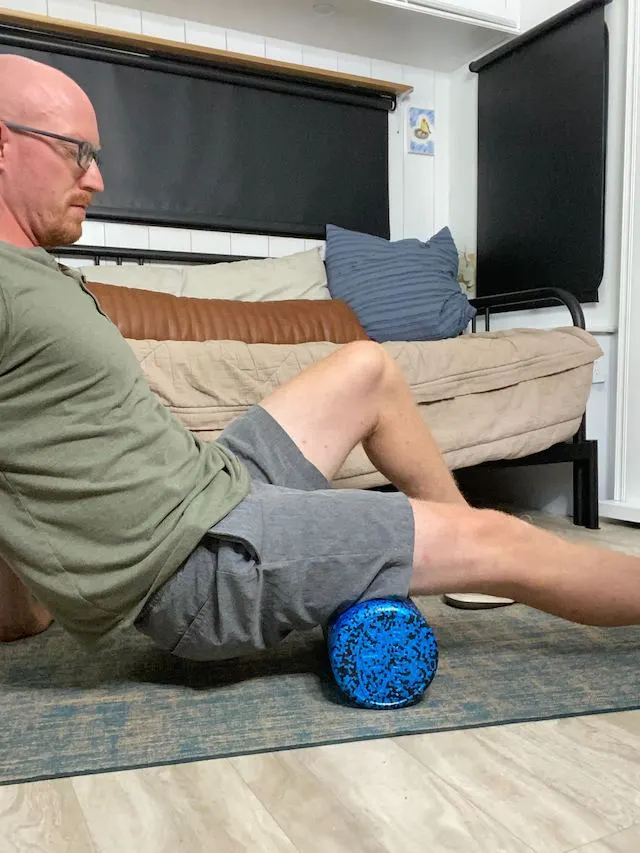
- Starting position: Sit on the floor with the back of the thighs laying on top of the foam roll. Place the arms behind you with the hands flat on the floor.
- On one leg (the side that will be foam rolled), keep the leg straight. On the other leg, bend the knee and place the foot flat on the floor.
- With the bent leg and arms, lift the hips off the floor, so that pressure is applied to the back of the thigh (the hamstrings) on the side being foam rolled.
- Begin pushing yourself back and forth, using the bent leg and arms for support and power.
- Continue rolling, as tolerated, aiming for at least 30 seconds of rolling or up to 1 minute, if able.
- Once you have finished foam rolling one side, repeat on the other leg.
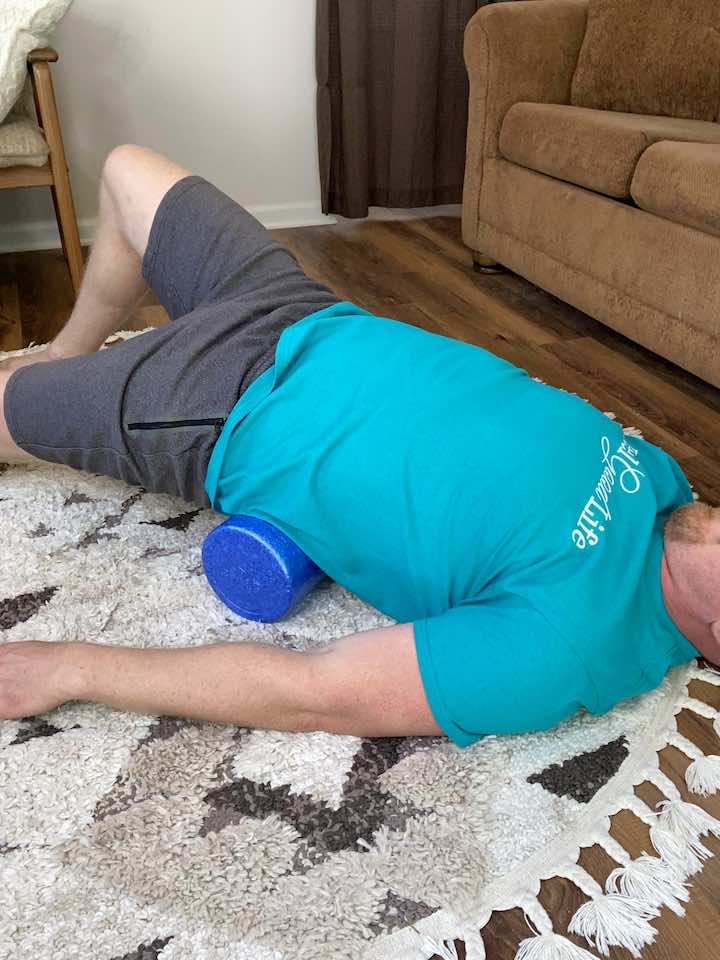
Exercise 5: Lower Back Foam Roller Stretch
- Start by placing a foam roller on the floor.
- Sit down in front of the foam roller with your knees bent and feet flat on the floor.
- Slowly lie back onto the foam roller, positioning it underneath your lower back.
- Extend your arms out to the sides for support and stability.
- Relax your body and allow your lower back to rest on the foam roller gently.
- You can gently roll your body from side to side to target different lower back areas.
- Hold this position for about 30 seconds to 1 minute, allowing the foam roller to provide a gentle stretch and release tension in your lower back.
- Slowly roll off the foam roller and carefully stand up.
Exercise 6: Pec Stretch on Foam Roller
- Lay on your back on a long foam roller to support your head and entire spine.
- Bring your arms out to the side as though you’re in the shape of a goalpost
- Relax, allowing your chest to stretch,
- Hold this position for about 30 seconds to 1 minute
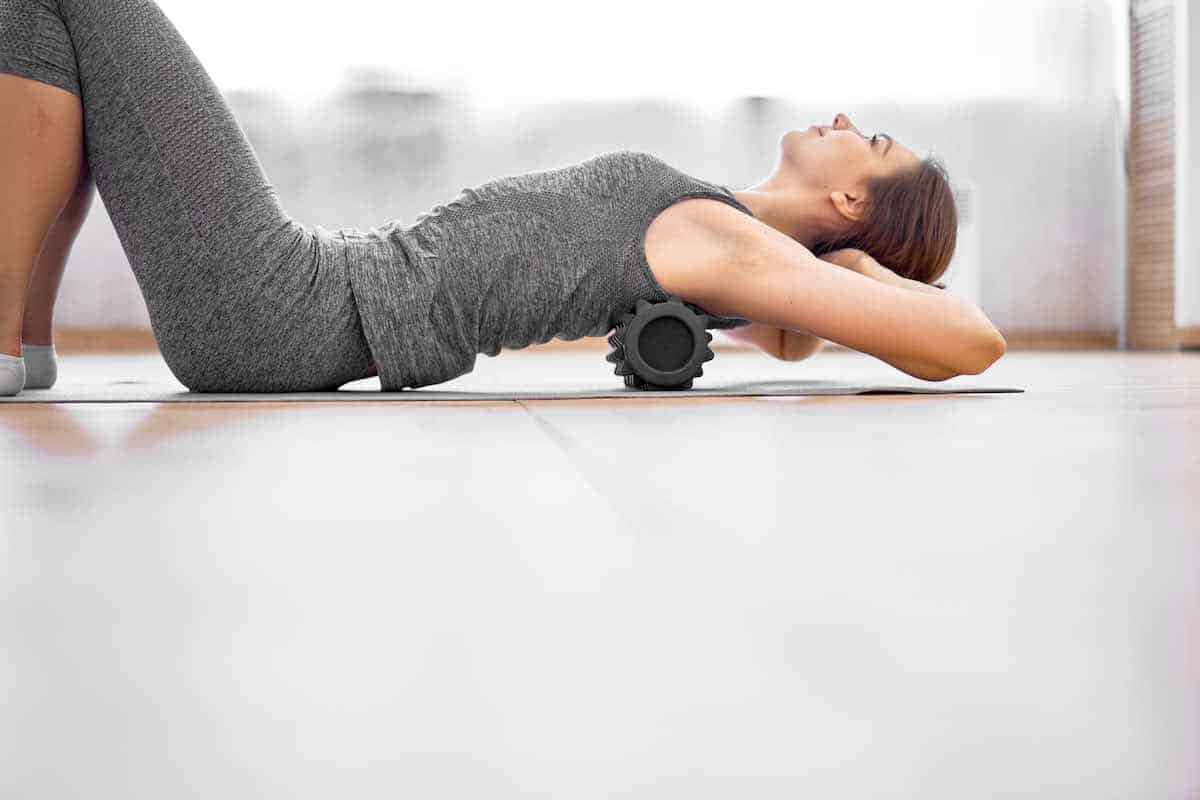
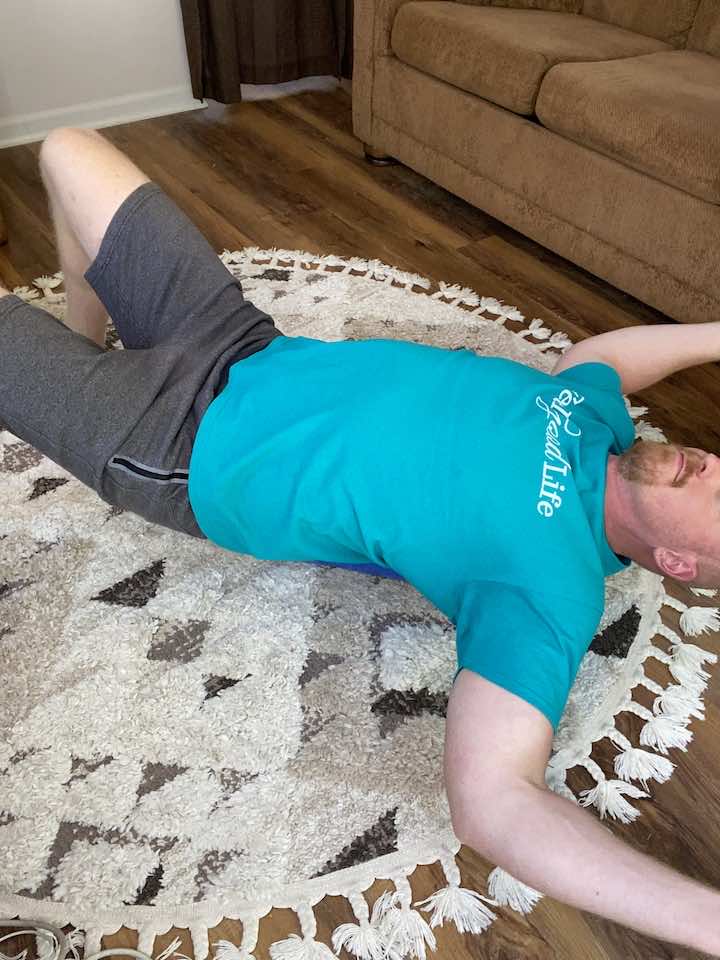
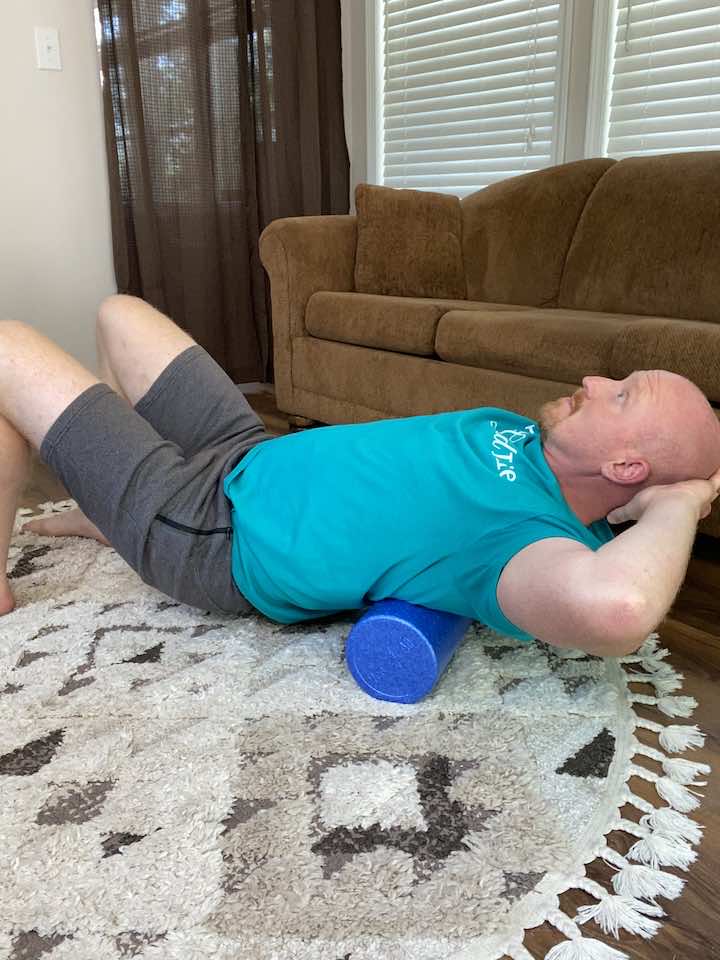
Exercise 7: Back Extension using Foam Roller
- Sit on your bum and lean back so that the foam roller is at the bottom of your scapula (bones behind your shoulders)
- Bring your hands behind your head and extend back, then come back to a neutral position.
- Scootch your bum about an inch down your mat away from the foam roller (this will move the roller higher up on your thoracic spine). Extend again, then come back to neutral.
- Repeat until you’ve reached your shoulders, moving just a little at a time to allow extension throughout your entire back.
Consistency is Key
Like any exercise regimen, consistency is key when it comes to foam rolling. Make it a part of your daily routine; soon enough, your back will feel much better. And the beauty of foam rolling is that it’s not just about pain relief – it can also increase your flexibility and range of motion, improve circulation, and reduce stress. So roll on, and enjoy these benefits!
Conclusion
So, here’s to taking the first step towards saying goodbye to back pain and hello to a host of other benefits! Remember, foam rolling is not just a one-time fix, it’s a lifestyle change. By incorporating these exercises into your daily routine, you’re making an investment in your health and well-being.
Of course, as with any new exercise routine, it’s always a good idea to consult with a healthcare professional before you start. And don’t forget to listen to your body. Adjusting the exercise or stopping completely is important if something doesn’t feel right.
Take your foam roller, roll out those kinks, and embark on this journey to a healthier, happier you. You’ve got this!
Wondering What's Next?
Discover 11 Easy, At-Home “Stretch Exercises” for Stronger, Pain-Free Joints (click below)