
Free download: Top 10 Natural & Easy Remedies for Joint Pain from Home. Learn these helpful remedies.
Estimated Reading Time: 6 minutes read
If you’re dealing with spinal instability, you know it can really mess with your day-to-day life. This condition means your spine doesn’t stay properly aligned when you move, which can lead to a lot of back pain. It’s the kind of thing that can make simple stuff, like bending over or sitting for a while, really uncomfortable. It’s more than just physical pain; it can stress you out and wear you down mentally.
Spinal instability can happen for a bunch of reasons. It could be because of wear and tear in the spine, an injury, or even bad posture and insufficient exercise. These things make your spine less stable, which can cause pain, a feeling like your back isn’t strong enough, and make it hard to move around easily. This isn’t just about having a sore back; it can really get in the way of doing normal stuff and enjoying life.

But there’s good news – you can do something about it. Certain exercises can make your core and hips stronger, which helps support your spine. This means less pain and more ability to move however you want. Adding these exercises to your routine can help you feel better and return to doing the things you love.
Table of Contents
Developing Core Strength to Manage Spinal Instability
Building core strength is really important if you have spinal instability. Strong core muscles help keep your spine stable and can reduce the pain and discomfort that comes with spinal instability. By doing certain exercises, you can make the muscles around your spine stronger and more supportive.
1. Abdominal Brace
- Begin on your back; knees bent, and feet flat on the floor.
- Exhale and draw your belly button towards your spine (as if a string was pulling on the inside of your belly button from the ground).
- Hold for 5 seconds before relaxing.
- Do this 10 times for one set, and complete 2 sets.
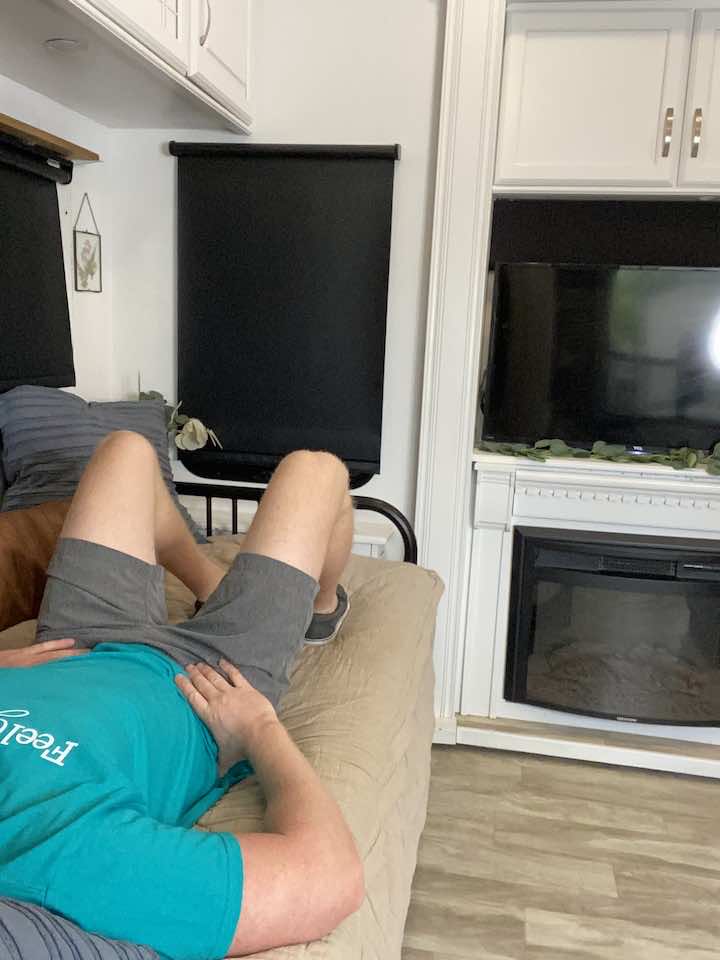
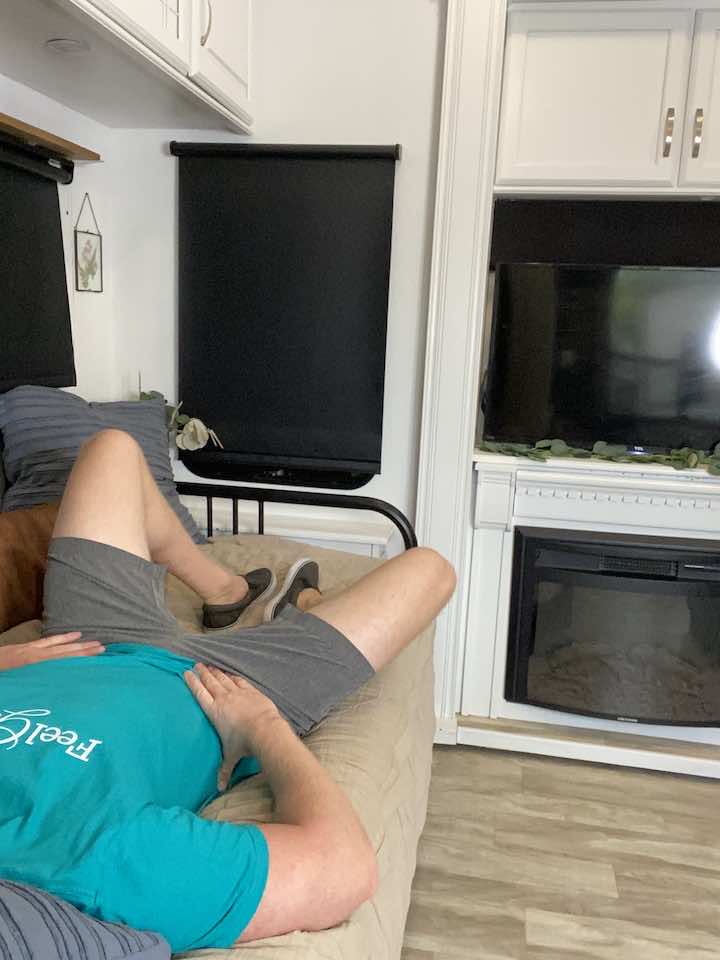
2. Pelvic Tilt
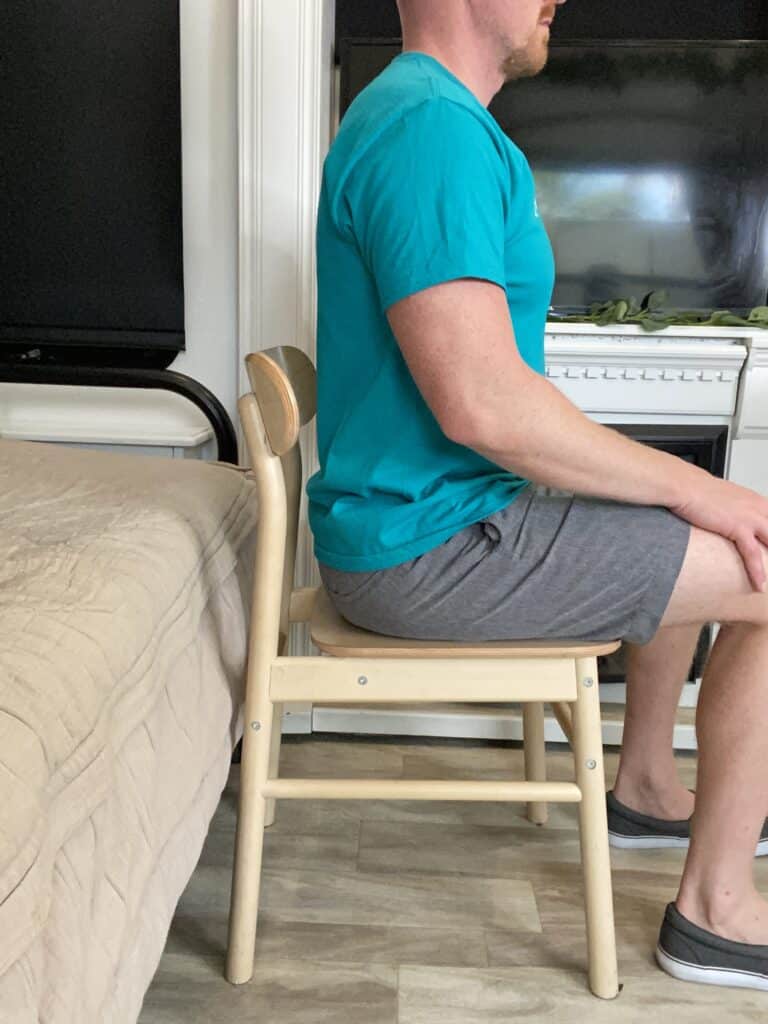

- Sit upright in a chair with your shoulders relaxed. Take a deep inhale and expand your belly.
- As you exhale, contract your abdominal muscles by pulling your belly button in towards your spine and flattening your low back against the chair.
- Hold this position for 5 seconds and then slowly relax.
- Perform 10 repetitions for a total of 3 sets.
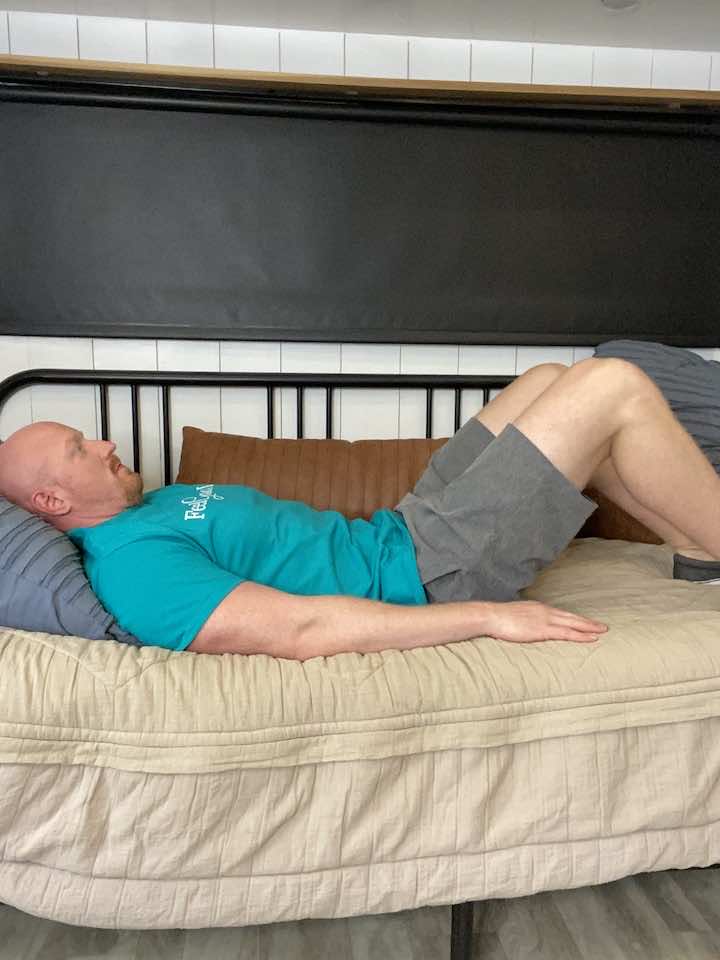
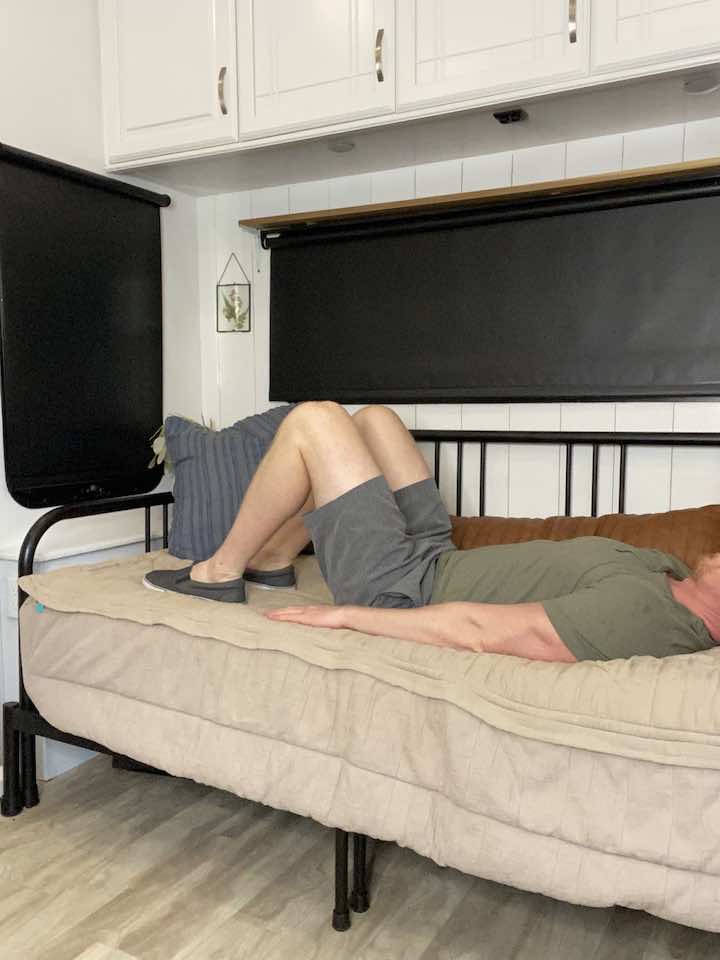
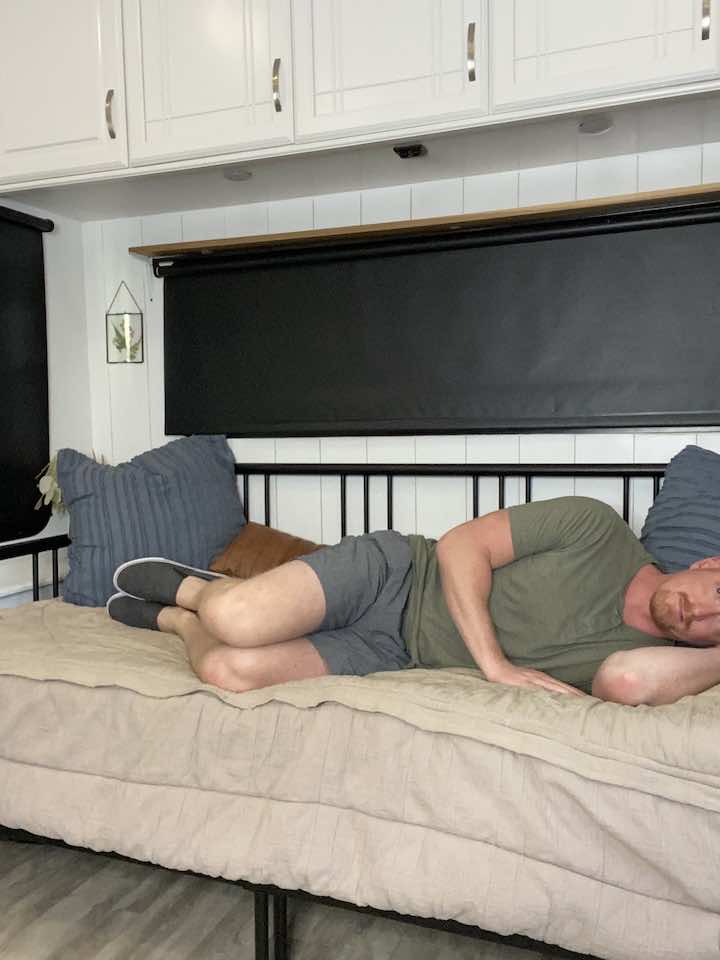
3. Supine Marching
- Starting position: Laying flat on your back (on your bed, couch, or floor), with your knees bent and feet flat on the surface.
- To activate your transverse abdominis, try to pull the belly button down towards the surface, gently flattening the back simultaneously. This will help to brace the core.
- While keeping this braced core (don’t forget to breathe!), lift one knee towards your chest, like a march, then lower back down to the surface.
- Repeat 10 repetitions for 3 sets. Perform on the opposite leg.
- You can perform all repetitions on one side, switch to the other or perform alternatingly between the legs.
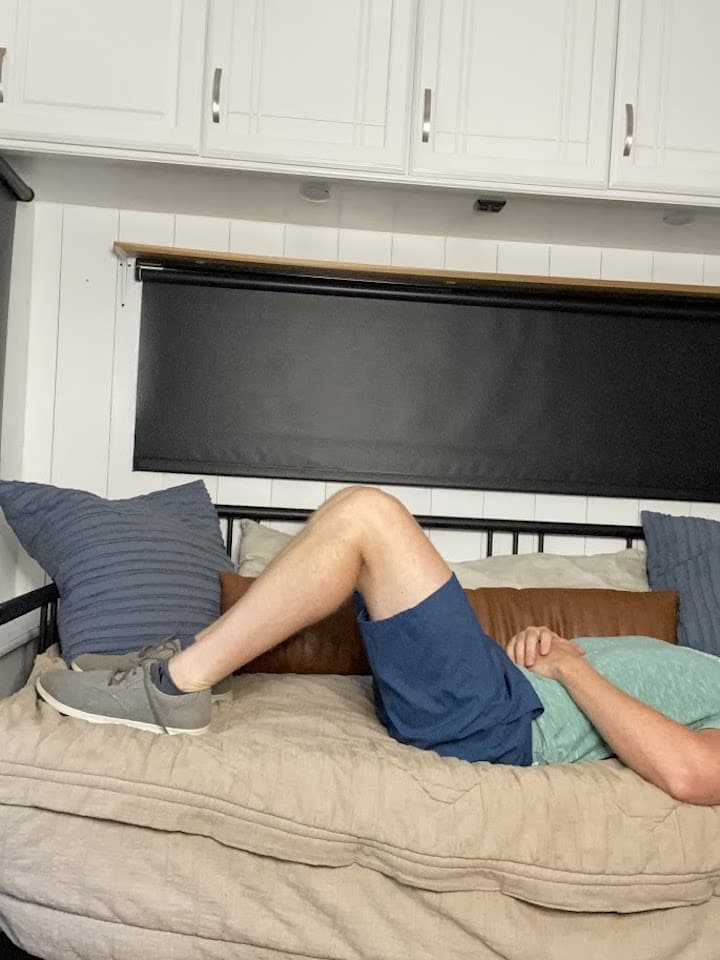
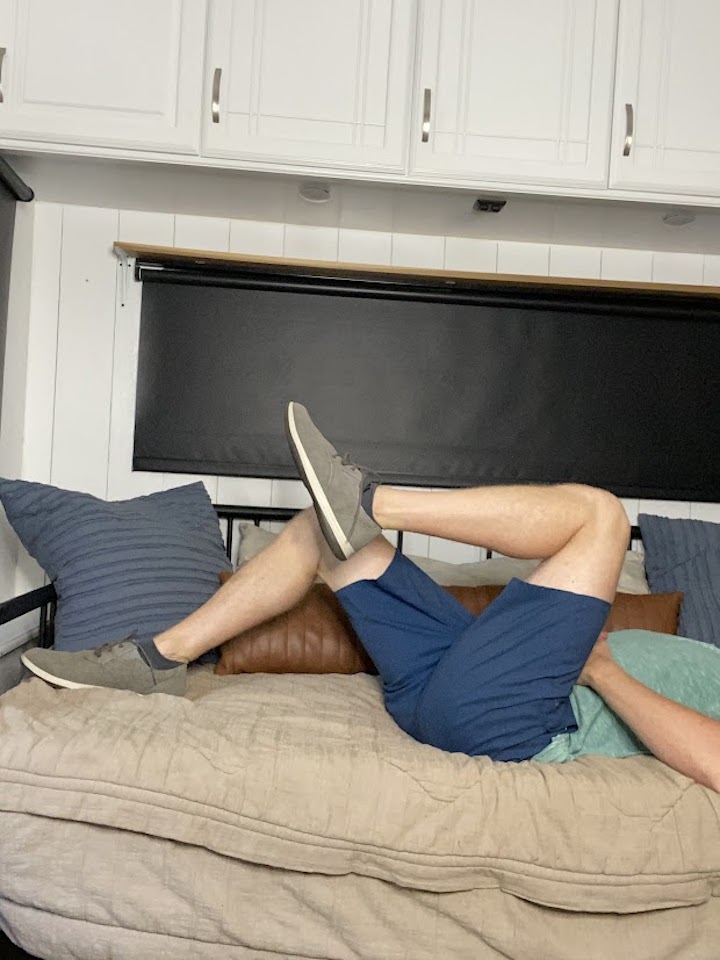
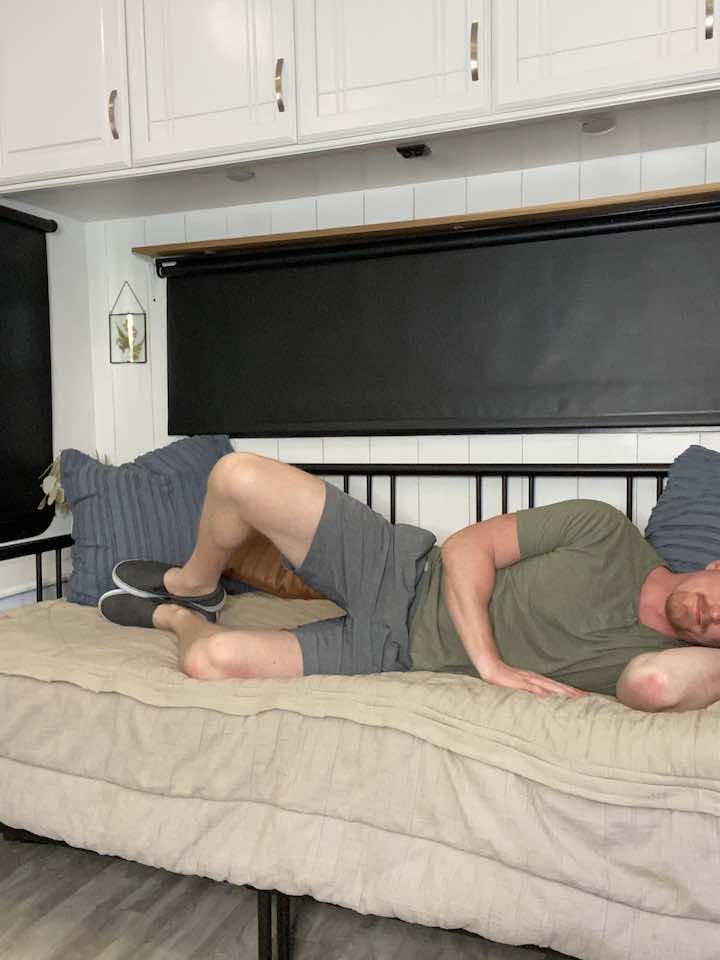
4. Bent Knee Fallouts
- Lie on your back with both knees bent and your hands on your hips.
- Engage your core by bracing your muscles like a trampoline surface. It’s a subtle movement and shouldn’t feel like you’re pushing your core up or sucking your core in. Just a gentle brace as though someone was about to place a weight on your belly.
- Keep your left knee frozen where it is, then let your right knee lower to the side 45 degrees and come back to the center. Keep your core engaged the whole time. You can monitor for control by using your hands on your hips. If your hip drops to the right side as the right leg moves, you’re not keeping your core engaged. The goal is for your hips to stay perfectly still while you perform this asymmetrical movement.
- Perform sets on the right side, then repeat on the left.
These exercises are all about making your core muscles – the ones around your belly and lower back – stronger, which is really helpful for your spine.
Strengthening Hip Muscles to Support Spinal Health
Strong hips are also key in dealing with spinal instability. They support your lower back and play a big part in keeping your spine healthy.

1. Bridge
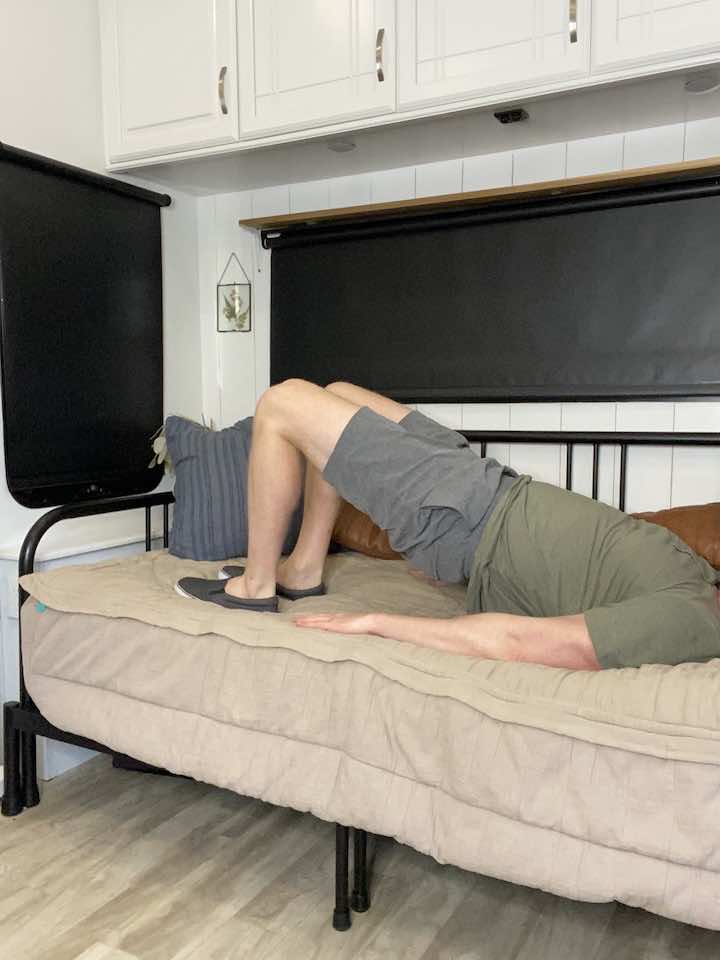
- Lie on the floor or bed with your legs bent and feet flat on the floor/bed.
- Gently squeeze your butt muscles to lift your hips off the ground, feeling a nice stretch in your front thigh and a contraction in the back of your thigh.
- Lower your hips back down to the starting position.
- Repeat 10 times.
2. Clamshells
- Start by paying on your side with both knees bent.
- Keep your feet in contact with each other, and then rotate your top leg up.
- Make sure you keep your spine in alignment and your hips don’t rock back! Rule of thumb is to do a smaller range of motion if you think your back is moving.
- Rotate your top leg back down to the starting position.
- Do this 10 times for one set, and complete 3 sets.
3. Standing Hip Lifts
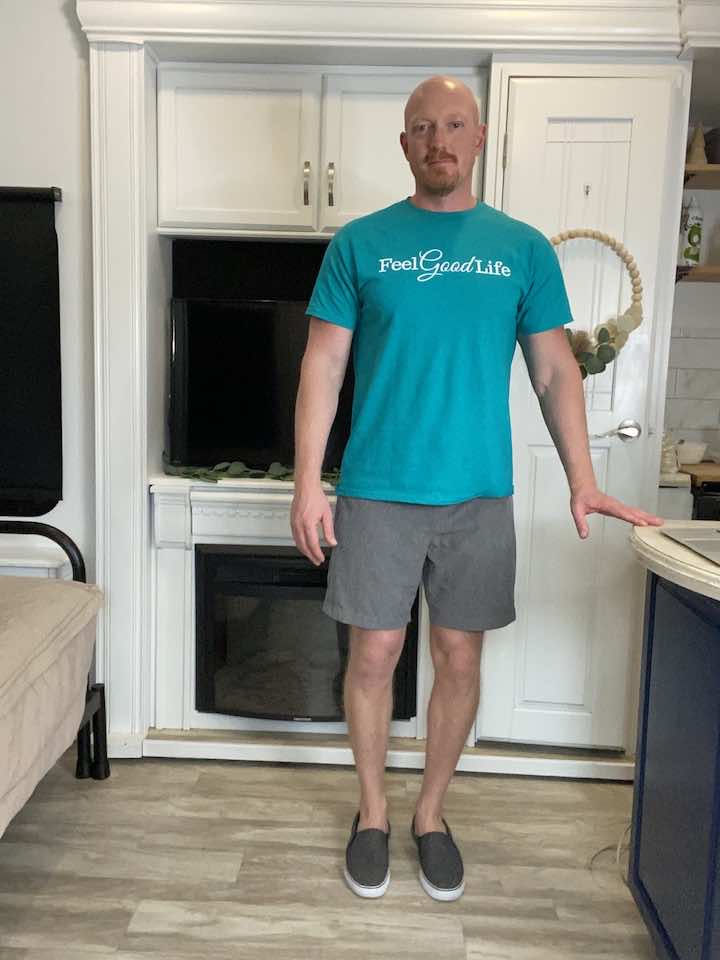
- Stand tall with one hand placed on a bed or chair. Balance on your left leg, keeping a soft bend in your knee to keep from locking out.
- Leading with your heel, lift your right leg out to the side. Be sure not to lean to the left.
- Repeat 10 times per leg.
- Complete 3 sets of the exercise.
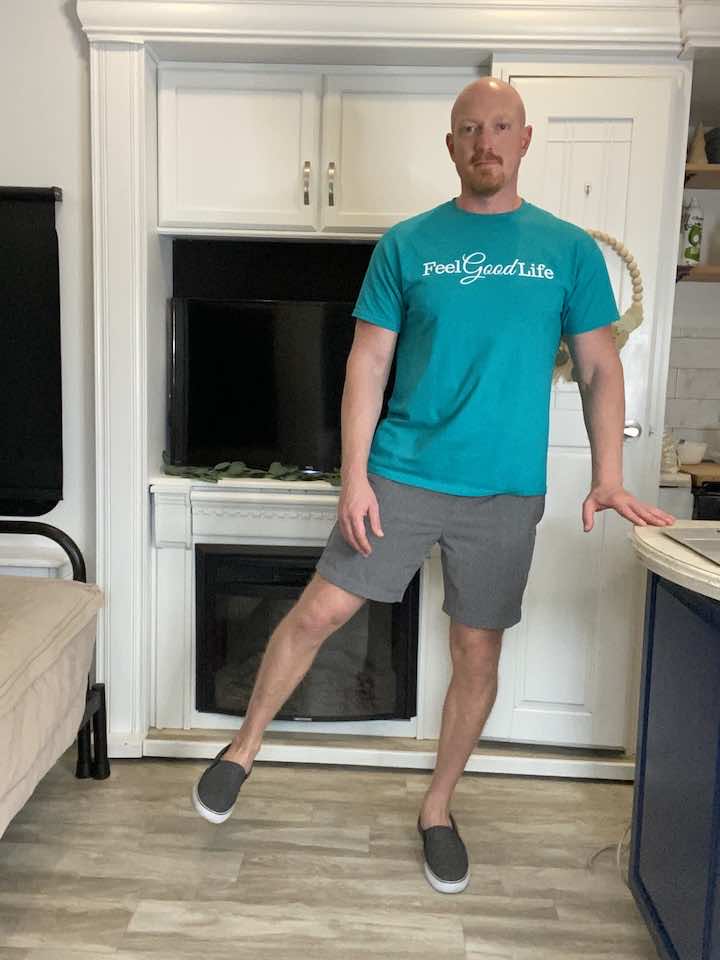
4. Standing Hip Extension
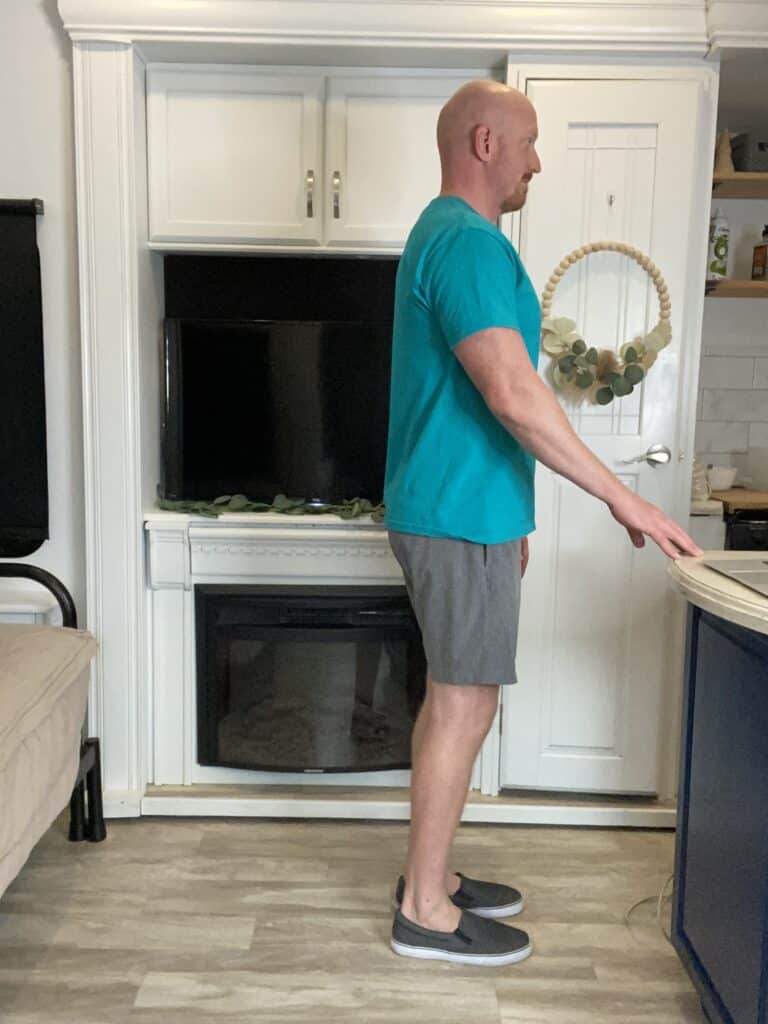
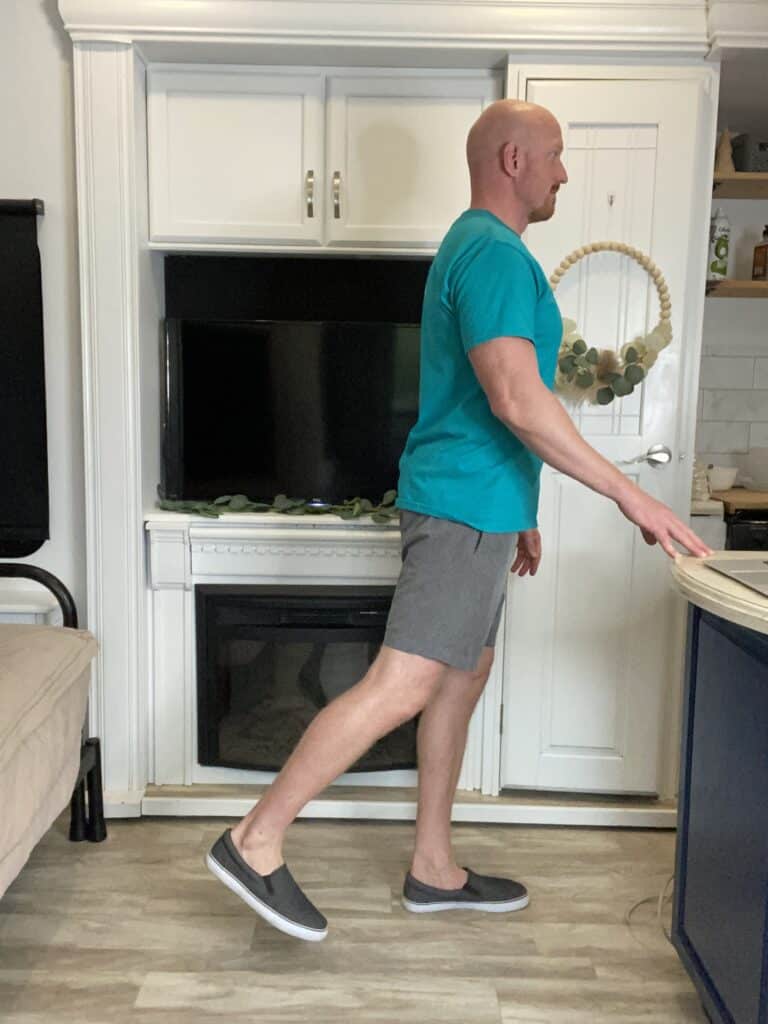
- Stand tall with your hands placed on a steady surface. You can use a counter, sink, or chair (no chairs with wheels) to hold on to for balance.
- Shift your weight onto your left leg, keeping a soft bend in your left knee to keep it from locking out.
- Then, keeping your toes pointed forward and your right leg straight, lift your right leg back a few inches, then lower back down.
- Repeat 10 times per leg for 3 sets.
Focusing on these hip exercises can greatly affect how your spine feels. They work on the muscles around your hips and lower back, which can really help with spine stability.
Conclusion
Doing these core and hip exercises regularly can really help if you’re struggling with spinal instability. Sticking with them is essential to get and keep the benefits. But remember, it’s best to do these exercises in a way that feels comfortable for you. If you’re still in pain or if you have special health concerns with your spine, it’s a good idea to talk to a doctor or a physical therapist. They can give you advice that’s just right for you and your spine.
Wondering What's Next?
Discover 11 Easy, At-Home “Stretch Exercises” for Stronger, Pain-Free Joints (click below)