Free download: Top 10 Natural & Easy Remedies for Joint Pain from Home. Learn these helpful remedies.
Estimated Reading Time: 7 minutes read
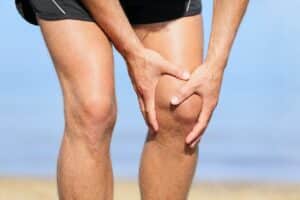
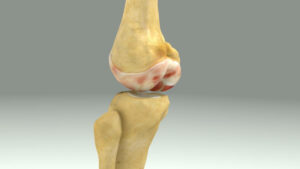
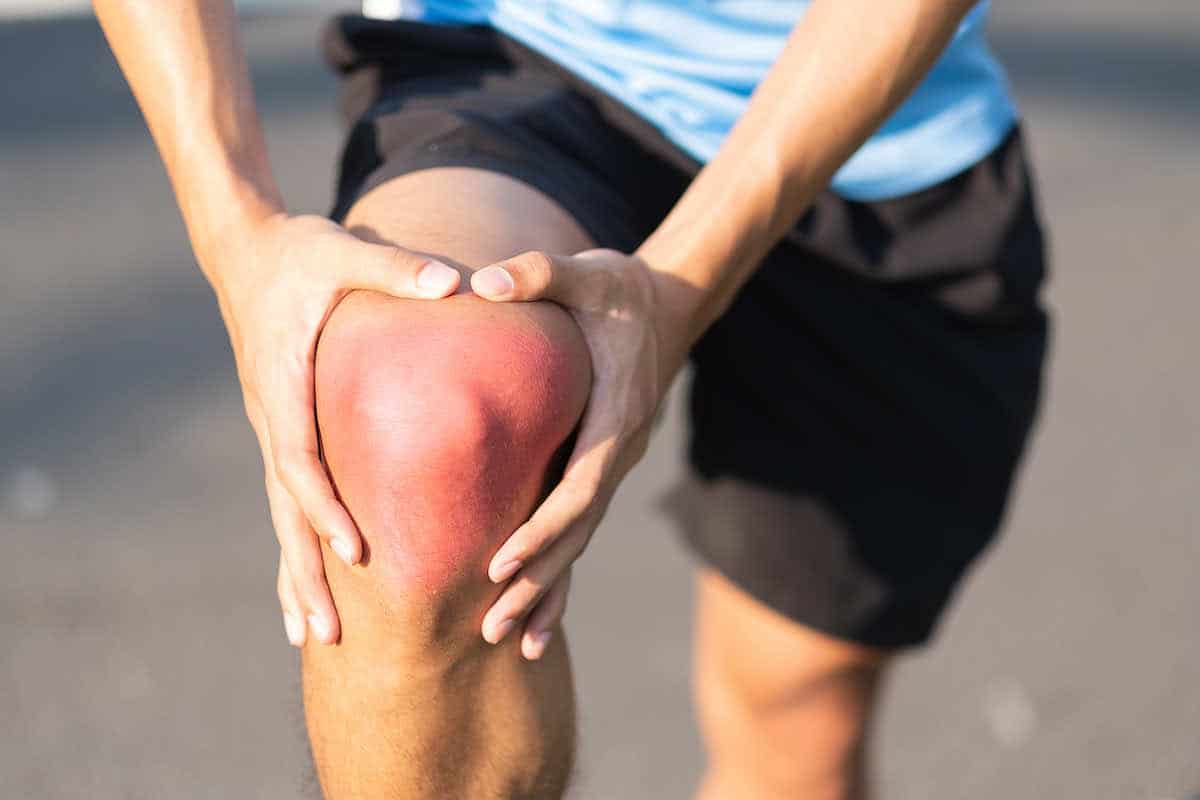
Patellofemoral arthritis is a term used to describe arthritis that happens when the cartilage on the underside of the kneecap (patella) wears thin or completely breaks down. It’s an uncomfortable condition that can limit your mobility. But with the right exercises and a positive attitude, we can help you tackle this condition head-on. Let’s jump right in!
Table of Contents
Understanding Patellofemoral Arthritis
Understanding your patellofemoral joint is the first step. This joint is where your kneecap (patella) and thigh bone (femur) connect. Arthritis in this particular area can trigger various inconvenient and painful symptoms.

The main causes of patellofemoral arthritis include:
- Aging: As we get older, our joints naturally wear down, and this can lead to arthritis.
- Injury: Any damage to the knee can increase the risk of arthritis later on.
- Strain from Physical Activity: Overuse from high-impact sports or heavy physical labor can contribute to the wear and tear on your knee joints.
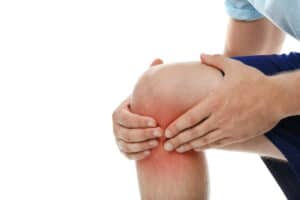
If you’re dealing with patellofemoral arthritis, you might experience the following symptoms:
- Knee Pain: This is often the first sign of arthritis. You might notice discomfort in your knee during activity or even at rest.
- Stiffness: Your knee might feel stiff, especially when you first get up in the morning or after sitting for a long period.
- Swelling: The affected knee may look swollen or feel tender to the touch.
- Grinding Sensation: You might feel or hear a grating sensation during knee movements.
- Difficulty with Certain Activities: Pain may increase when sitting for long periods, kneeling, or climbing stairs.
- Knee Buckling: In some cases, the knee may give way or buckle.
Despite these symptoms and the discomfort they can cause, there are ways to manage this condition effectively and improve your quality of life.
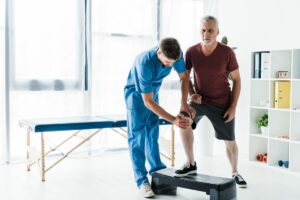
Steps Towards Recovery
Now that we’ve covered the challenging aspects let’s focus on the road to recovery. The path to reclaiming your knee’s health involves a blend of physical therapy, lifestyle adjustments, and occasionally medications or even surgical interventions.
However, remember that every journey begins with a single step; for us, that first step is exercise. The following exercises are designed specifically to alleviate your pain and enhance your knee’s functionality. So, let’s dive right in and move toward a better and healthier tomorrow.
Exercises for Patellofemoral Arthritis
1. Quad Sets
- Starting position: Seated with the injured leg stretched in front of you (can be on the floor, couch, or bed).
- Squeeze the quadriceps (the muscles on the top of the thigh) and try to press the back of the injured knee down toward the surface.
- Hold for 5 seconds, then relax.
- Repeat 10 repetitions for 3 sets.
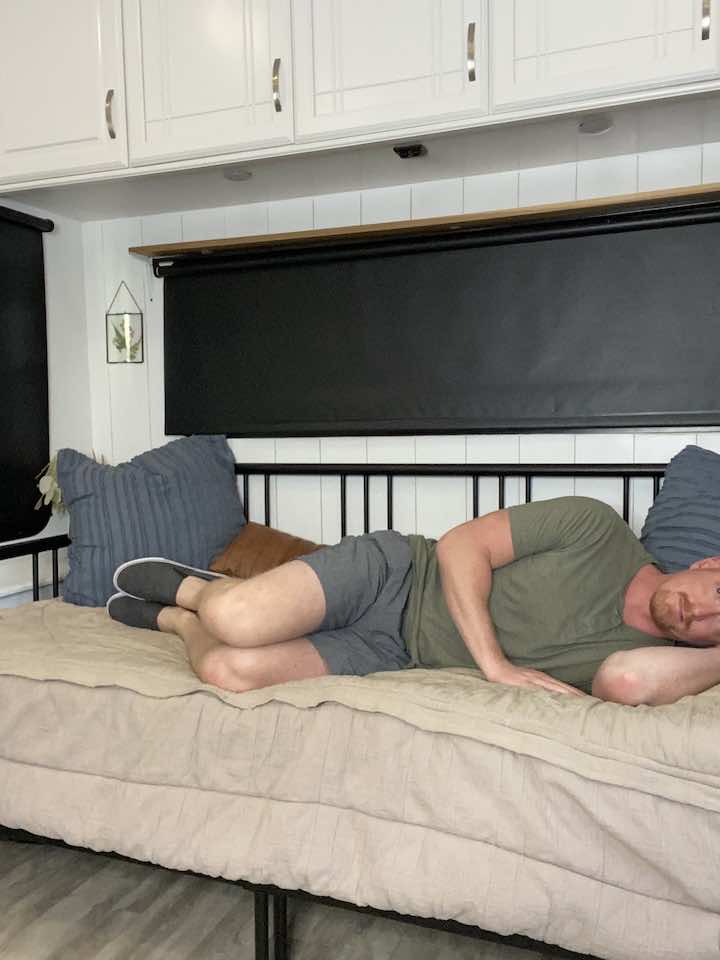
2. Heel Slides with Rope
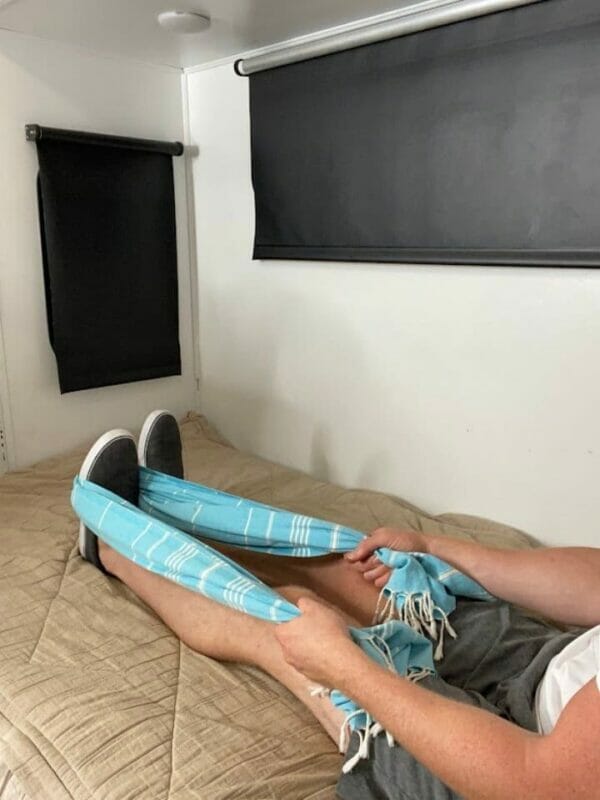
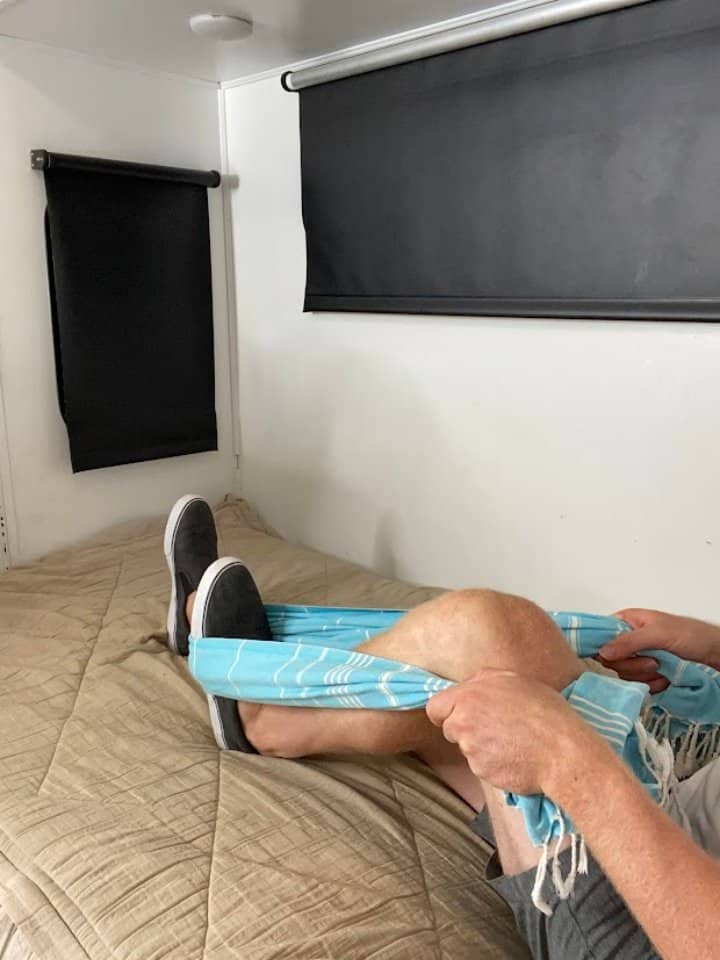
- Starting position: Sitting or laying down with the injured leg in front of you (can be on the floor, couch, or bed).
- Wrap a non-elastic strap around the foot.
- Pull on the strap with the arms to slide the heel towards the bottom while simultaneously bending the knee.
- Hold for 5 seconds, then return to your starting position.
- Repeat 10 repetitions for 3 sets.
3. Full Leg Lifts
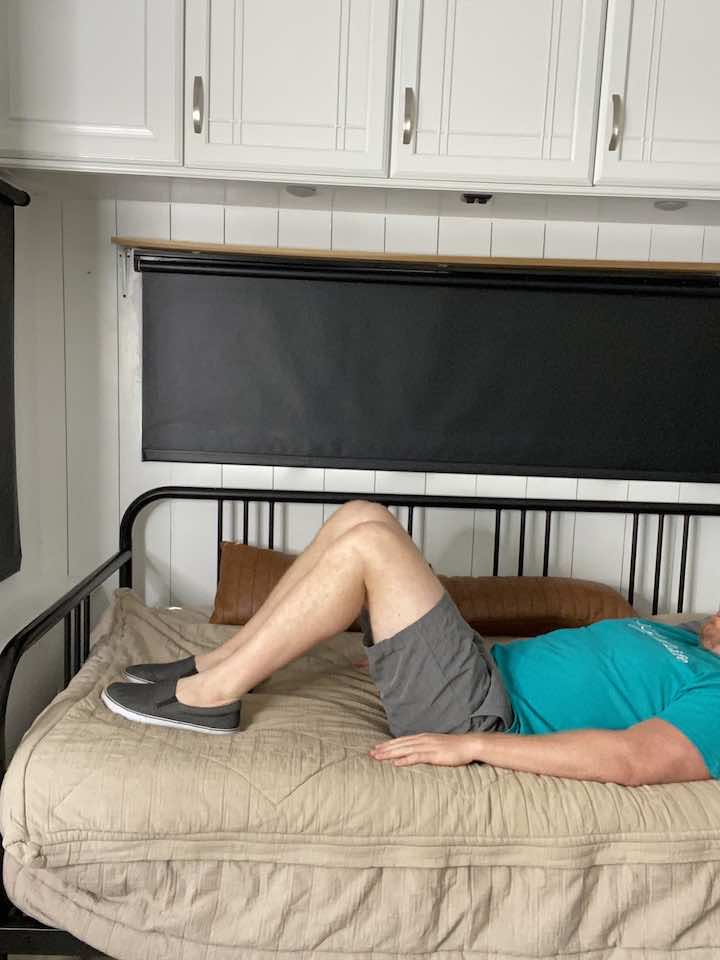
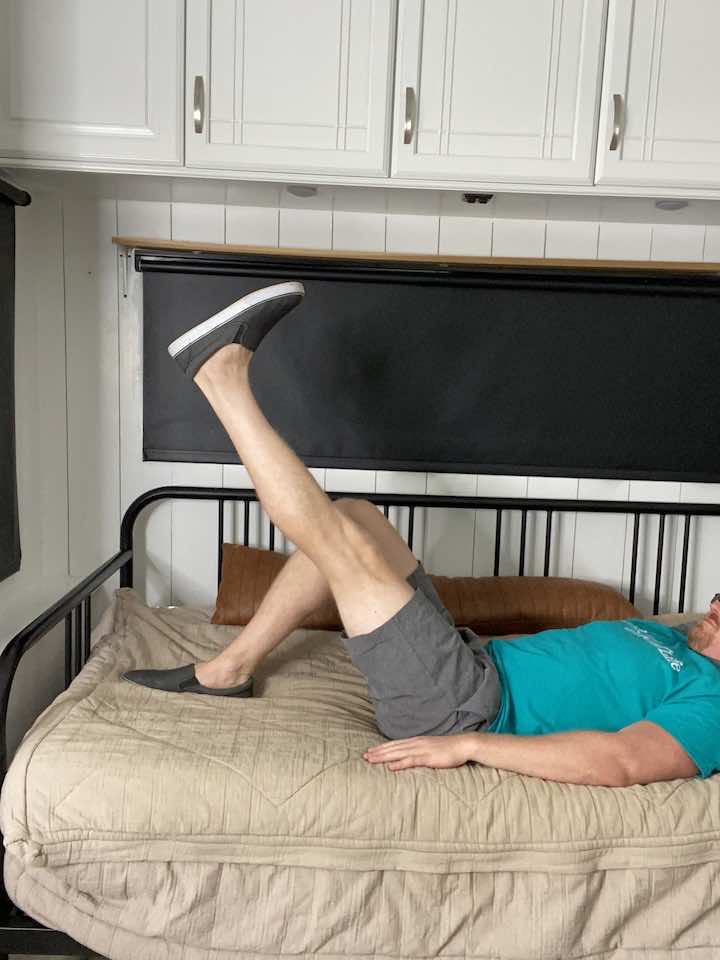
- Lie on your back with one leg bent and the other leg straight and together.
- Lift your straight leg up towards the ceiling, raising your buttocks off the floor.
- Slowly lower your leg back down, stopping just above the floor. Hold for 5 seconds briefly.
- Repeat the movement for 10 repetitions and 3 sets.
4. Seated Knee Extension
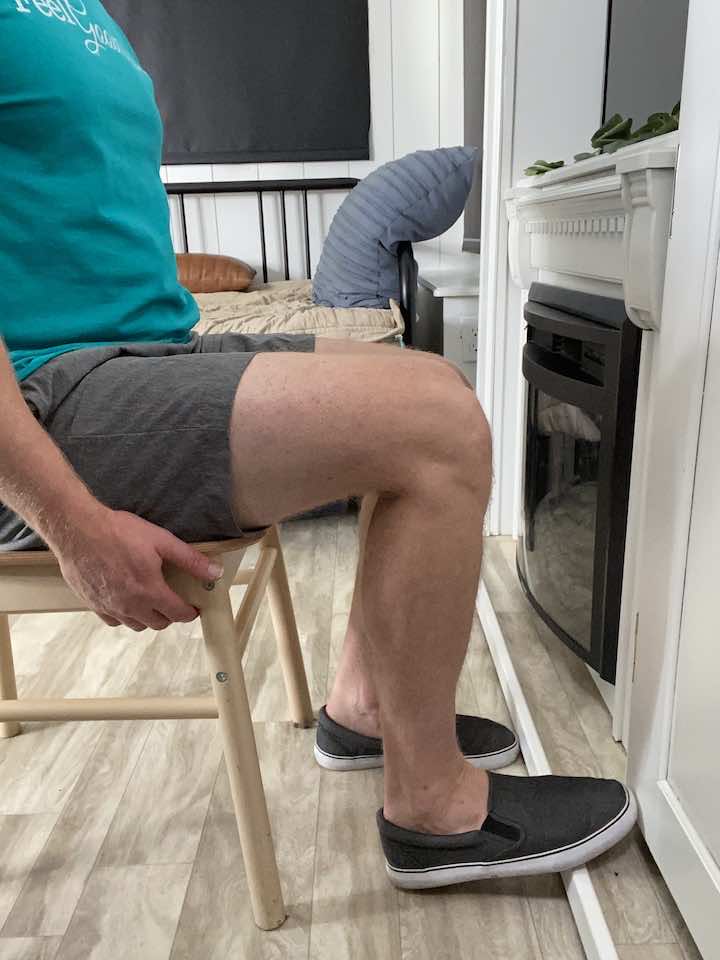
- Sit in a chair about a foot away from a wall, with your knees at a 90-degree angle and your spine in a neutral position.
- Press your toe into the wall to tense your thigh muscle.
- Push with about 70-80% of your maximal exertion for 10 seconds.
- Release the tension and rest for a few seconds.
- Repeat this exercise for a total of 3 times per knee.
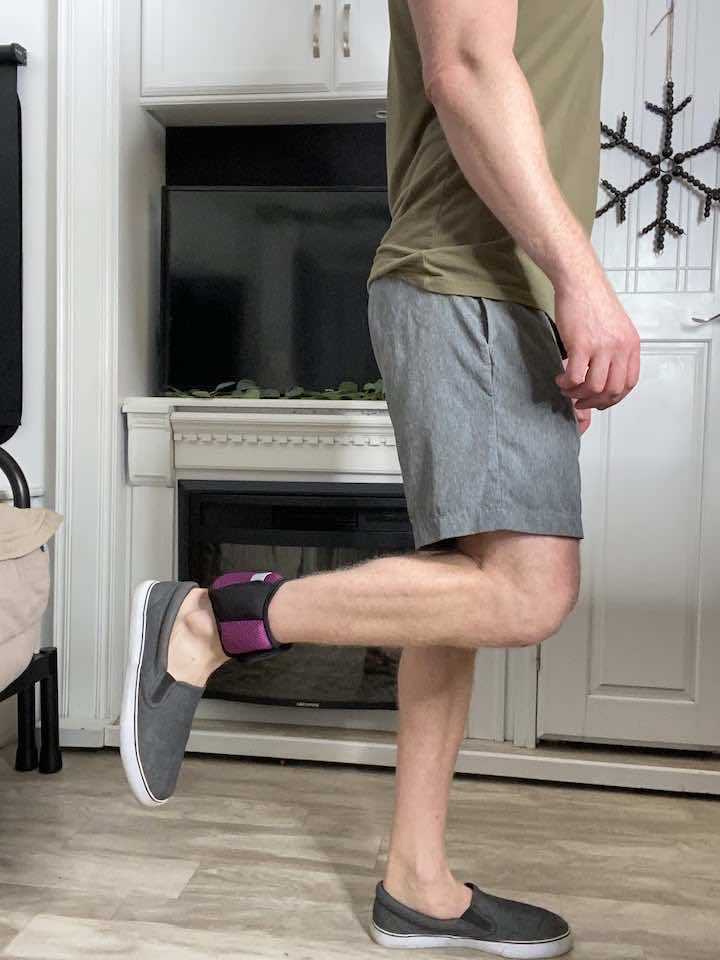
5. Standing Hamstring Curls
- Use 2-3 lb. ankle weights or tie a resistance band around your ankles.
- Stand in front of a sturdy surface, such as a countertop, for support.
- Bend one knee, allowing your foot to kick up towards your bottom.
- Return to the starting position.
- Repeat this movement 10-15 times for 2-3 sets.
- Practice this exercise on both legs.
6. Clamshells
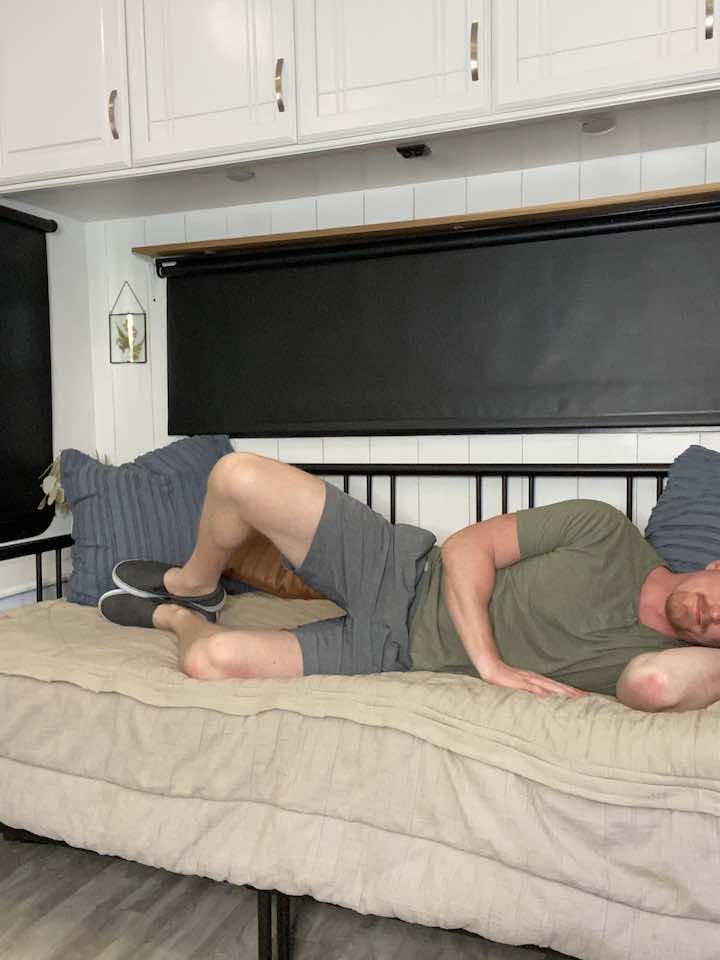
- Start by laying on your side with both knees bent.
- Keep your feet in contact with each other, and then rotate your top leg up. Ensure you keep your spine aligned and your hips don’t rock back! The rule of thumb is to do a smaller range of motion if you think your back is moving.
- Rotate your top leg back down to the starting position.
- Do this exercise 10 times in each set.
- Complete 3 sets of the exercise.
7. Standing Hip Extension (only lifting the injured leg)
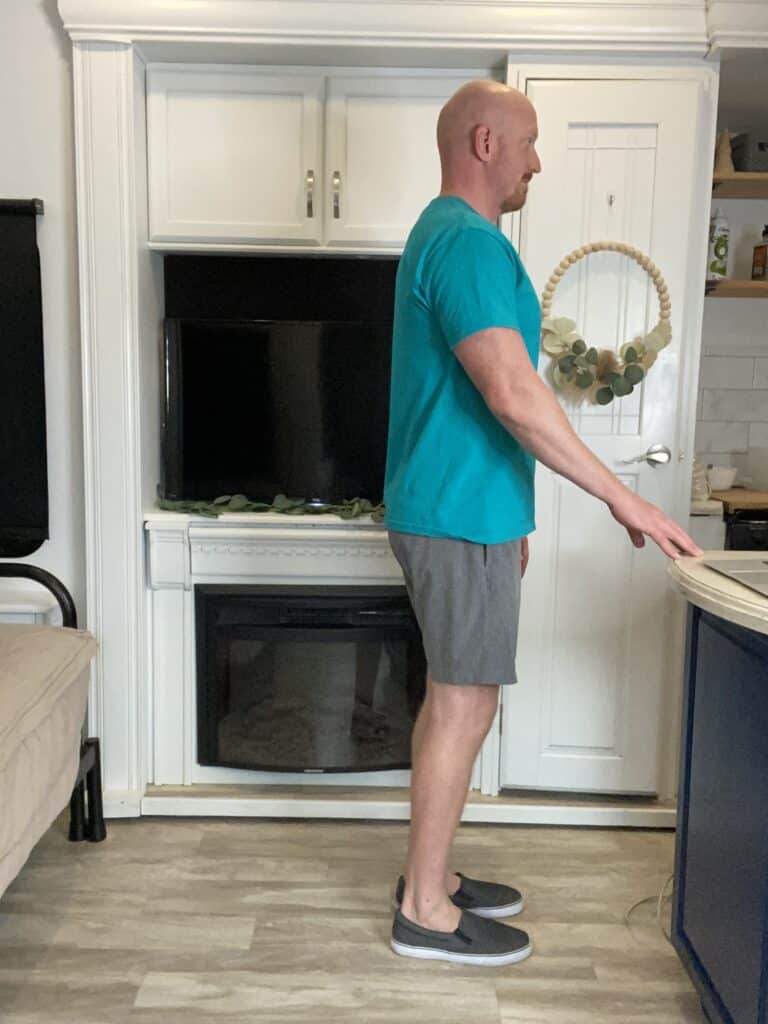
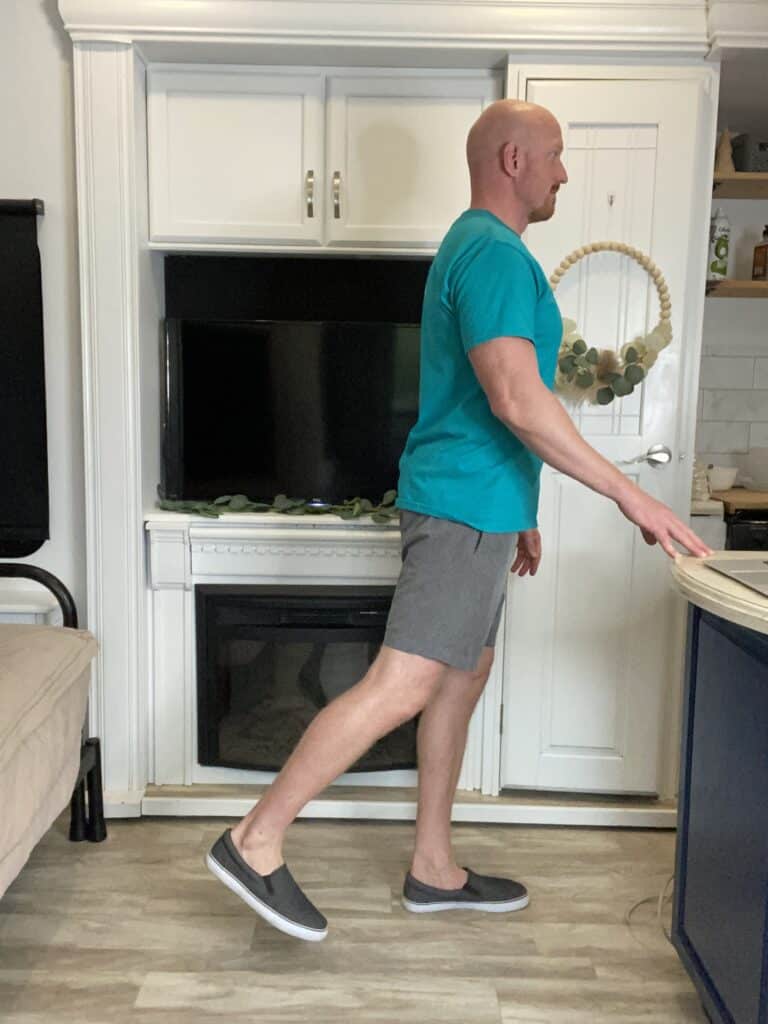
- Stand tall with your hands placed on a steady surface, such as a counter, sink, or chair (without wheels), to hold onto for balance.
- Shift your weight onto your left leg, keeping a slight bend in your left knee to avoid locking it out.
- Keeping your toes pointed forward and your right leg straight, lift your right leg back a few inches.
- Lower your leg back down to the starting position.
- Repeat this movement for 10 repetitions only on the injured leg.
- Do a total of 3 sets of this exercise.
8. Standing Hip Lifts (only lifting the injured leg)
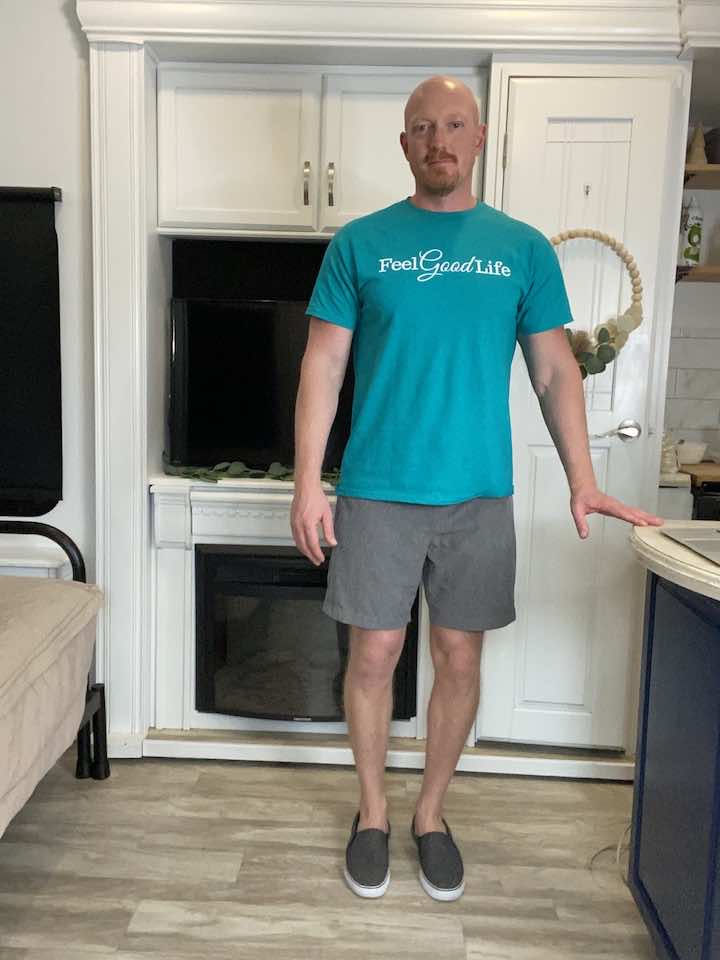
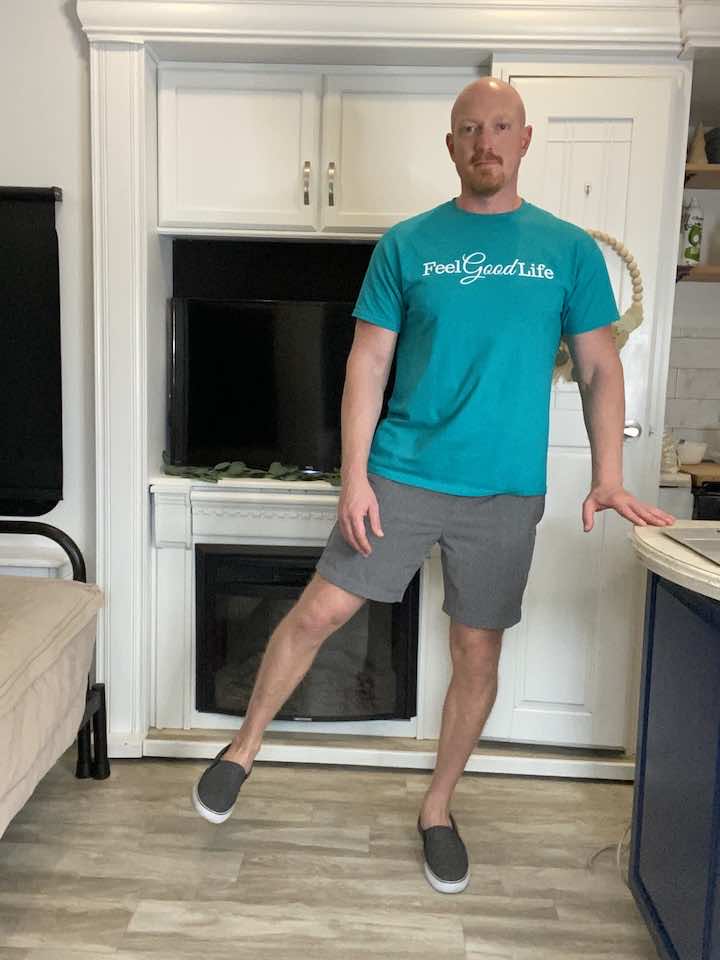
- Stand tall with one hand placed on a bed or chair for support.
- Balance on your left leg, keeping a slight bend in your knee to avoid locking it out.
- Lead with your heel and lift your right leg out to the side, keeping your foot flexed.
- Be sure not to lean to the left while lifting your leg.
- Lower your leg back down to the starting position.
- Repeat this movement for 10 repetitions only on the injured leg.
- Do a total of 3 sets of this exercise.
- If pain increases, wait for two weeks and try again.
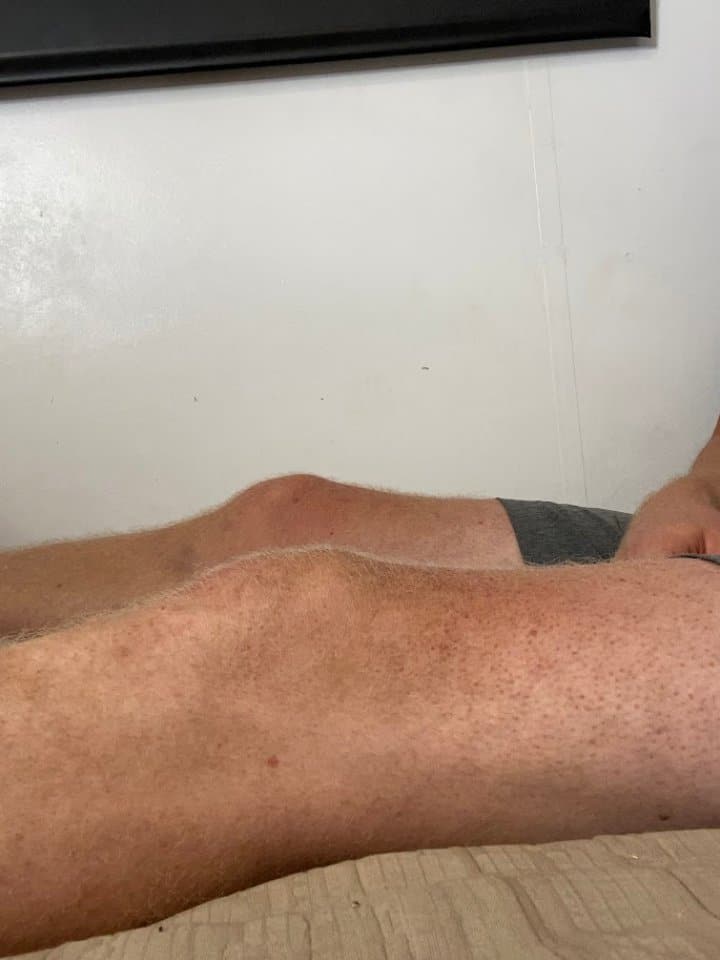
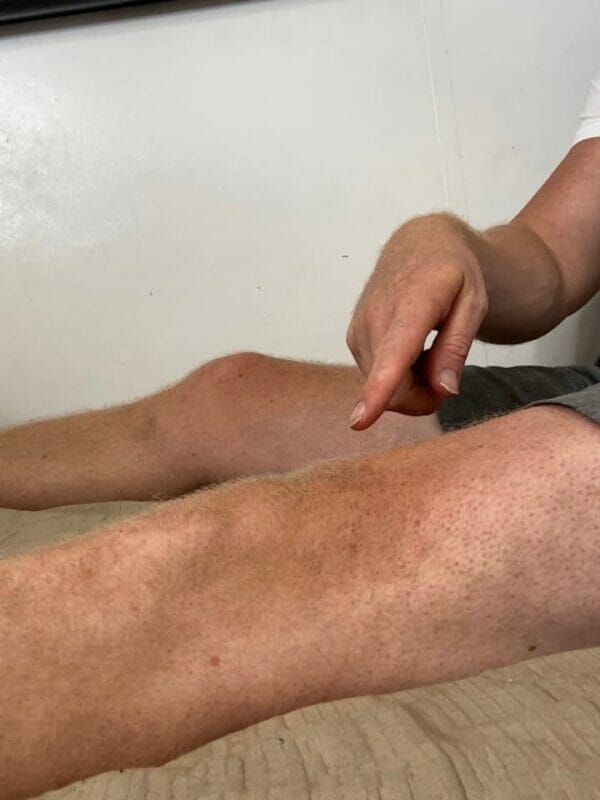
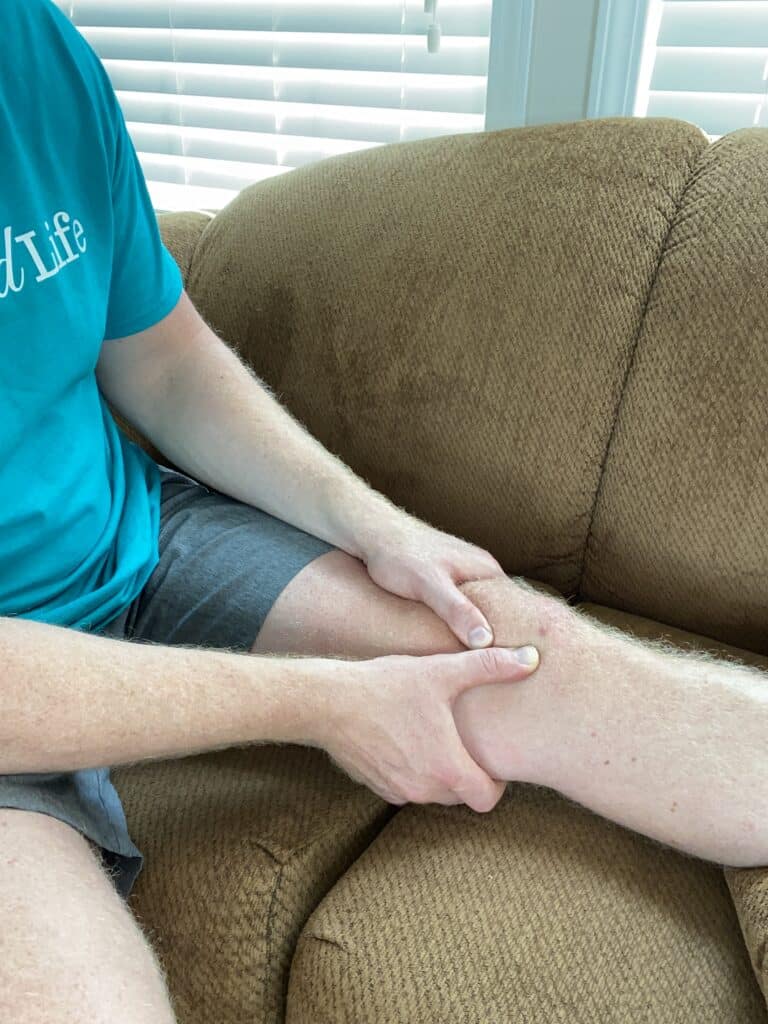
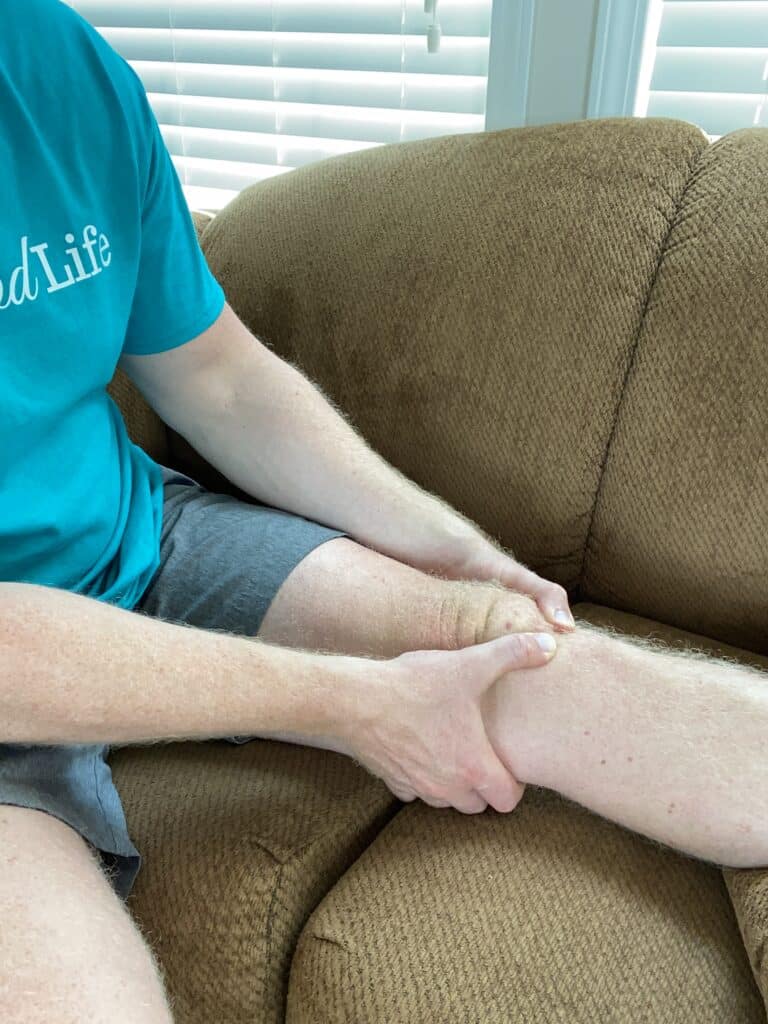
10. Knee Cap Releasing
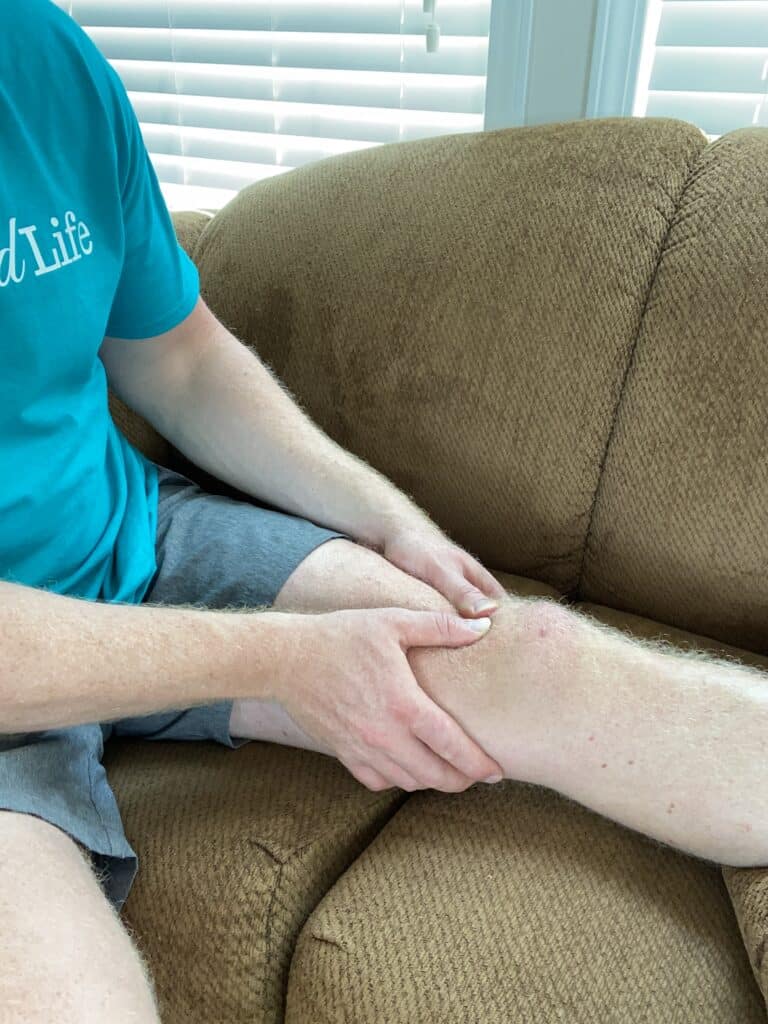

- Sit on a couch with one leg straightened, supported by the cushions. You can also use two chairs facing each other. You’ll need your knee straight so that your knee cap (patella) can get the maximum range of motion.
- Place your thumbs at the top of your kneecap. Your fingers will drape around each side of your knee, creating a cupping position.
- Apply downward pressure so that your kneecap floats downward in the direction of your foot. Do this 5 times in the downward direction in one-second intervals.
- Now, place your thumbs on the side of your kneecap closest to your toes. Apply upward pressure on your kneecap and slide it towards you. Do this 5 times in one-second intervals.
- Place both thumbs on the knee cap’s outside (lateral) side. Apply an inward (medial) pressure on the knee cap. Do this 5 times in one-second intervals.
- Lastly, place your thumbs on your kneecap’s inner (medial) part.
- Apply outward (lateral) pressure 5 times in one-second intervals.
Conclusion
These targeted knee exercises aim to make a significant difference in improving your knee function. However, it’s important to understand that everyone’s experience with patellofemoral arthritis is unique. What brings relief and progress to one person might not necessarily work for another.
The key is not rushing to the finish line but making steady, consistent progress toward your wellness goals. Exercise patience, remain consistent, and don’t forget to applaud your small triumphs along the way. By staying determined and maintaining a positive outlook, you’ll be well-prepared to manage your patellofemoral arthritis effectively and live your life to the fullest. Here’s to your continued health and well-being!
Wondering What's Next?
Discover 11 Easy, At-Home “Stretch Exercises” for Stronger, Pain-Free Joints (click below)