Free download: Top 10 Natural & Easy Remedies for Joint Pain from Home. Learn these helpful remedies.
Estimated Reading Time: 9 minutes read
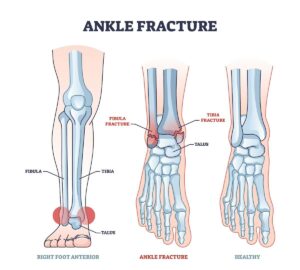
Stress fractures in the foot, typically resulting from overuse and repetitive impact, can be a significant hindrance, especially for active individuals. These small cracks in the bones of the foot arise from continuous stress and can lead to persistent pain and discomfort.
The recovery process focuses not only on rest but also on exercises that promote healing while not exacerbating the injury. It’s essential to consult with a healthcare provider before starting any exercise regimen, especially to confirm if weight-bearing activities are safe.

Table of Contents
Symptoms and Causes of Stress Fractures in the Foot
Stress fractures in the foot present specific symptoms that should not be ignored, as early detection is key to effective treatment:
A: Symptoms
- Gradual Onset of Pain: Often increases with weight-bearing activities.
- Localized Swelling: Typically around the fracture site.
- Noticeable Bruising: Around the affected area.
- Discomfort in Daily Tasks: Pain is not just limited to physical activities.
- Consistent Pain: Even during periods of rest, indicating the progression of the fracture.
Awareness of these symptoms is vital. If you experience escalating pain during activities, it’s essential to seek medical evaluation.
B: Unveiling the Causes
Various factors can lead to the development of stress fractures in the foot, with each contributing to the likelihood of injury:
- Continuous Repetitive Activities: Such as long-distance running or frequent jumping.
- Abrupt Increase in Physical Activity: Sudden changes in exercise intensity or duration.
- Inadequate Footwear: Shoes that don’t provide proper support or cushioning.
- Bone-weakening Conditions: Like osteoporosis, making bones are more susceptible to fractures.
- Structural Foot Anomalies: This includes issues like flat feet or high arches.
Recognizing these causes is key to understanding your risk for a stress fracture. For instance, athletes who intensify their training suddenly or those with pre-existing bone conditions are particularly susceptible.

Initial Steps: Reducing Impact and Pain
When dealing with a stress fracture, minimizing foot stress is crucial. Here’s how to start:
- Switch to Low-Impact Exercises: Activities like swimming or cycling are ideal. They keep you fit without stressing the fracture.
- Rest is Key: Give your foot time to heal. This might mean cutting back on activities, especially those causing pain.
- Supportive Footwear: Wear shoes that cushion and support your foot, reducing pressure on the injured area.
Gradually resume weight-bearing activities as you heal, but listen to your body and follow medical advice. Patience in these initial steps can make a big difference in your recovery.
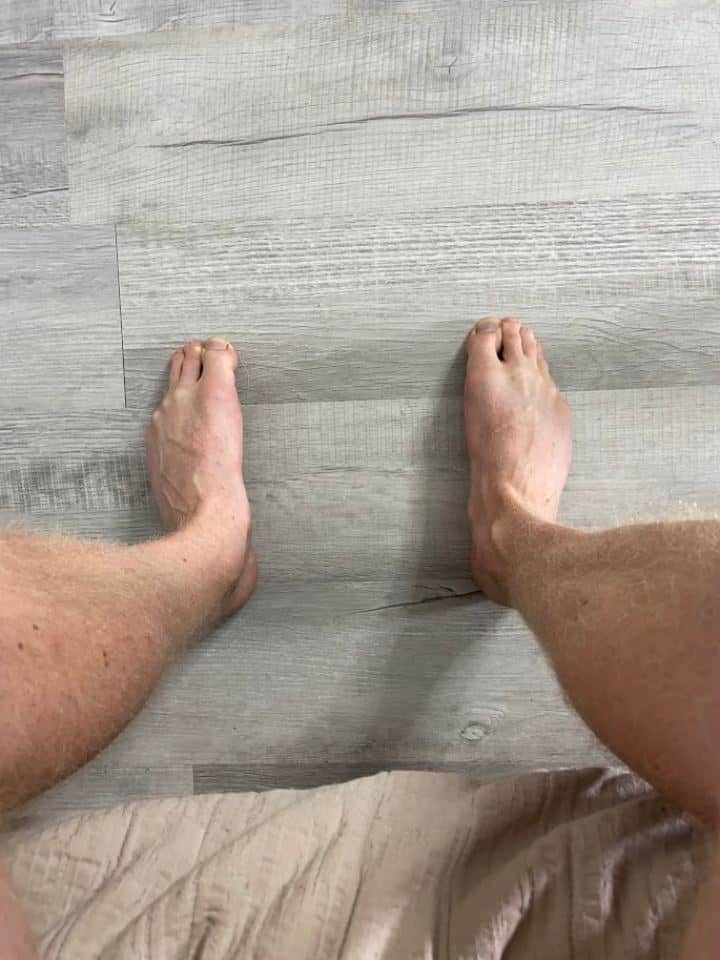
Gentle Stretching and Isometric Exercises
Begin with simple stretches and isometric exercises to manage pain:
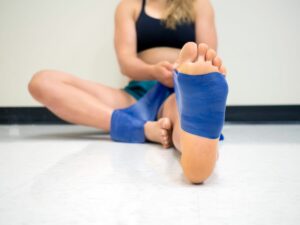
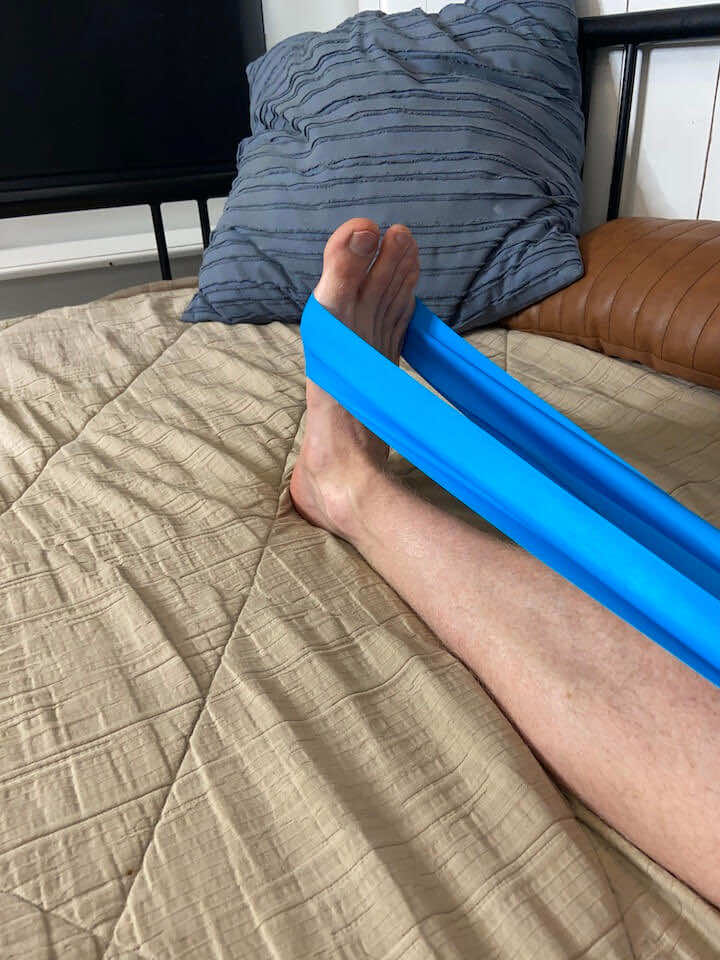
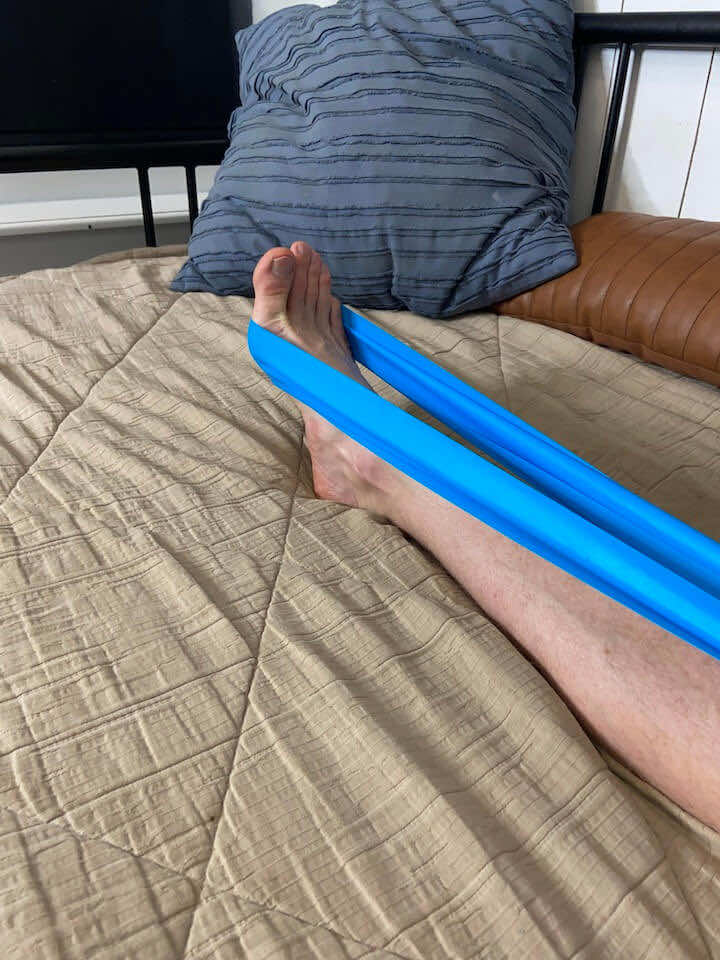
1. Calf Stretch with Towel
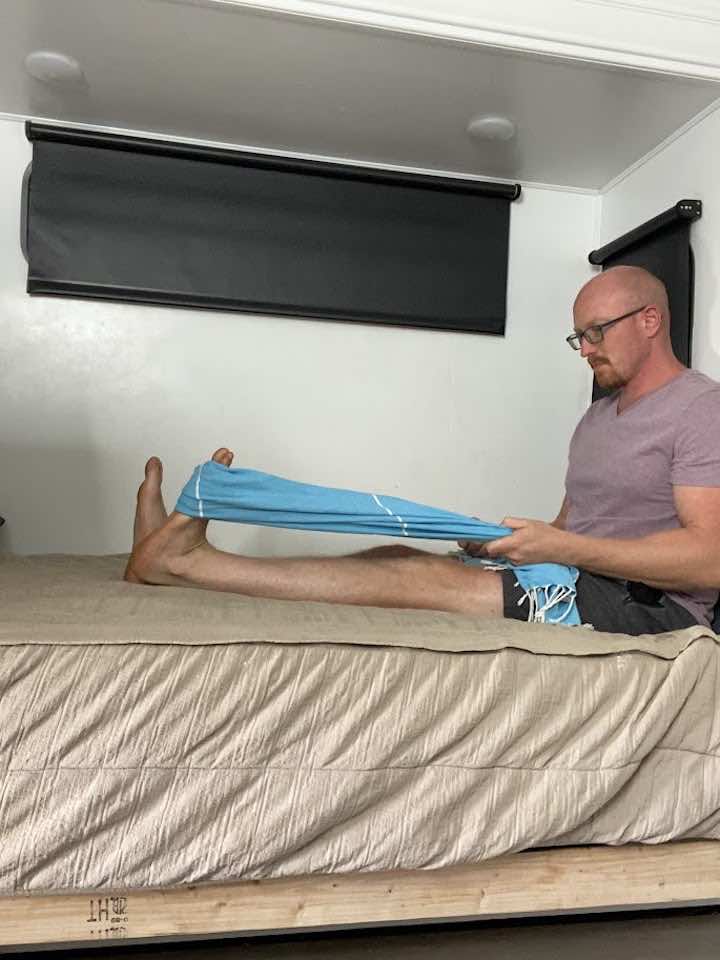
- Sit on the floor or bed with your legs extended in front of you.
- Place a towel around the ball of your foot.
- Hold onto each end of the towel with your hands.
- Slowly pull the towel towards you, bringing your toes towards your shin and stretching your calf muscle.
- Hold the stretch for 30 seconds.
- Release the stretch and repeat for a total of 3 sets.
- Repeat the exercise on the other leg.
2. Soleus Calf Stretch
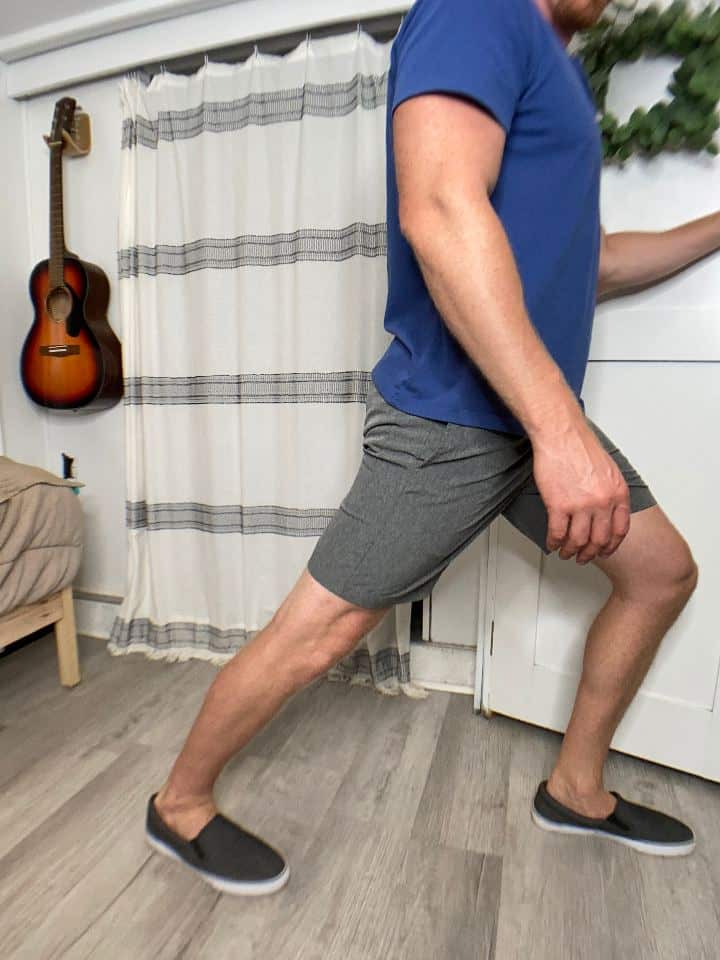
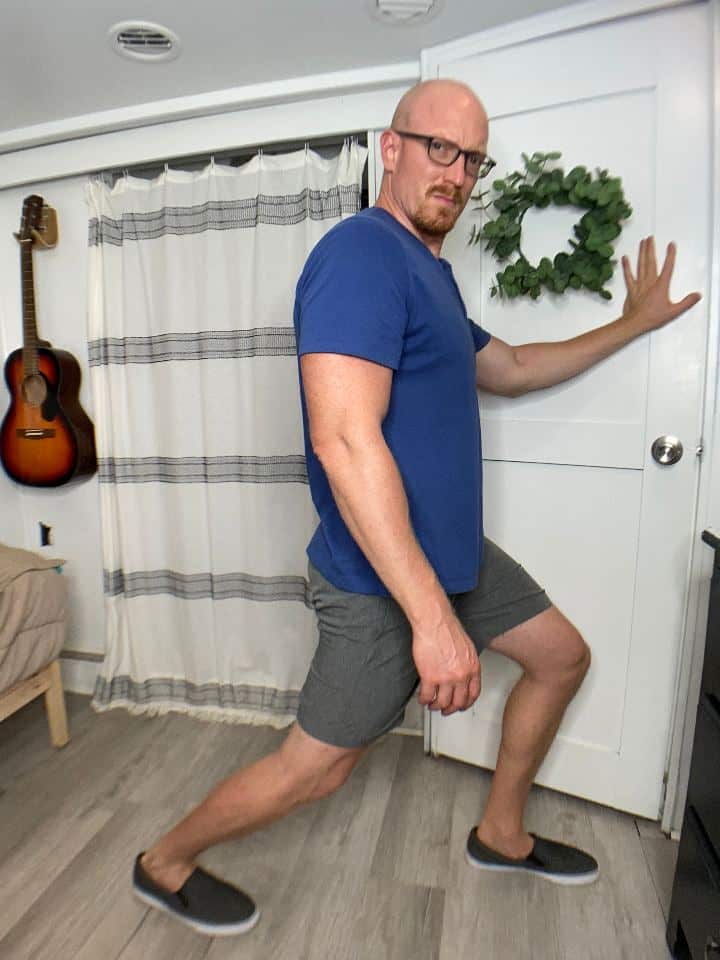
This stretches another muscle in your calf and is very similar to the gastrocnemius stretch.
- Position yourself just like you did for the gastrocnemius stretch in a small lunge.
- This time though, allow the back knee to slightly bend. Make sure to still keep both heels flat on the floor. You might feel this one a little more towards the Achilles tendon and heel.
- Hold 30-60 seconds. Repeat twice on both legs.
Remember, holding each stretch for at least 30 seconds is important. Using a timer can help ensure you hold the stretch for the full duration.
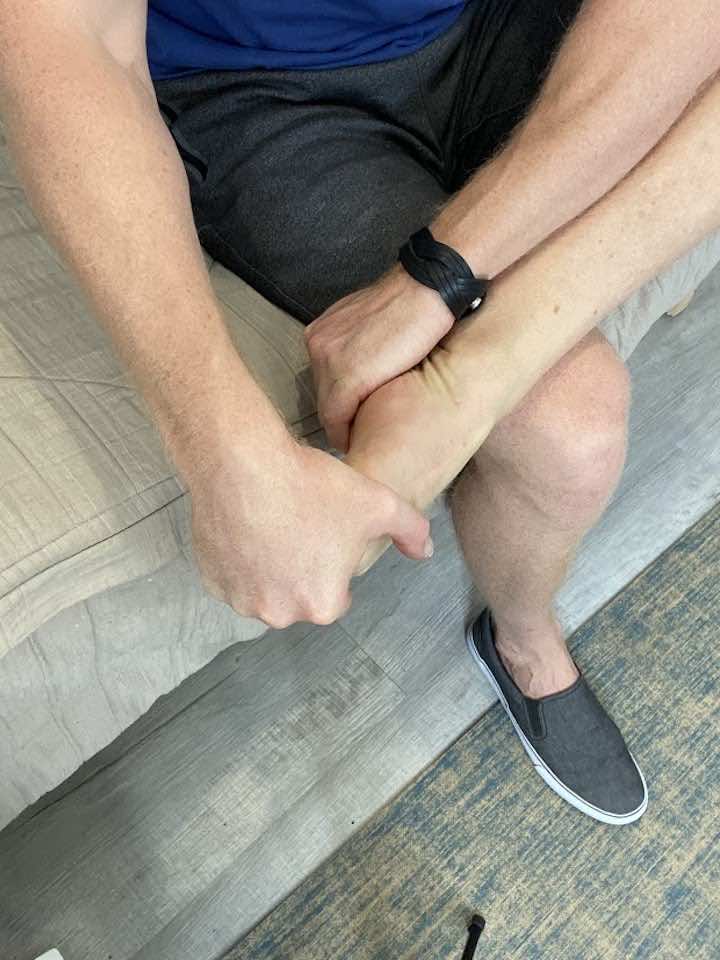
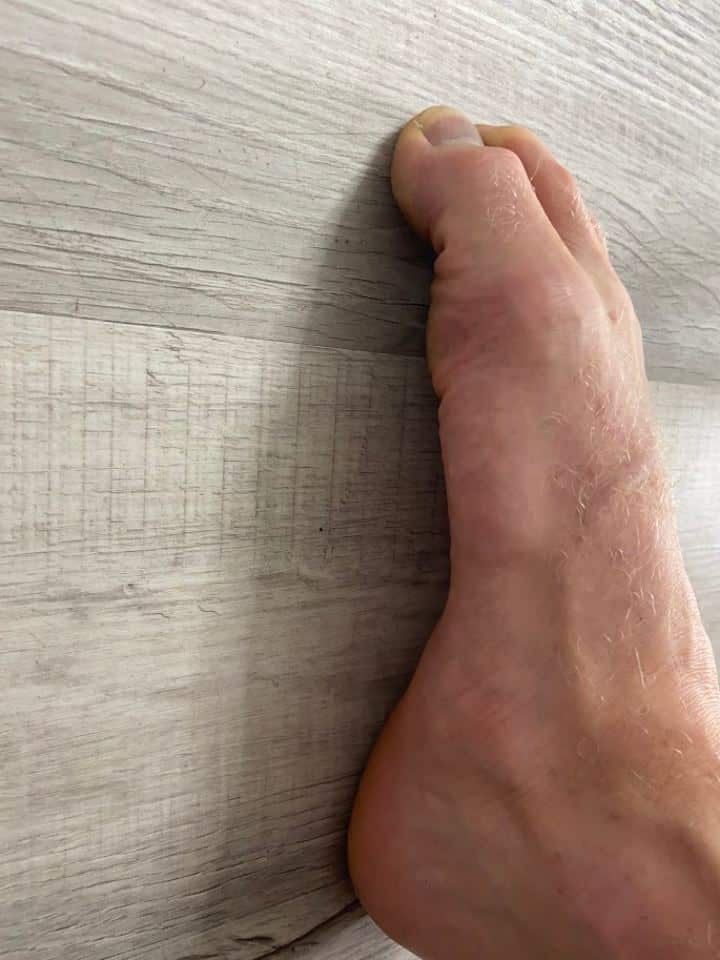
3. Isometric Ankle Dorsiflexion
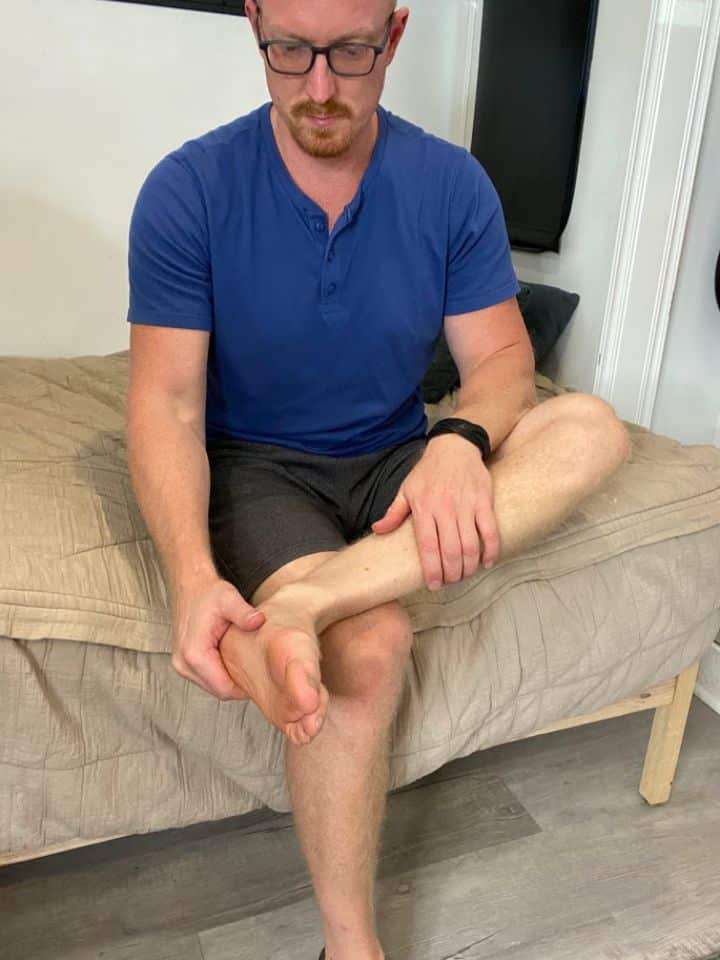
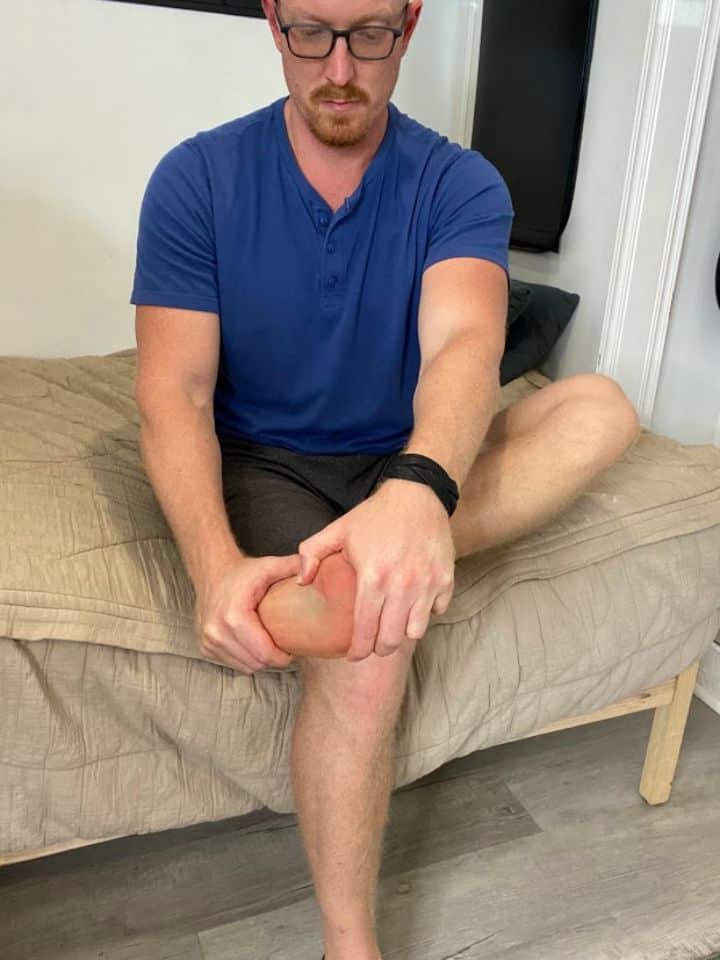
- Place one hand on the bottom of the foot, positioned over the ball of foot.
- Gently, pull the foot back into dorsiflexion until a gentle stretch is felt on the back side of the heel and ankle.
- If the stretch is very intense at first, try holding for 5 seconds, then rest. Repeat 10x.
- If the stretch is only mild, then try a longer hold time anywhere from 30-60 seconds.
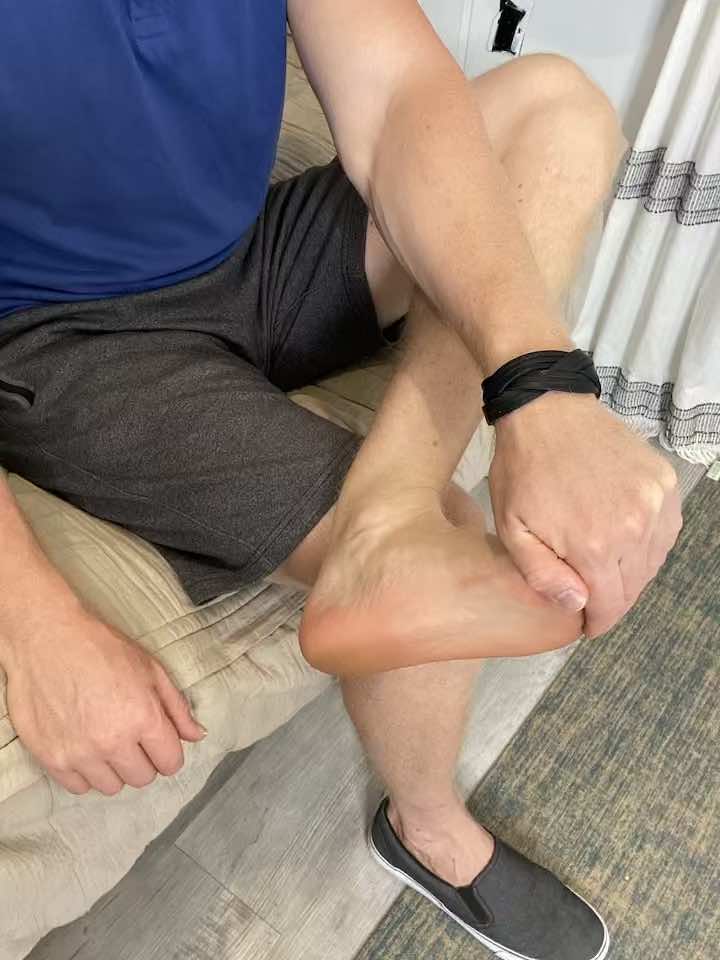
4. Isometric Ankle Plantarflexion
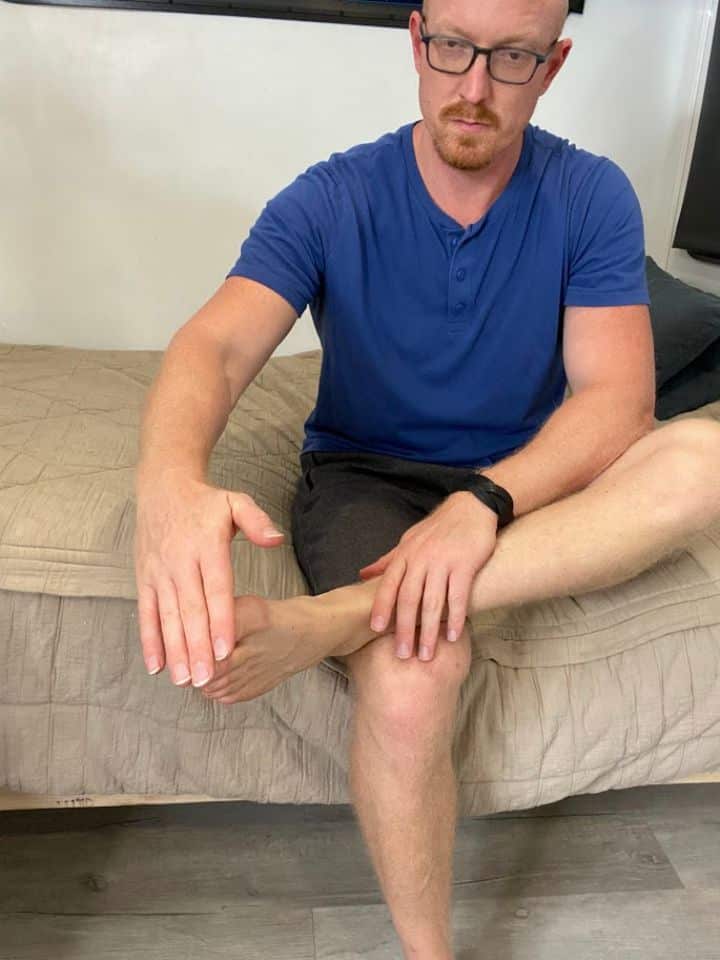
- Place one hand on the top of the foot, positioned on the forefoot near the toes.
- Gently, pull the foot down into plantar flexion until a gentle stretch is felt on the front side of the foot and ankle.
- If the stretch is very intense at first, try holding for 5 seconds, then rest. Repeat 10x.
- If the stretch is only mild, then try a longer hold time anywhere from 30-60 seconds.
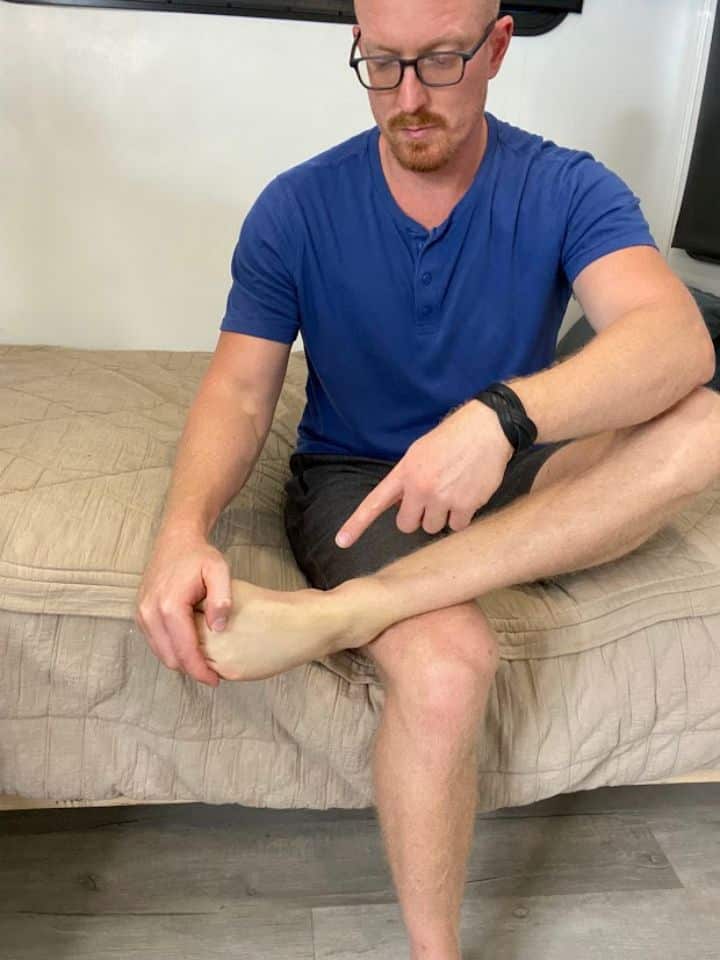
5. Isometric Ankle Inversion
- Place one hand on the top of the foot, positioned on the forefoot near the toes.
- Gently pull the foot and ankle into a plantar flexion stretch, then pull slightly inward to pull the foot towards you.
- If the stretch is very intense at first, try holding for 5 seconds, then rest. Repeat 10x.
- If the stretch is mild, try a longer hold time, anywhere from 30-60 seconds.
- Repeat this exercise two more times for a total of three repetitions.
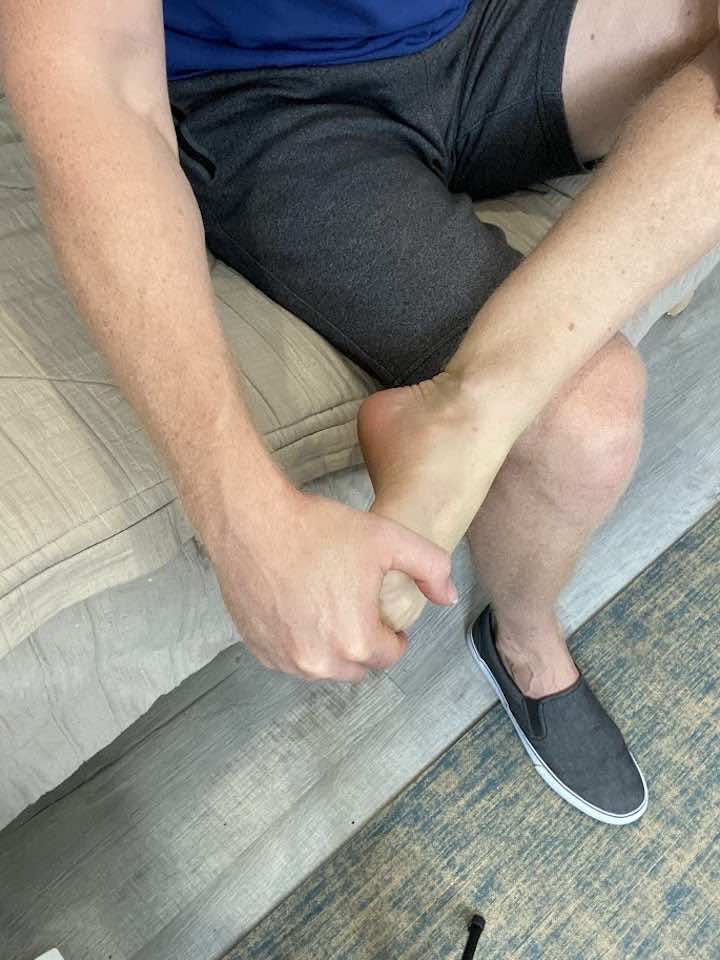
6. Isometric Ankle Eversion

- Place one hand on the bottom of the foot, over the ball of the foot.
- Gently pull the foot and ankle back into dorsiflexion, then pull slightly outward, so the foot moves away from you.
- If the stretch is very intense at first, try holding for 5 seconds, then rest. Repeat 10x.
- If the stretch is mild, try a longer hold time, anywhere from 30-60 seconds.
- Repeat this exercise two more times for a total of three repetitions.
Strengthening Exercises
After addressing the initial pain and embracing rest, the next phase involves strengthening exercises. This stage is essential for rebuilding the strength and stability of your foot, which may have been compromised due to the stress fracture.
1. Marble Pick-Ups
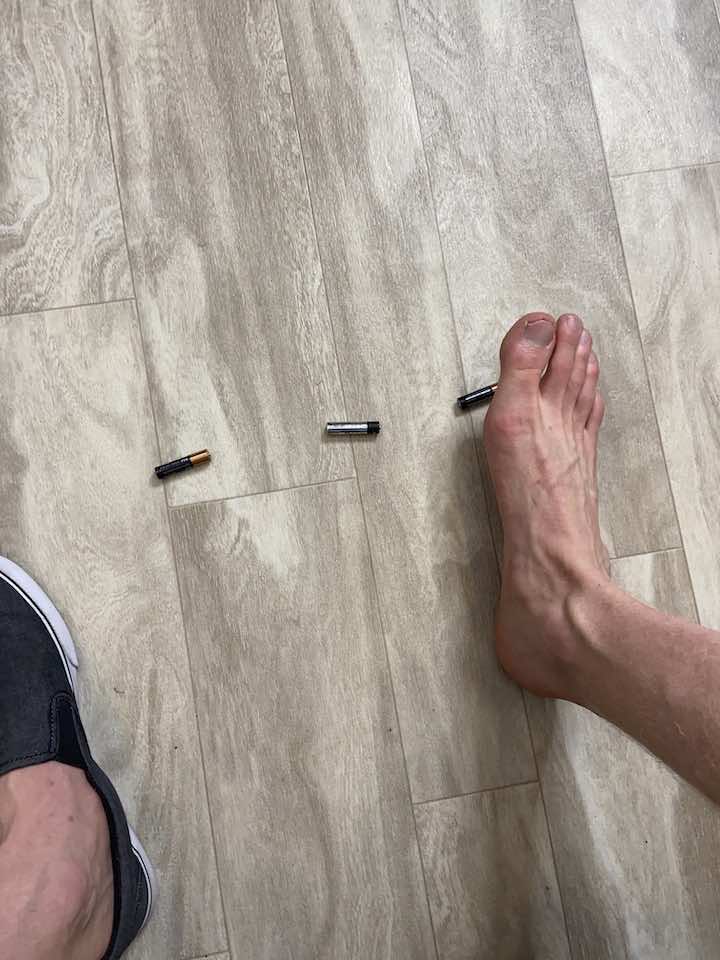
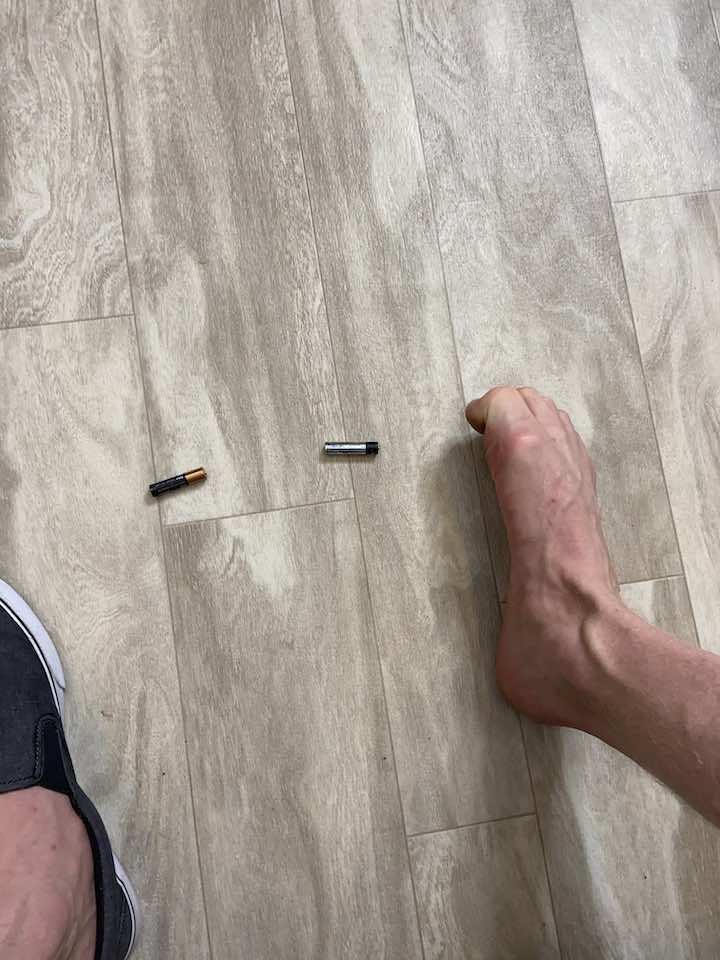
- Get 10-20 marbles and place them on the floor with a cup next to your pile of marbles.
- Stand up and hold onto a steady surface like a counter to help with balance.
- Then in standing, grab a marble with your toes and lift it into the cup. Picking up marbles can be challenging, but the great thing is that even just trying to pick up the marble will strengthen your foot!
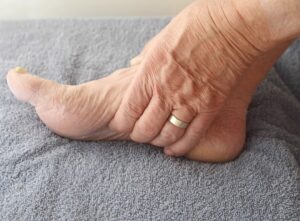
2. Arch Doming
- Starting position: Seated in a chair with the fleet flat on the floor. Shoes should be removed.
- You can practice with both feet at the same time or one foot at a time.
- Squeeze the bottom of the foot and lift the inner arch off the floor, without moving any other part of the foot.
- Hold this lift for 2 seconds, then slowly allow the arches to relax back down to the floor.
- Repeat 10 repetitions for 3 sets.
Advanced Rehabilitation Exercises
Once you’ve established a foundation of strength, advanced rehabilitation exercises come into play. This phase is about pushing the boundaries of recovery, focusing on exercises that challenge your foot to regain full functionality and mobility. These exercises are more dynamic and demanding, aiming to restore your foot’s ability to handle various stresses and movements.

It’s a phase that brings you closer to your normal activity levels, including returning to more demanding physical tasks or sports. During this advanced stage, continue to listen to your body and work in tandem with a healthcare provider or physical therapist to ensure that your progression is on track and within safe limits.
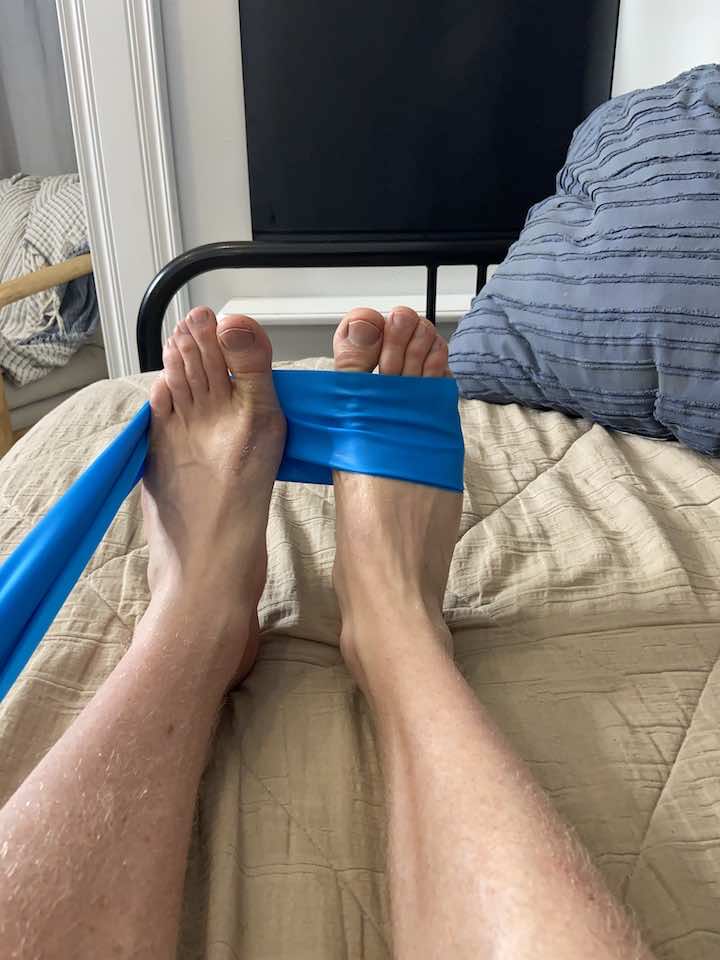
1. Ankle Eversion with Resistance Band
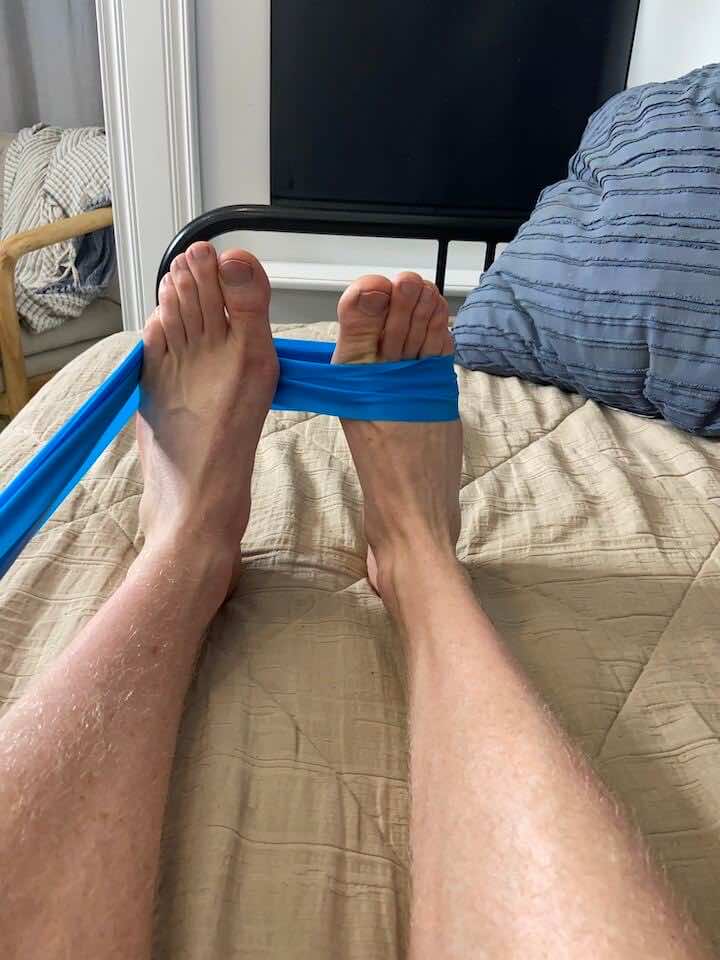
- Lay down on your bed with your ankle off the end.
- Loop the band around your right foot and around your left, as seen in the graphic. We’re going to use your left foot as an anchor for your right foot as your exercise.
- Bring your right foot out like you’re angling your ankle away from your left foot, squeeze in, then relax.
- Do this for 10 repetitions and complete 3 sets in total.
Tip: Work on just moving your ankle and not your entire leg when performing this exercise! See if your knee rolls out at all; try to keep it still.
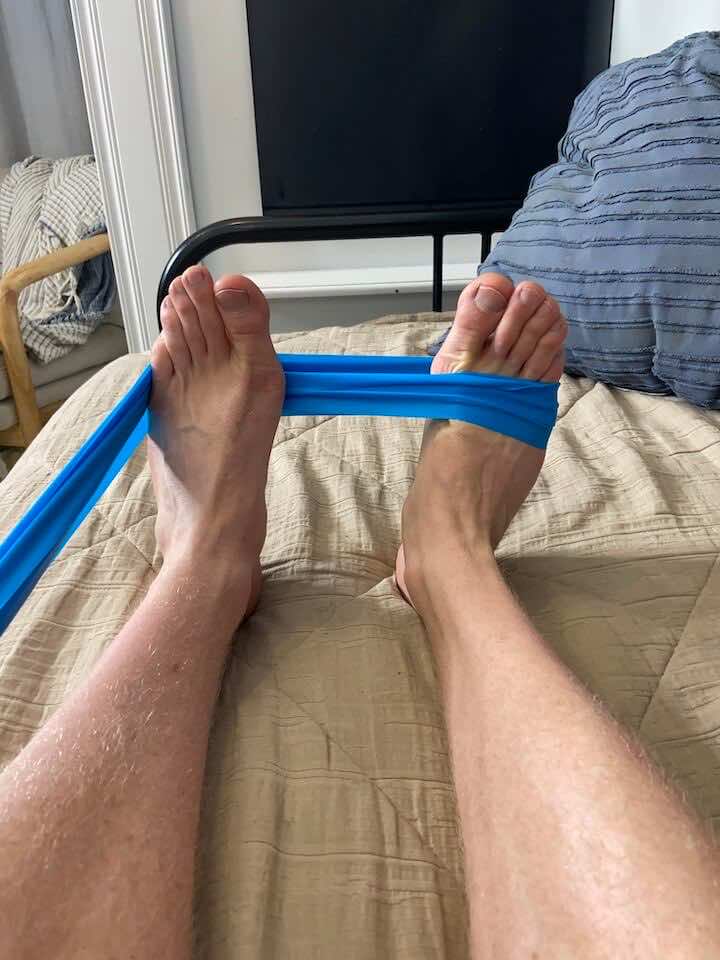
2. Ankle Inversion with Resistance Band
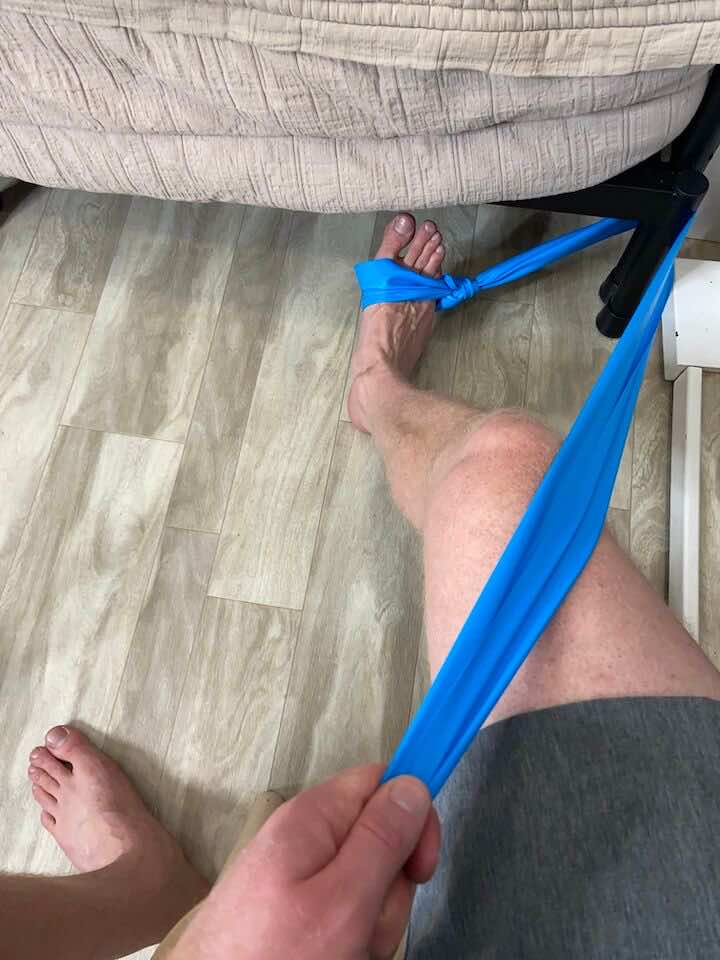
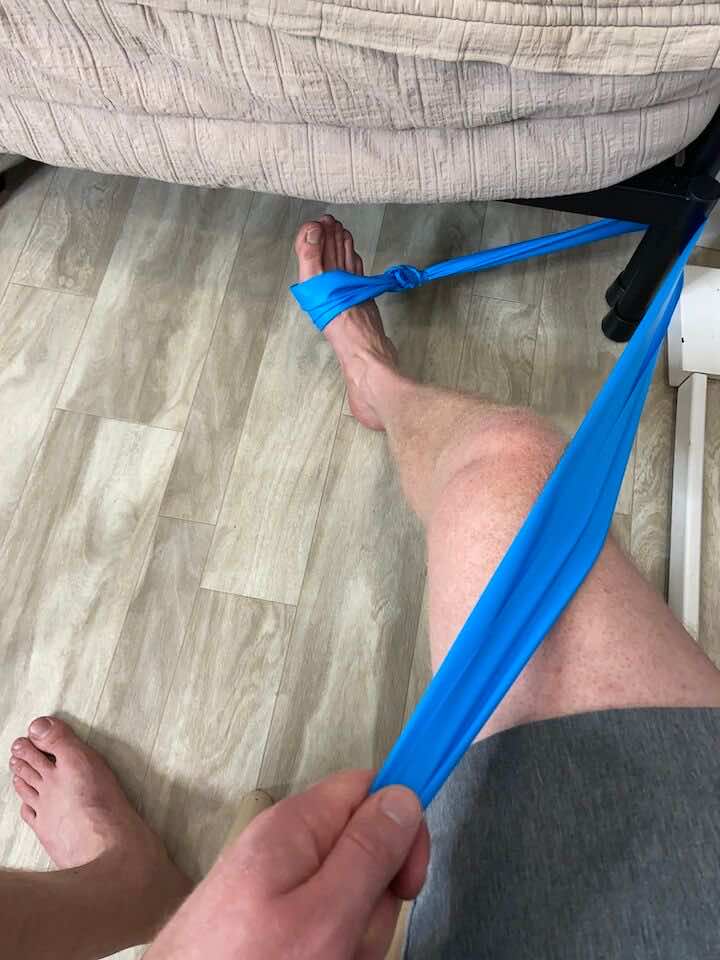
- Sit near a heavy table or sturdy chair that won’t move easily.
- Bring your foot in like you’re angling your ankle toward your other foot, squeeze in, then relax. Loop the resistance band over your foot and around the table or chair leg, as shown in the graphic above.
- Repeat this movement for 10 reps, and do a total of 3 sets.
Tip: Work on just moving your ankle and not your entire leg when performing this exercise! See if your knee rolls out at all, try to keep it still.
3. Ankle Dorsiflexion with Resistance Band
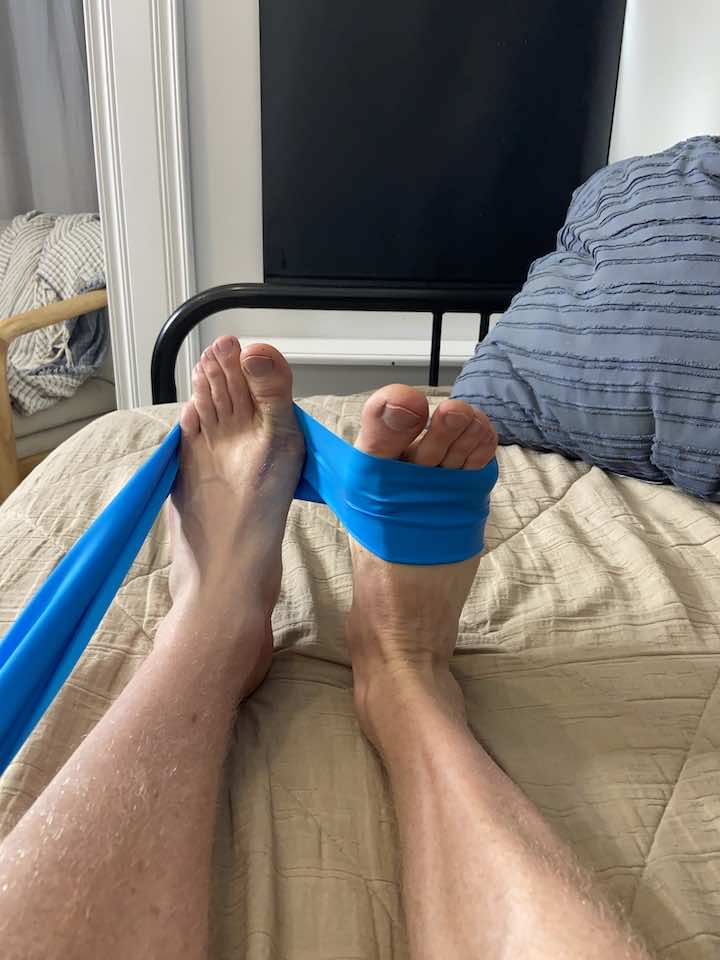
- Lay down on your bed with your ankle off the end.
- Loop the band around your right foot and loop the band around your left foot.
- Point your left foot and hold that position.
- Draw your right foot up like you’re trying to bring your toes to your nose, then relax. Finish the set, then repeat with your left foot.
- Repeat 10 repetitions for 3 sets.
4. Ankle Plantar Flexion with a Resistance Band
- Lay down on your bed with your ankle off the end.
- Loop the band around your right foot and hold onto the other end of the band with your hands.
- Point your toes and squeeze the back of your calf muscles, then relax. Finish the set, then repeat with your left foot.
- Repeat 10 repetitions for 3 sets.
5. Single Leg Balance
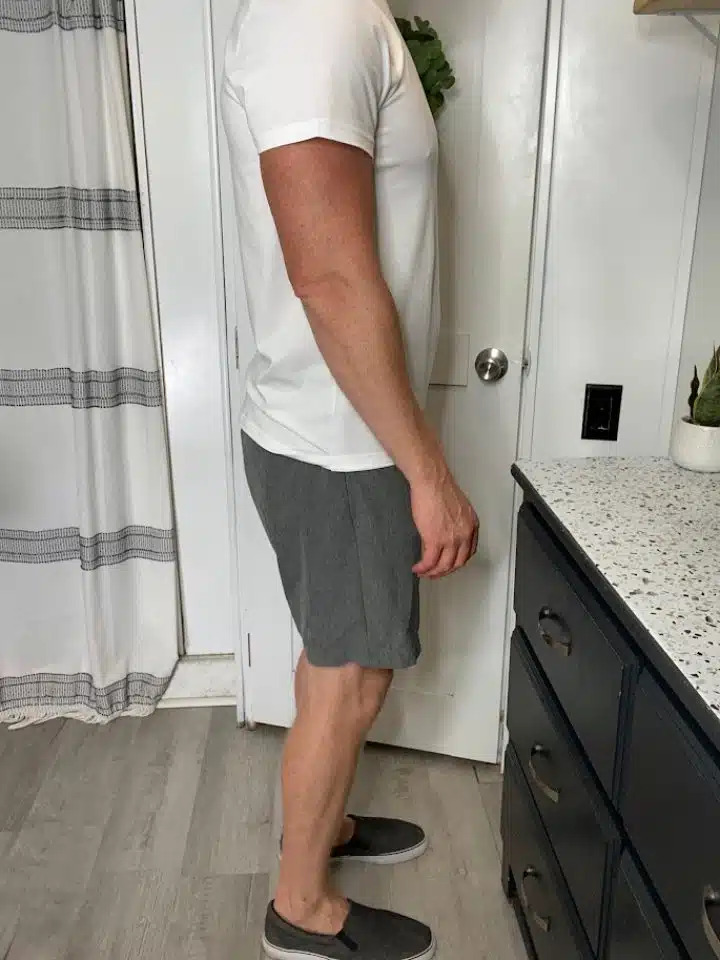
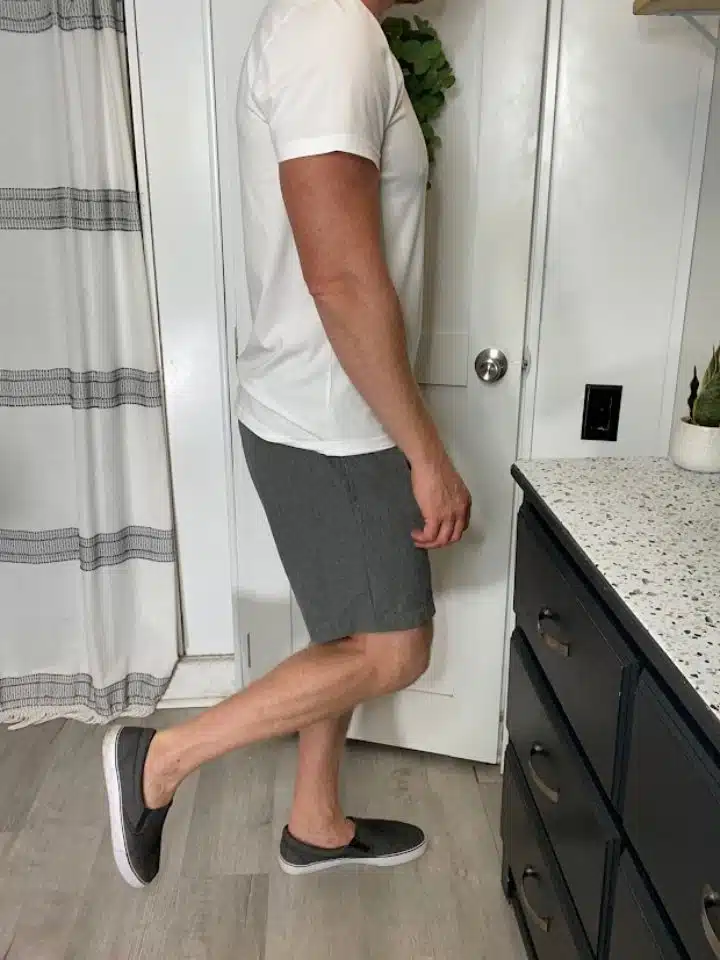
- Starting position: Standing in front of a sturdy surface, such as your countertop.
- Shift all of your weight onto the injured leg (avoid locking into the knee joint), picking the opposite foot up off the floor.
- Practice balancing for 30 seconds (you can use the counter for balance assist as needed).
- Return to your starting position to take a break.
- Repeat 2 more times on both sides.
Conclusion: A Careful Balance in Recovery
Managing stress fractures in the foot involves a careful blend of rest, gentle stretching, and progressively challenging exercises. Adhering to medical advice and gradually increasing exercise intensity ensures safe and effective healing. Patience and consistency are key to overcoming the challenges posed by stress fractures and regaining full foot health and functionality.
Wondering What's Next?
Discover 11 Easy, At-Home “Stretch Exercises” for Stronger, Pain-Free Joints (click below)