Free download: Top 10 Natural & Easy Remedies for Joint Pain from Home. Learn these helpful remedies.
Estimated Reading Time: 7 minutes read
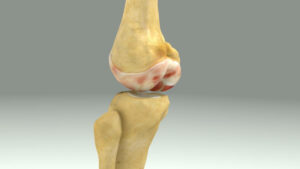
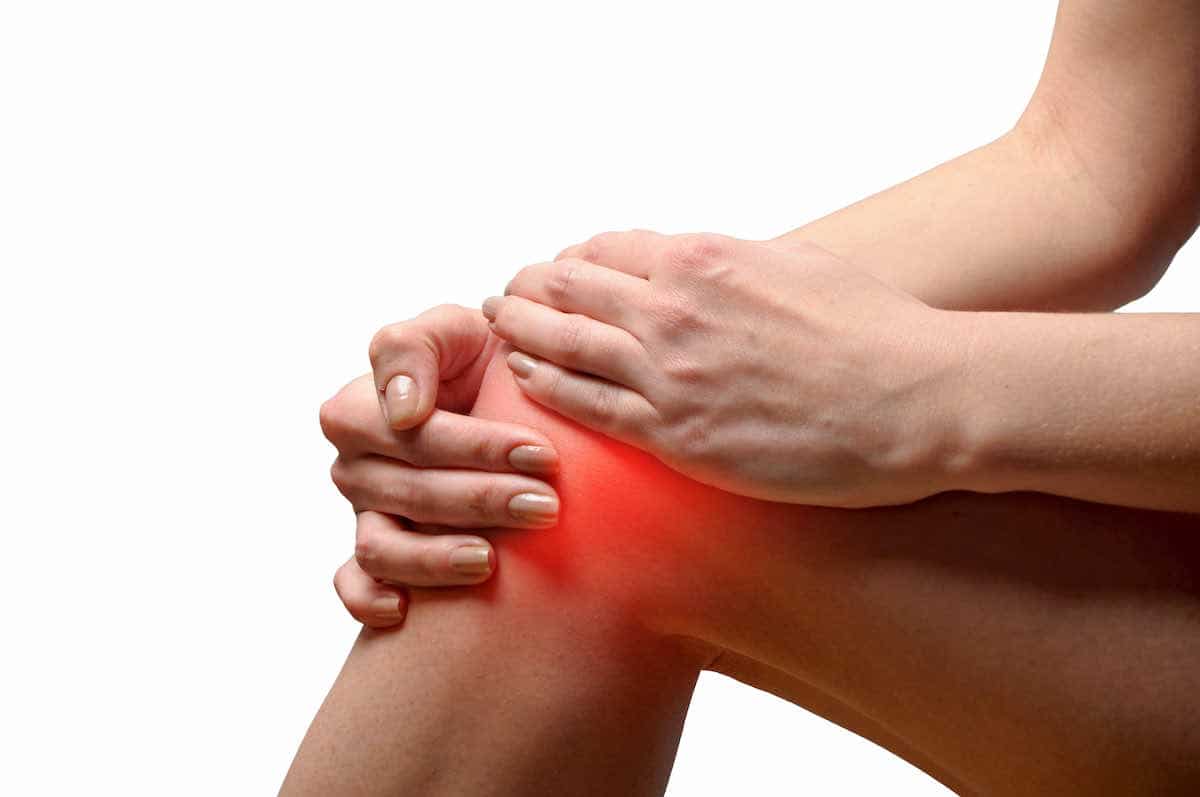
Oh, dear knees! Have they been aching lately, hindering your smooth moves on the dance floor or your strolls through the park? Well, worry no more because we’ve got your back (or should we say knees?). Today, we’re bringing you the ultimate guide to strengthening exercises and myofascial release techniques that will help alleviate knee pain and make you feel like you’re walking on clouds again.
So, are you ready to dive in and discover the secrets to happy, pain-free knees? Let’s get started on this journey to enhanced knee strength, mobility, and overall wellness!

Table of Contents
The Benefits of Myofascial Release Techniques in Knee Pain Conditions
Myofascial release techniques are a godsend for those of us experiencing knee pain. But the benefits don’t stop there! By focusing on the connective tissue surrounding our muscles, these techniques help to release tension and alleviate discomfort in the knee area.
These techniques can also improve your range of motion and flexibility, allowing you to move with greater ease and less discomfort. With regular practice, myofascial release can even help prevent future injuries, keeping you active and pain-free in the long run.
The most significant benefit of myofascial release techniques is their ability to address the root cause of knee pain. By targeting the tight and restricted tissues that contribute to discomfort, these techniques help to relieve pain at its source, allowing for lasting relief and improved function.
Tips for Exercising Correctly and Warming Up
Before you jump into these exercises and myofascial release techniques, it’s essential to ensure you’re doing them correctly and safely. Here are some tips to help you get started:
- Always begin your workout with a warm-up: Spend about 5-10 minutes doing light cardio exercises, like walking or marching in place, to get your blood flowing, and your muscles warmed up.
- Maintain proper form: Always focus on keeping your body in proper alignment during each exercise to prevent injuries.
- Breathe: Don’t hold your breath while exercising. Inhale during the relaxation phase and exhale during the exertion phase of each movement.
- Take it slow: Start with a lower intensity and gradually increase it as you become more comfortable with the exercises.
7 Best Strengthening Exercises for Knee Pain
Before we jump into our list of amazing strengthening exercises, let’s remember that these are designed to target specific knee muscles and help you regain strength and stability in your knees. By regularly practicing these exercises, you’ll be well on your way to enjoying pain-free movement and all the activities you love!
1. Seated Knee Extension
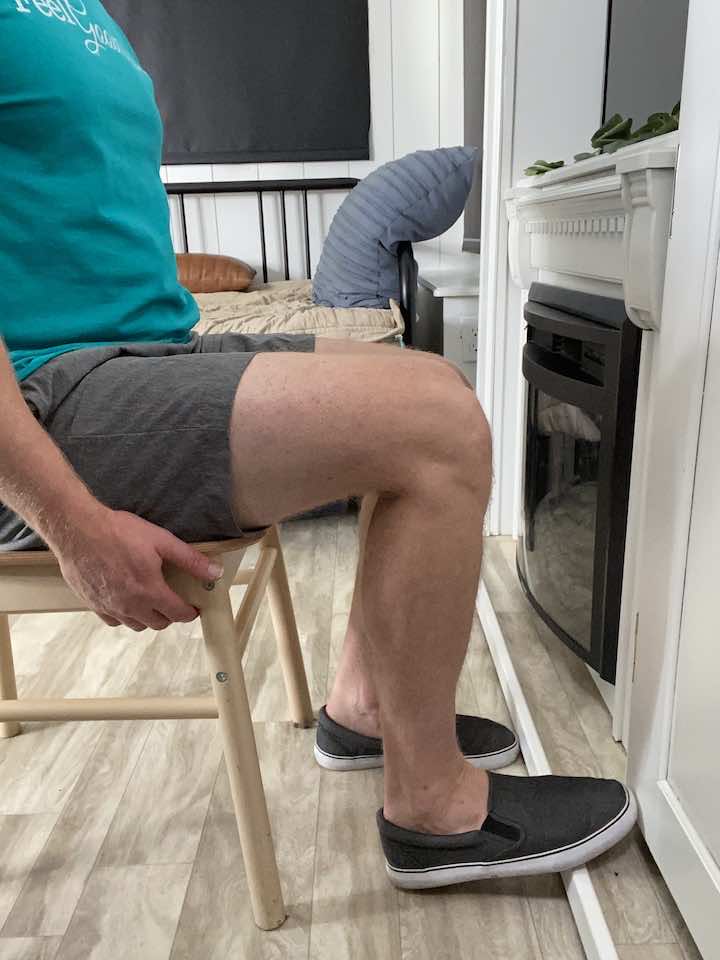
- Sit in a chair about a foot away from a wall, with your knees at a 90-degree angle and your spine in a neutral position.
- Press your toe into the wall to tense your thigh muscle.
- Push with about 70-80% of your maximal exertion for 10 seconds.
- Release the tension and rest for a few seconds.
- Repeat this exercise for a total of 3 times per knee.
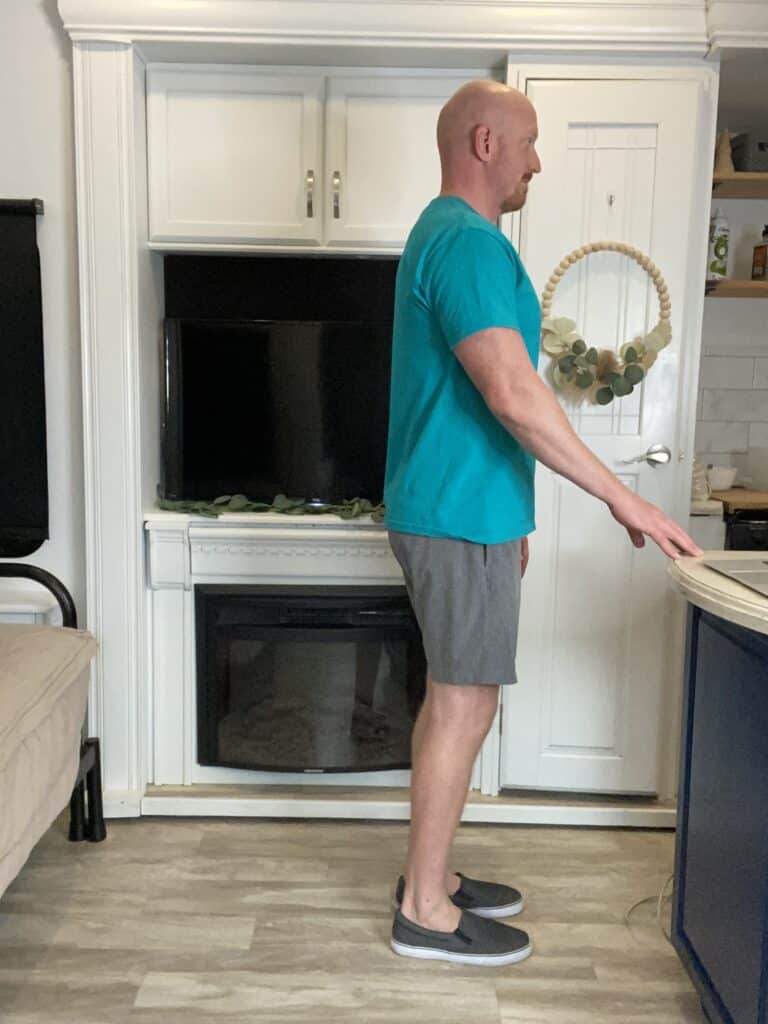
2. Standing Hip Lifts


- Stand tall with one hand placed on a bed or chair for support.
- Balance on your left leg, keeping a slight bend in your knee to avoid locking it out.
- Lead with your heel and lift your right leg out to the side, keeping your foot flexed.
- Be sure not to lean to the left while lifting your leg.
- Lower your leg back down to the starting position.
- Repeat this movement 10 times on each leg.
- Do a total of 3 sets of this exercise.
3. Standing Hip Extension
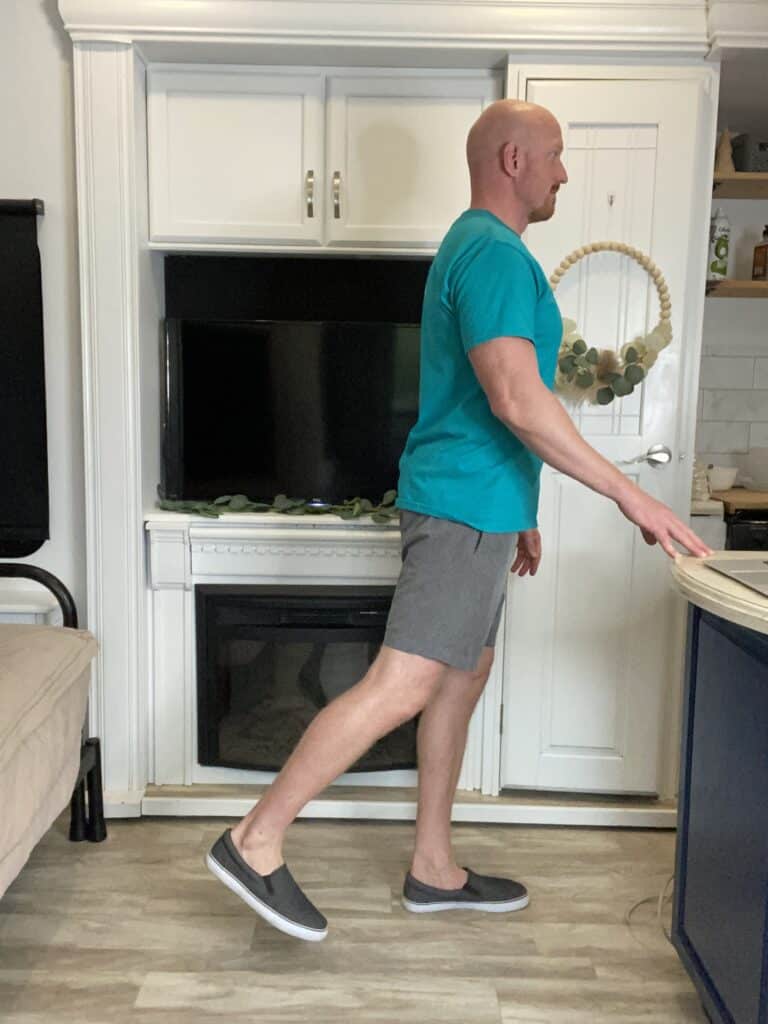
- Stand tall with your hands placed on a steady surface, such as a counter, sink, or chair (without wheels), to hold onto for balance.
- Shift your weight onto your left leg, keeping a slight bend in your left knee to avoid locking it out.
- Keeping your toes pointed forward and your right leg straight, lift your right leg back a few inches.
- Lower your leg back down to the starting position.
- Repeat this movement for 10 repetitions on each leg.
- Do a total of 3 sets of this exercise.
4. Standing Hamstring Curls
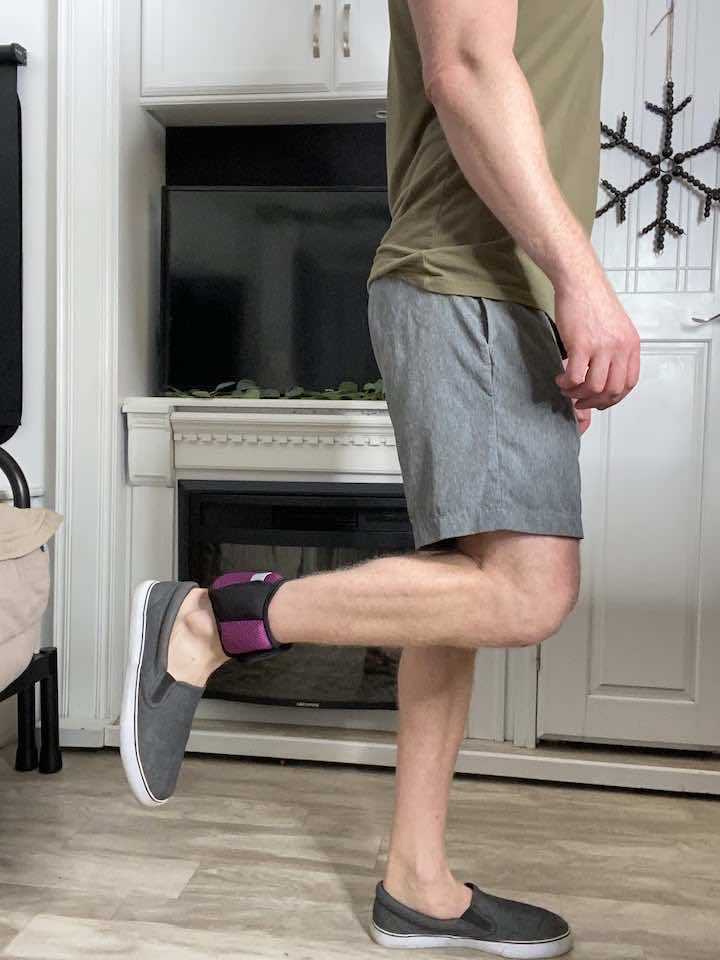
- Use 2-3 lb. ankle weights or tie a resistance band around your ankles.
- Stand in front of a sturdy surface, such as a countertop, for support.
- Bend one knee, allowing your foot to kick up towards your bottom.
- Return to the starting position.
- Repeat this movement 10-15 times for 2-3 sets.
- Practice this exercise on both legs.
5. Calf Raises
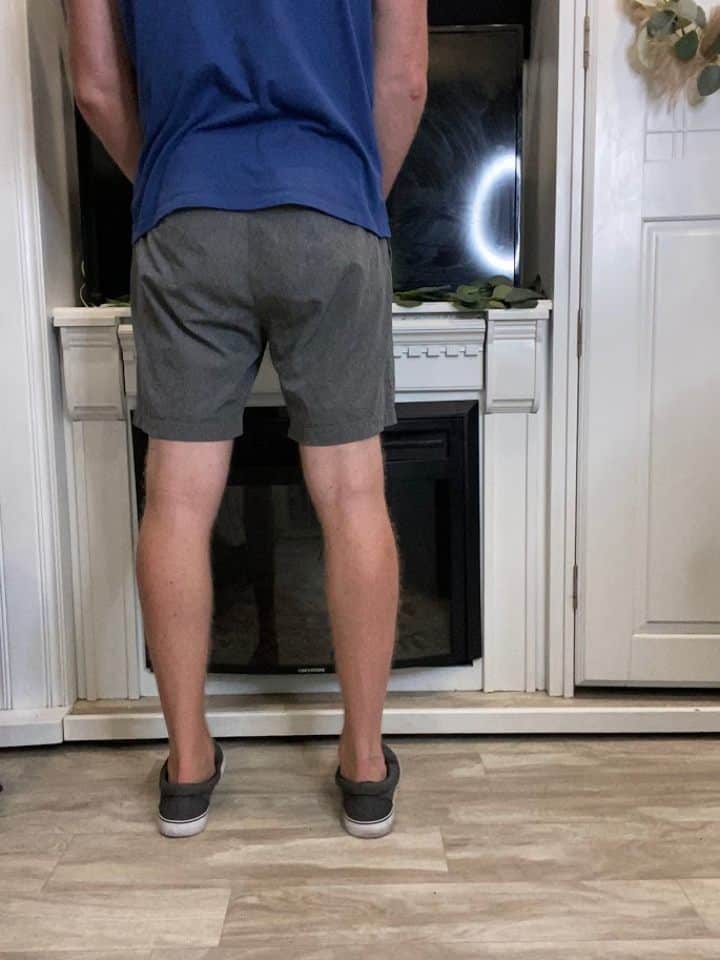
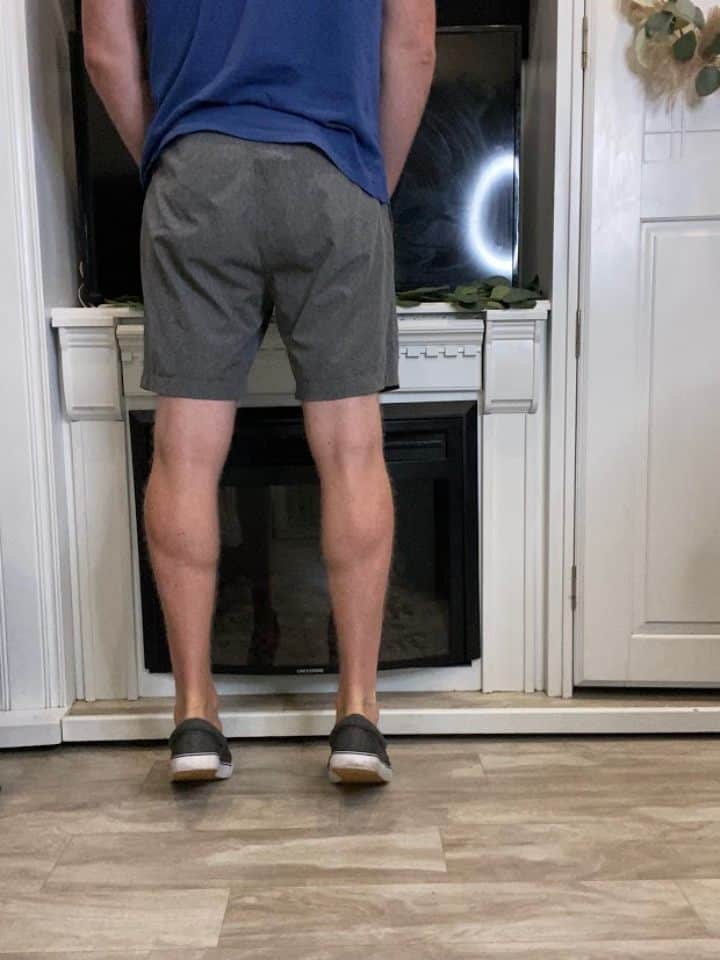
- Stand facing a wall or sturdy surface for balance.
- Place your feet hip-width apart.
- Slowly lift your heels as high as you can and then lower them back down.
- Repeat for 10 repetitions for 3 sets.
6. Lunges

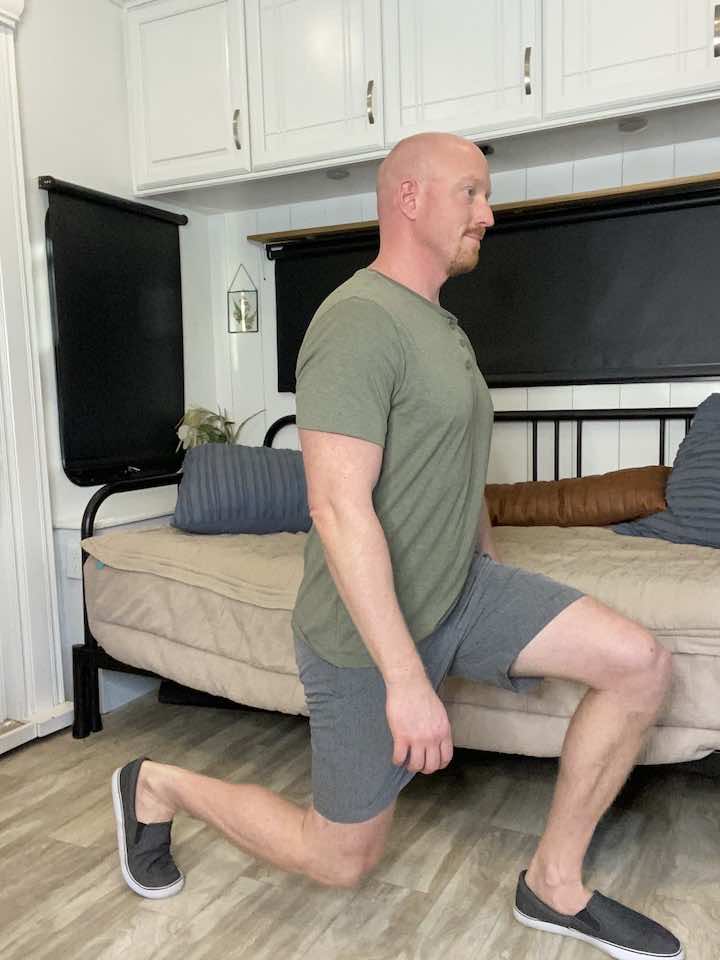
- First, stand with your feet hip-width apart and your arms at your sides.
- Step forward with one leg, dropping your back knee towards the floor as you bend both legs.
- Make sure to keep your front knee in line with your ankle and your weight in your heel.
- Make sure to keep your core and glutes tight.
- Push off your front heel to return to the starting position.
7. Squats

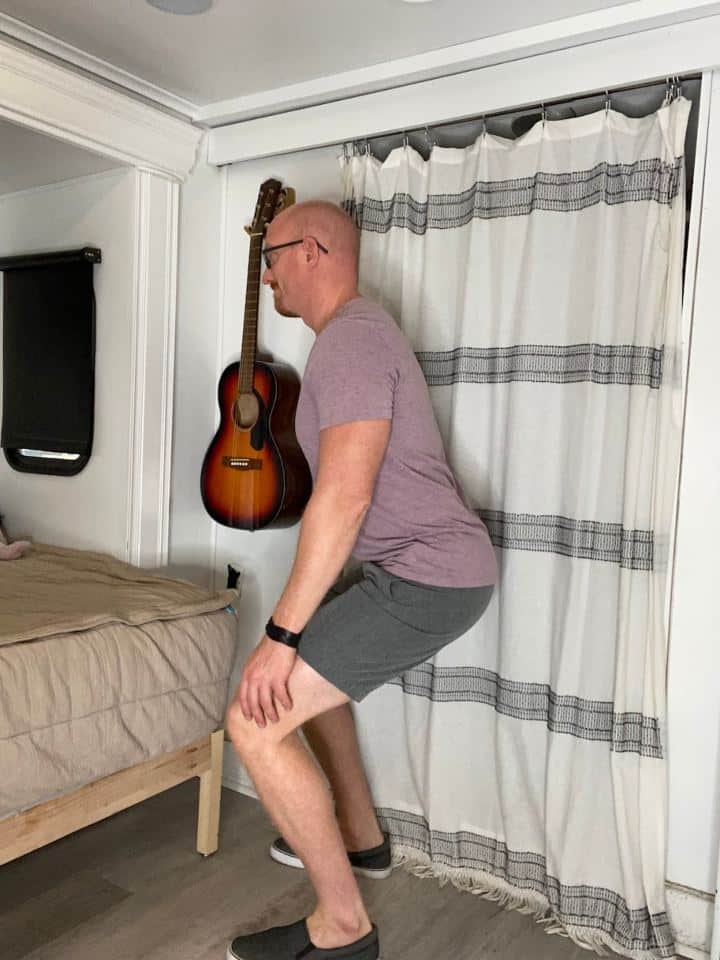
- Position the feet about hip-width apart for a proper squat, with the toes pointing forward.
- Slowly sit the hips back towards the heels as the knees bend. Your torso should hinge forward to counterbalance your hips, sitting back towards the heels.
- Bend the knees as far as you’re comfortable, hold for 2 seconds, then return to your starting position.
- Repeat 10-15x for 2-3 sets.
Best 3 Myofascial Release Techniques for Knee Pain
Now, let’s talk about myofascial release techniques. These methods focus on releasing tension in the muscles surrounding the knee joint, which can contribute significantly to knee pain. By incorporating these techniques into your routine alongside the strengthening exercises, you’ll be giving your knees the ultimate care package to keep them in tip-top shape.
1. Quad Stretch

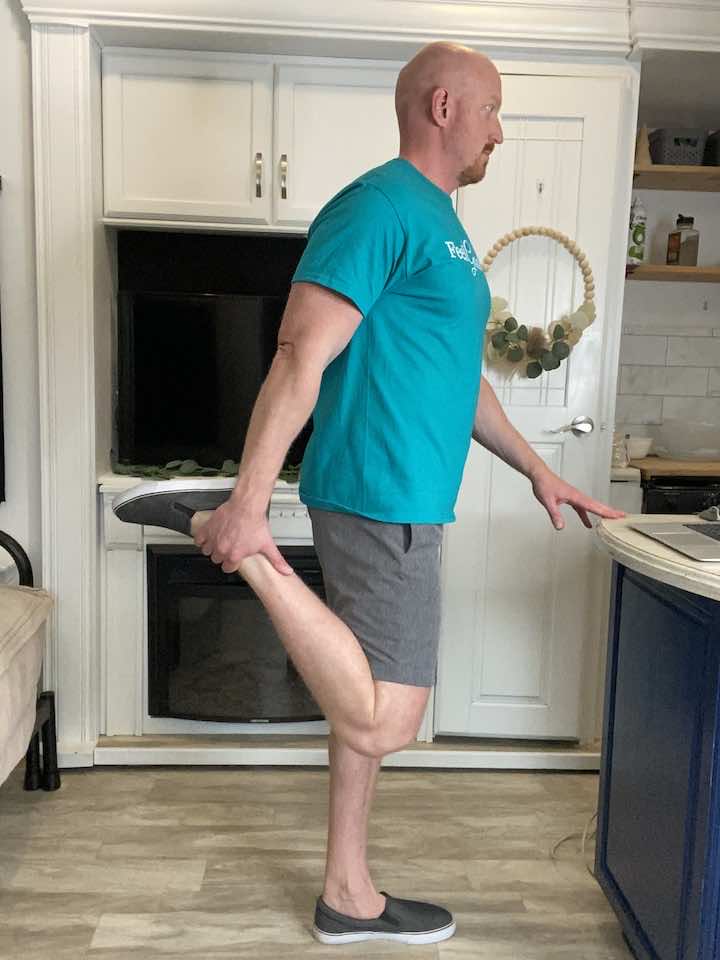
- Stand tall with your hands placed on a steady surface. You can use a counter, sink, or chair (no chairs with wheels) to hold on to for balance.
- Bend your knee and hold onto the top of your foot.
- Hold for 30 seconds, focusing on keeping your knees lined up.
- Repeat 2 more times.
2. Seated Hamstring Stretch
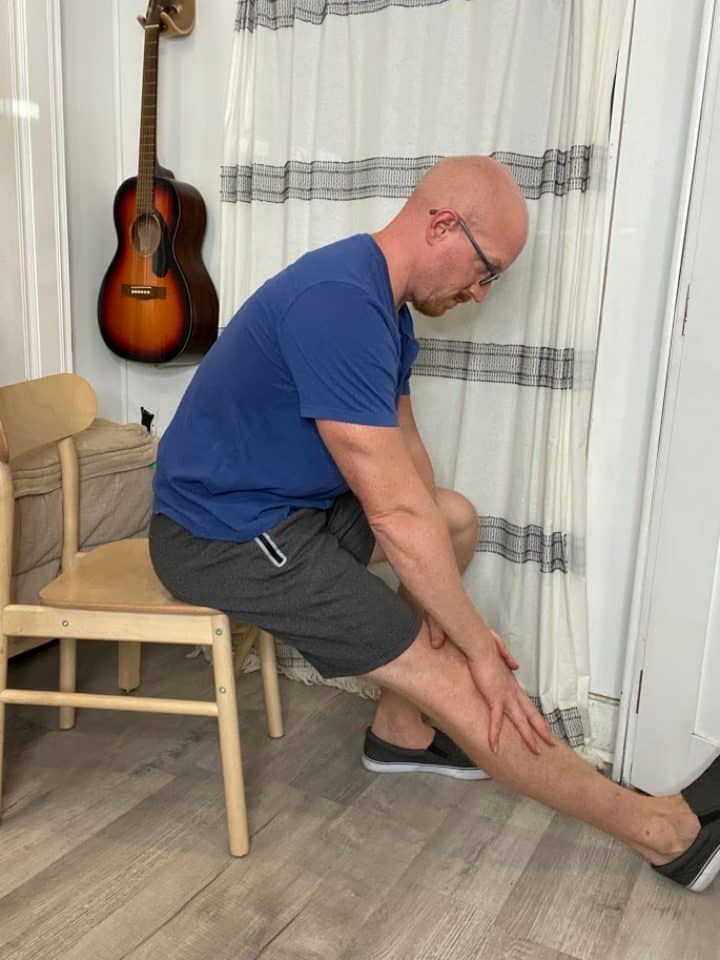
- Seated in a chair, place the leg to be stretched and extended in front of you (the knee should be straight).
- Keeping a straight back, bend forward via hinging at the hips.
- Once you feel a tolerable stretch behind the back of the leg, hold for at least 30 seconds.
- Repeat for 3 sets in total.
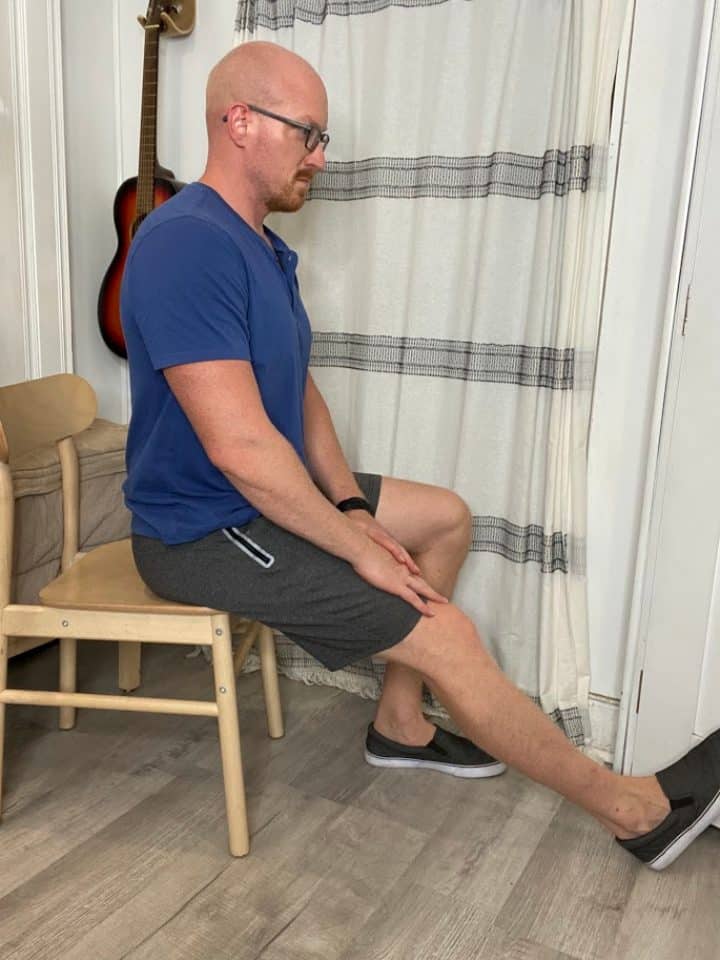
3. Patella Shaking Technique
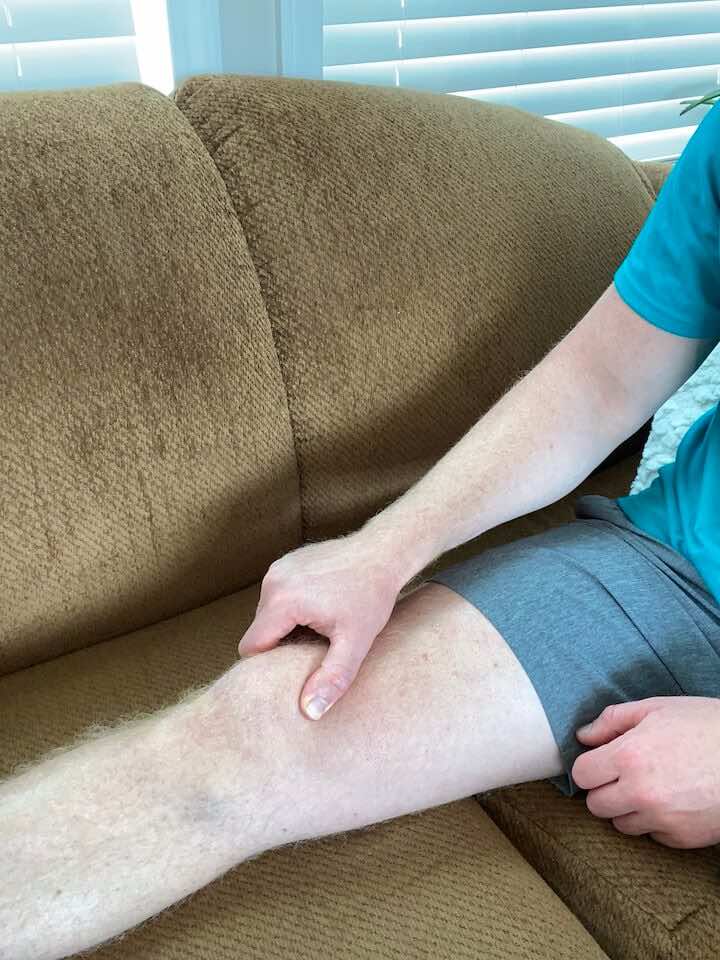

- Sit in a chair with a neutral spine and place your foot on a stool or bed.
- Make sure your leg is straight, and your toe is pointed toward the ceiling.
- Take the edges of your hands and cup them around the edges of the kneecap, and begin to rub vigorously, almost like a massage. You should feel the kneecap move back and forth.
- Go as fast as you can for 10 seconds.
- Next, use one hand (whichever is more comfortable) to shake your patella up and down for 10 seconds.
- Finally, use one hand again, this time shaking your patella side-to-side for 10 seconds.
- If you’re unable to straighten your knee all the way, begin with your knee as straight as you can comfortably stand, and try to straighten it gradually.
- Small, pulsing movements will help develop some flexibility and mobility.
Conclusion
Incorporating strengthening exercises and myofascial release techniques into your routine can make a world of difference when it comes to knee pain.
By regularly practicing these exercises and techniques, you’ll not only alleviate existing knee pain but also help prevent future discomfort and injuries. Remember, consistency is key! Making these exercises and techniques a regular part of your routine will yield the best results.
Wondering What's Next?
Discover 11 Easy, At-Home “Stretch Exercises” for Stronger, Pain-Free Joints (click below)