Free download: Top 10 Natural & Easy Remedies for Joint Pain from Home. Learn these helpful remedies.
Estimated Reading Time: 6 minutes read
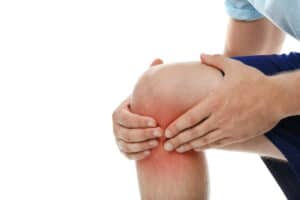
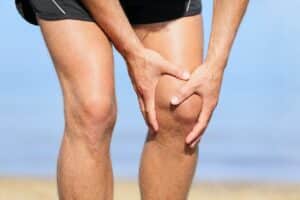
Dealing with rheumatoid arthritis (RA) in the knees can be tough. The constant pain and stiffness might make you feel helpless sometimes. But don’t lose heart! You can do a lot to manage your symptoms and enjoy life despite RA.
One of the most helpful ways to control RA, especially in the knees, is through specific exercises. You might think, “Why should I exercise when moving around hurts?” Well, the right kind of exercise can actually help reduce your pain and make you feel better overall.
Table of Contents
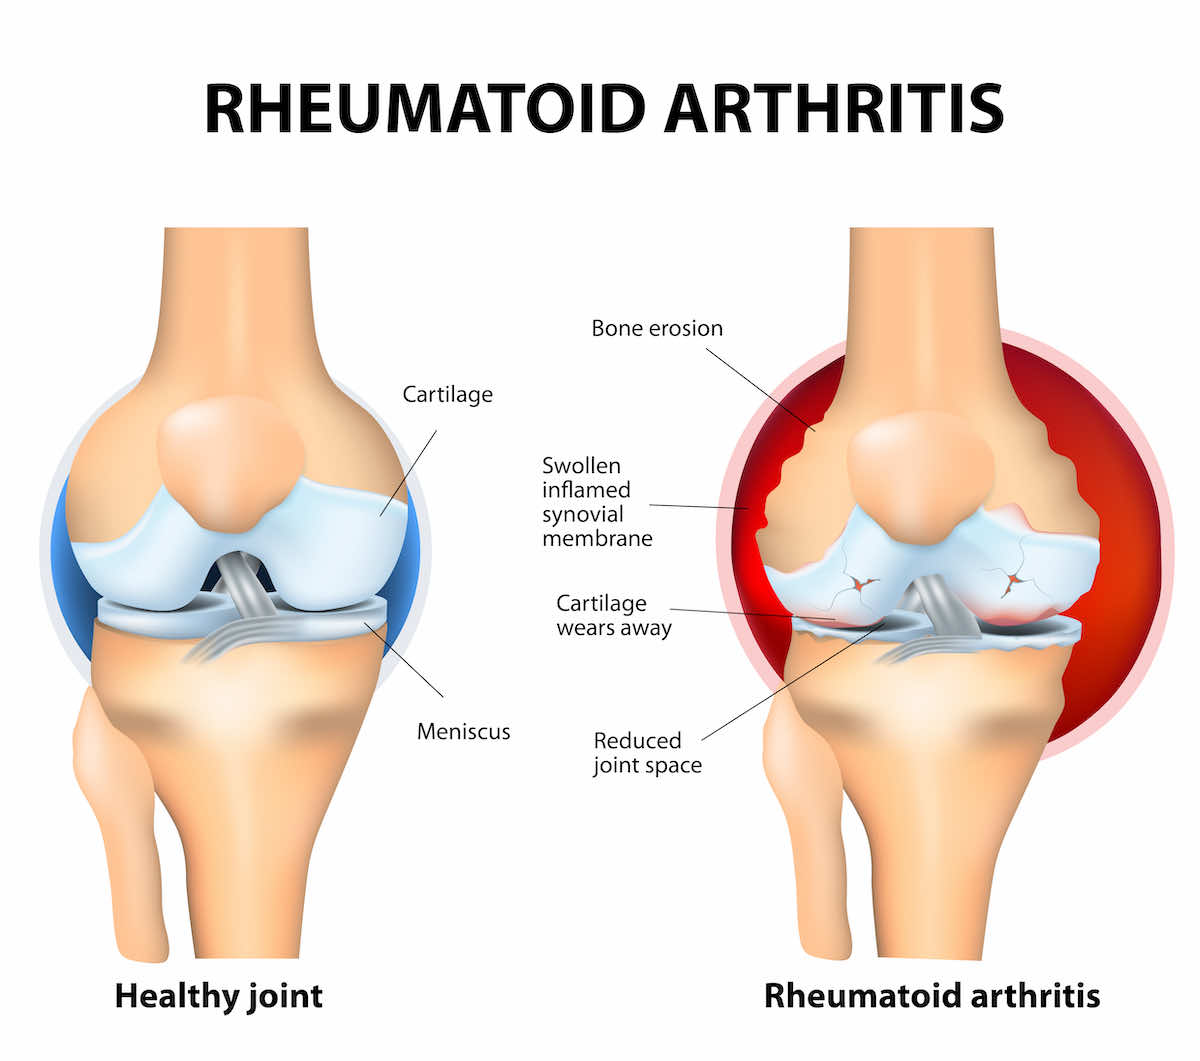
Understanding Rheumatoid Arthritis in the Knees
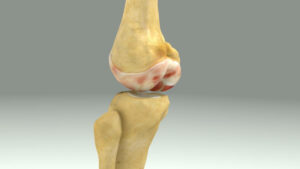
Rheumatoid arthritis is a condition where your body’s defense system, which usually keeps you safe from diseases, starts attacking your own tissues. In RA, this defense system targets your joint linings, which causes swelling and pain. While RA can affect any joint, it often troubles the knees, making moving around a challenge.
Here are some common signs of RA in the knees:
- Ongoing pain and stiffness in the knee
- Swelling and warmth around the knee joint
- Not being able to move your knee freely
- Trouble walking or doing regular tasks
Knowing these symptoms is the first step in managing RA effectively. Now, let’s move on to the most important part of managing RA in the knees – exercises.
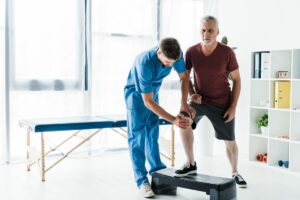
The Exercises
These exercises are created especially for people with knee RA. They can help you manage your pain and make moving around easier:
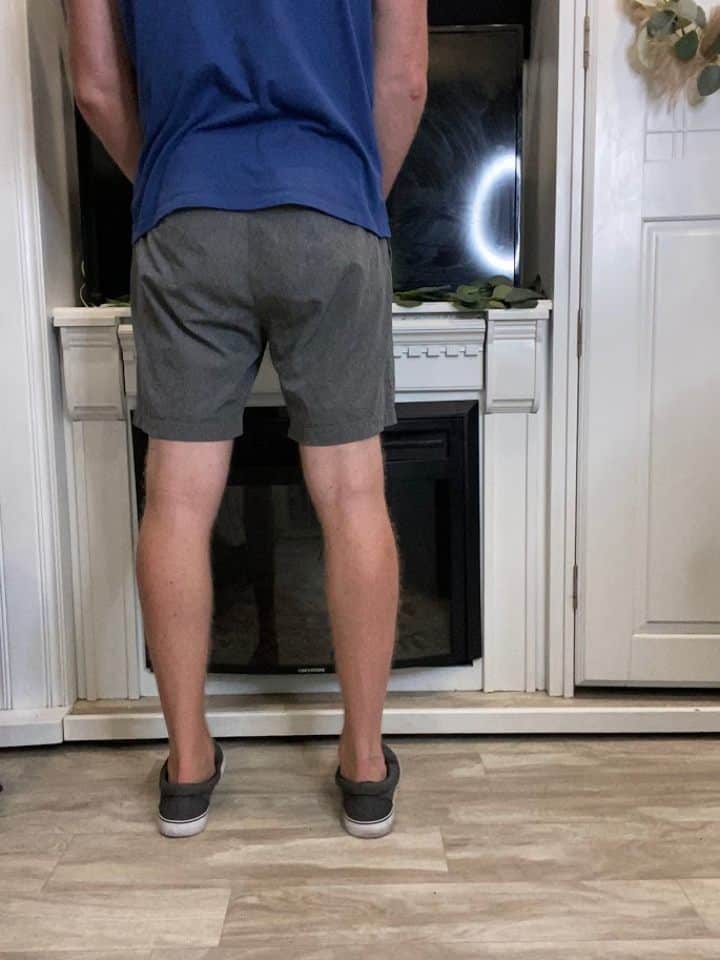
1. Seated Knee Extension
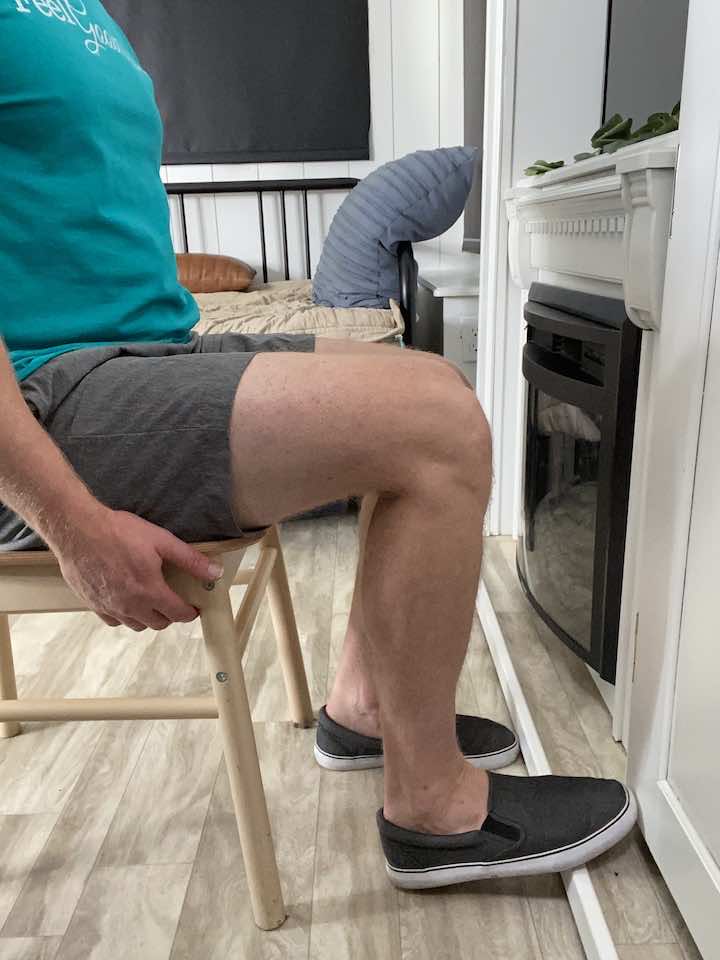
- Sit in a chair about a foot away from a wall, with your knees at a 90-degree angle and your spine in a neutral position.
- Press your toe into the wall to tense your thigh muscle.
- Push with about 70-80% of your maximal exertion for 10 seconds.
- Release the tension and rest for a few seconds.
- Repeat this exercise for a total of 3 times per knee.
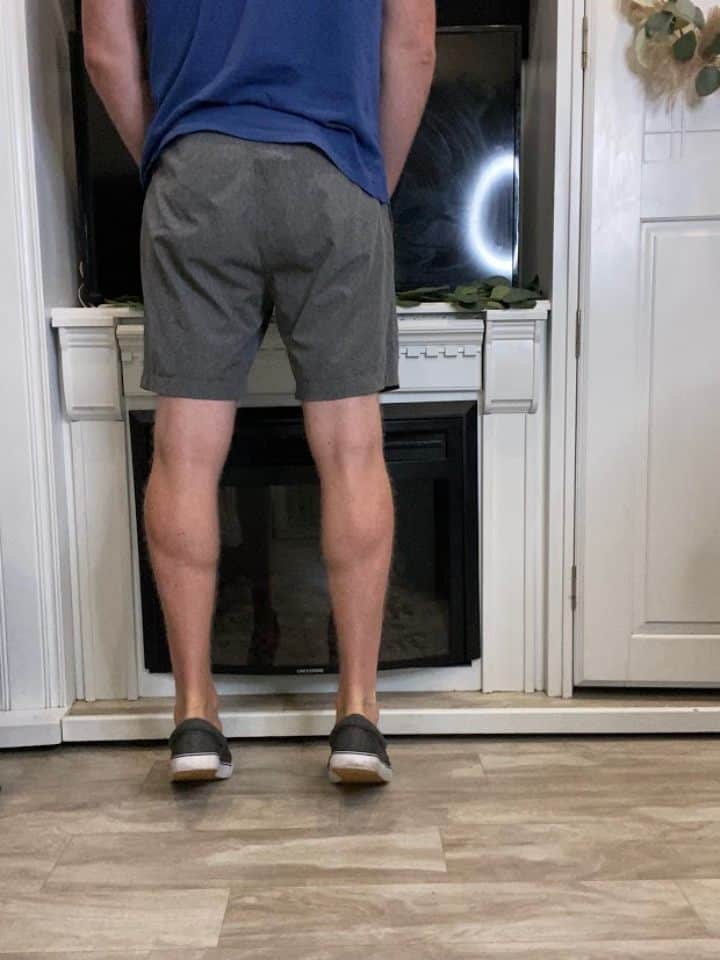
2. Standing Hip Lifts
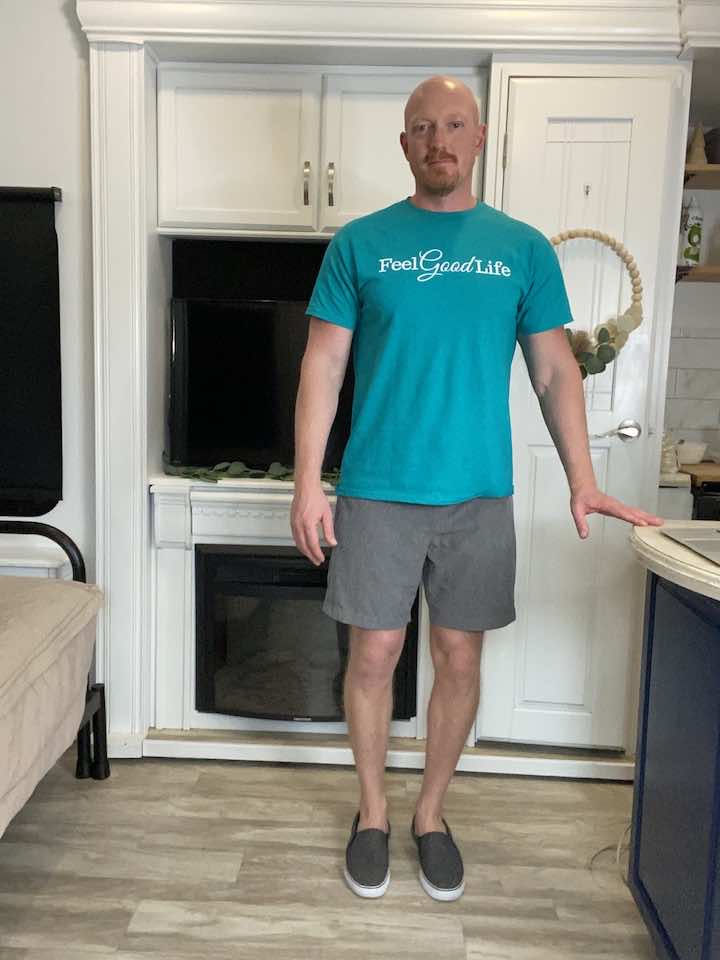
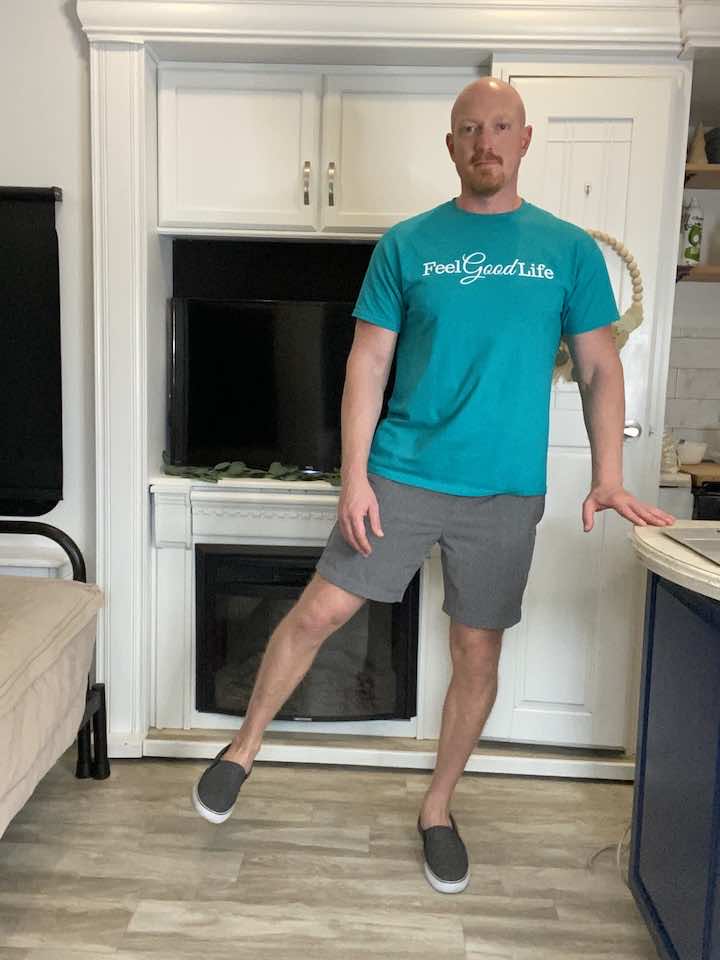
- Stand tall with one hand placed on a bed or chair for support.
- Balance on your left leg, keeping a slight bend in your knee to avoid locking it out.
- Lead with your heel and lift your right leg out to the side, keeping your foot flexed.
- Be sure not to lean to the left while lifting your leg.
- Lower your leg back down to the starting position.
- Repeat this movement 10 times on each leg.
- Do a total of 3 sets of this exercise.
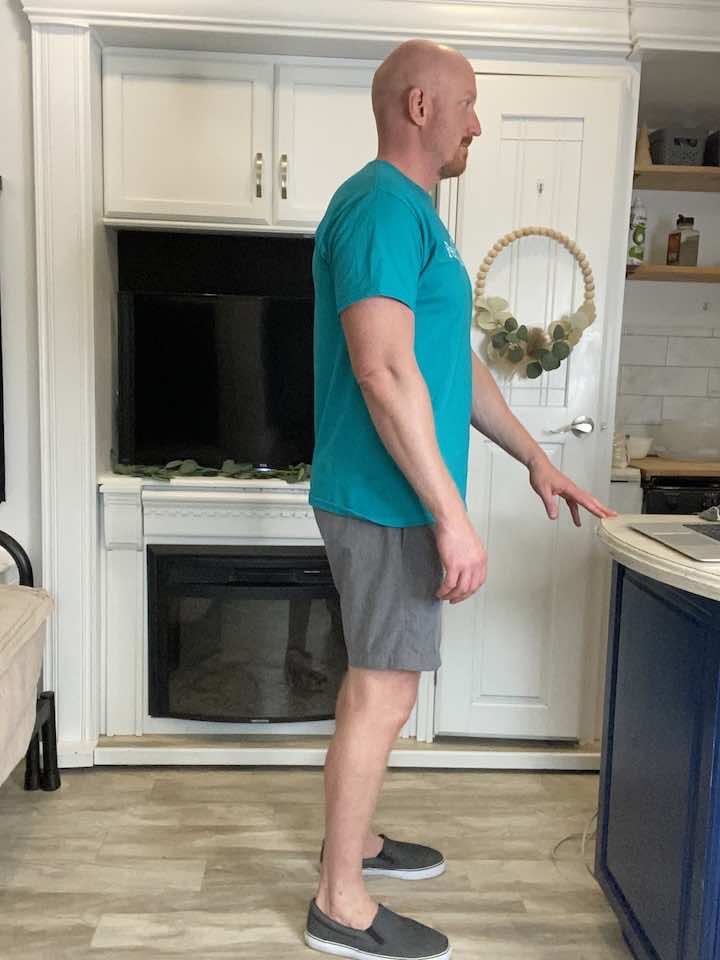
3. Standing Hip Extension
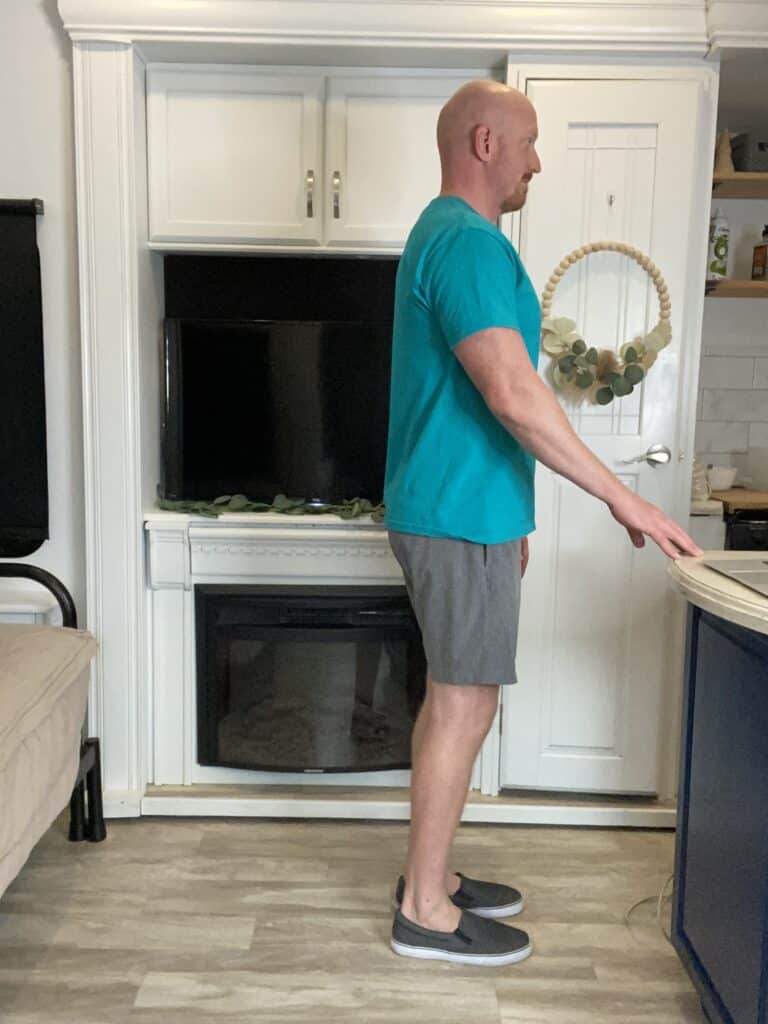
- Stand tall with your hands placed on a steady surface, such as a counter, sink, or chair (without wheels), to hold onto for balance.
- Shift your weight onto your left leg, keeping a slight bend in your left knee to avoid locking it out.
- Keeping your toes pointed forward and your right leg straight, lift your right leg back a few inches.
- Lower your leg back down to the starting position.
- Repeat this movement for 10 repetitions on each leg.
- Do a total of 3 sets of this exercise.
4. Standing Hamstring Curls
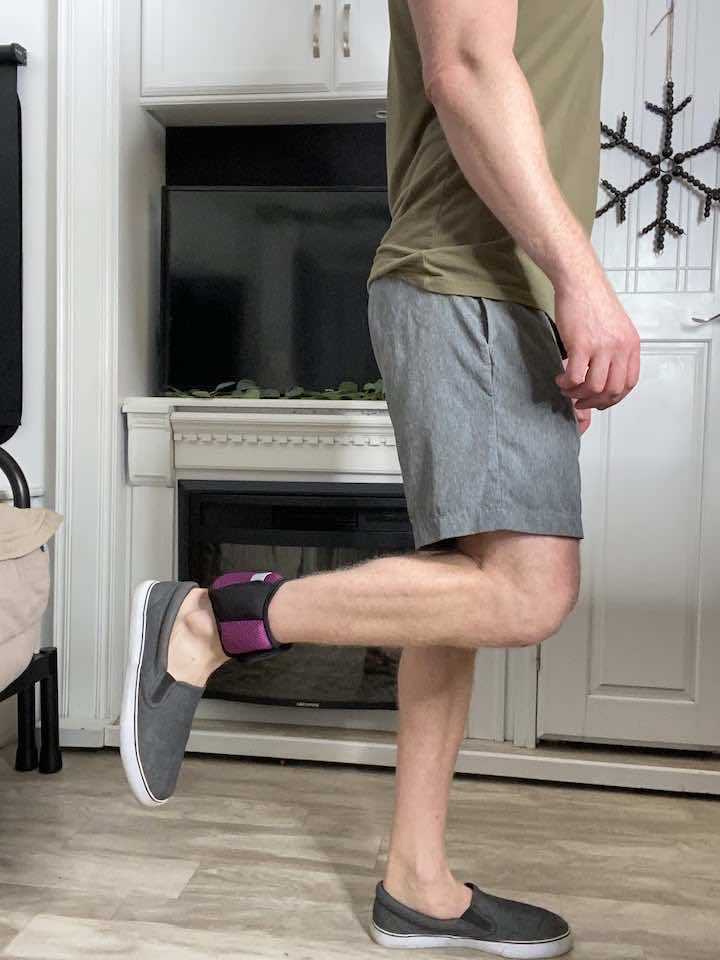
- Use 2-3 lb. ankle weights or tie a resistance band around your ankles.
- Stand in front of a sturdy surface, such as a countertop, for support.
- Bend one knee, allowing your foot to kick up towards your bottom.
- Return to the starting position.
- Repeat this movement 10 times for 3 sets.
- Practice this exercise on both legs.
5. Calf Raises
- Stand facing a wall or sturdy surface for balance.
- Place your feet hip-width apart.
- Slowly lift your heels as high as you can and then lower them back down.
- Repeat for 10 repetitions for 3 sets.
6. Hamstring Stretch
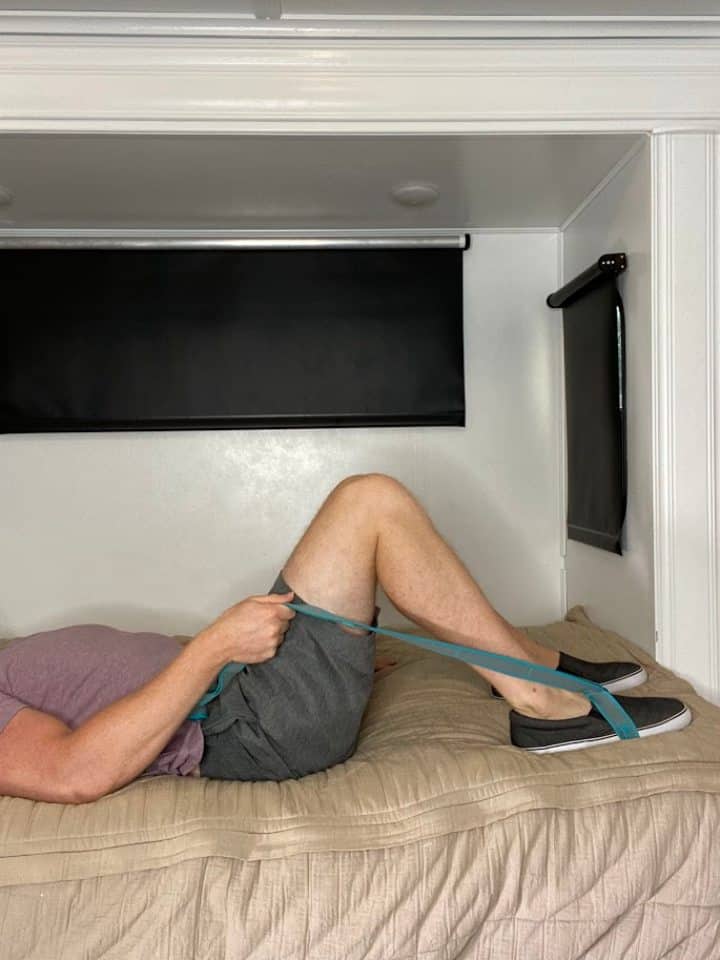
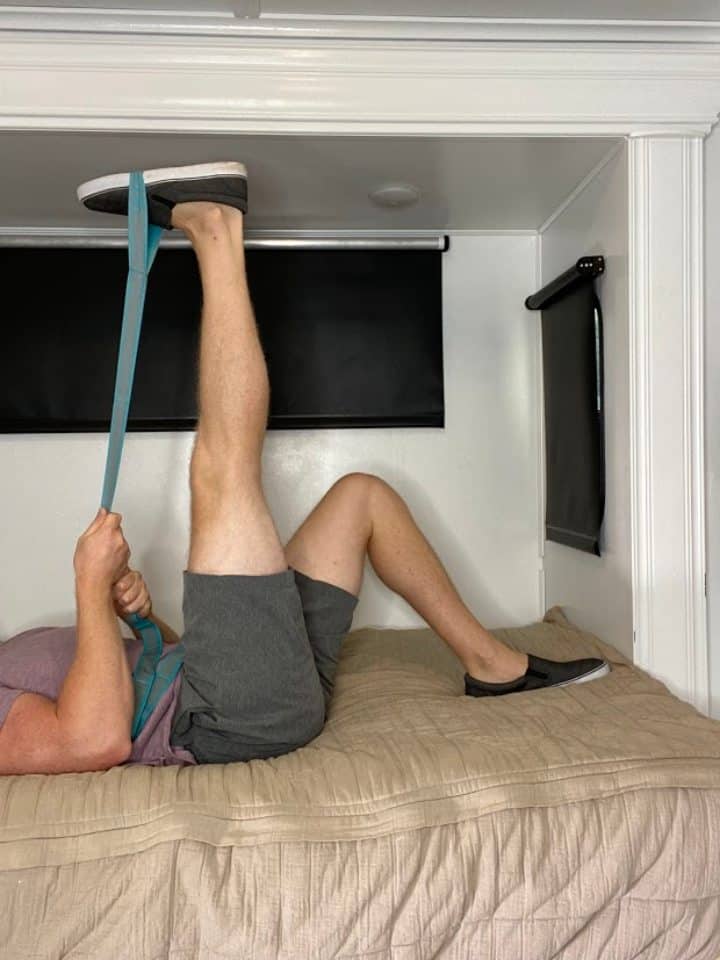
- Lay on your back on your floor, bed, or couch.
- Position the leg to be stretched straight in front of you.
- Using a non-elastic strap, wrap it around the foot on the leg to be stretched.
- The opposite leg can be bent with the foot on the surface to best support the back.
- Pull the leg up until you feel a tolerable pull behind the back of the leg (keep the knee straight).
- Hold for at least 30 seconds and repeat 3 times.
7. Quad Stretch
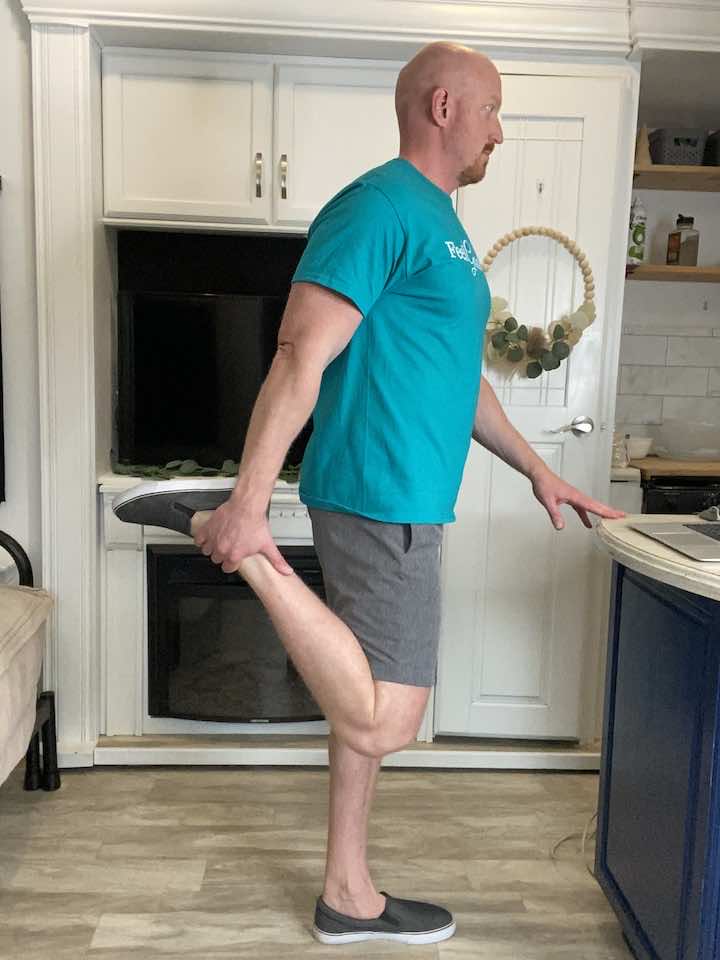
- Stand tall with your hands placed on a steady surface. You can use a counter, sink, or chair (no chairs with wheels) to hold on to for balance.
- Bend your knee and hold onto the top of your foot.
- Hold for 30 seconds, focusing on keeping your knees lined up.
- Repeat 2 more times.
- To make this exercise easier:
- You can always decrease the time you hold the stretch. The goal is to hold for 30 seconds eventually but you don’t have to do that day one.
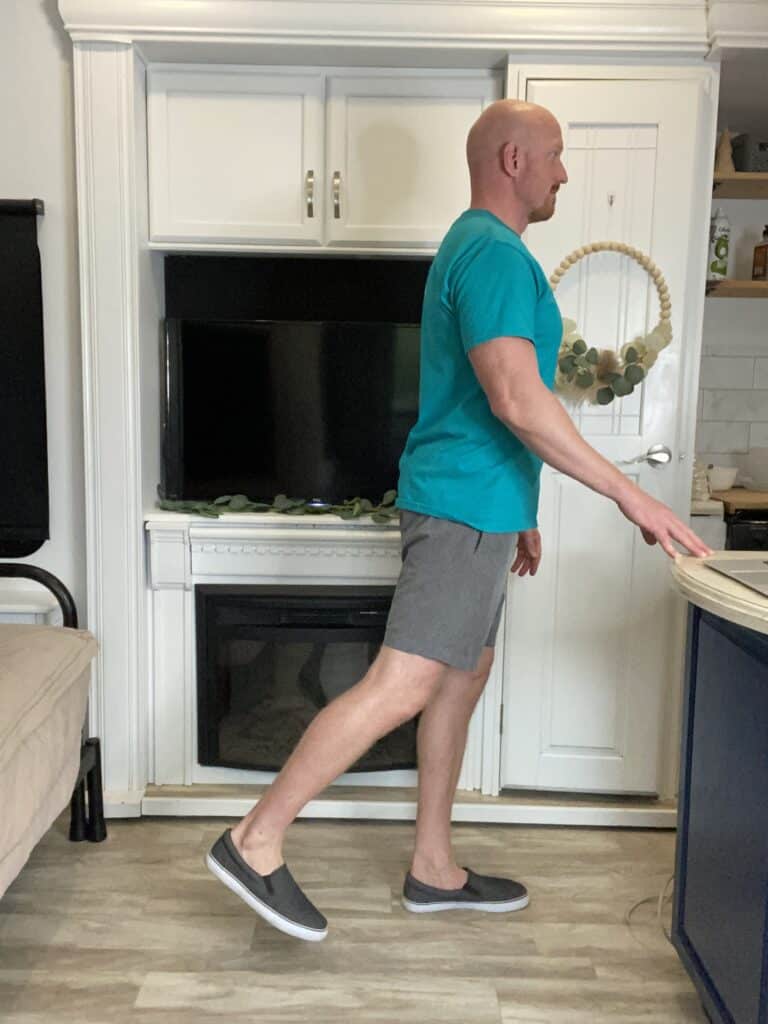
8. Hip Flexor Stretch
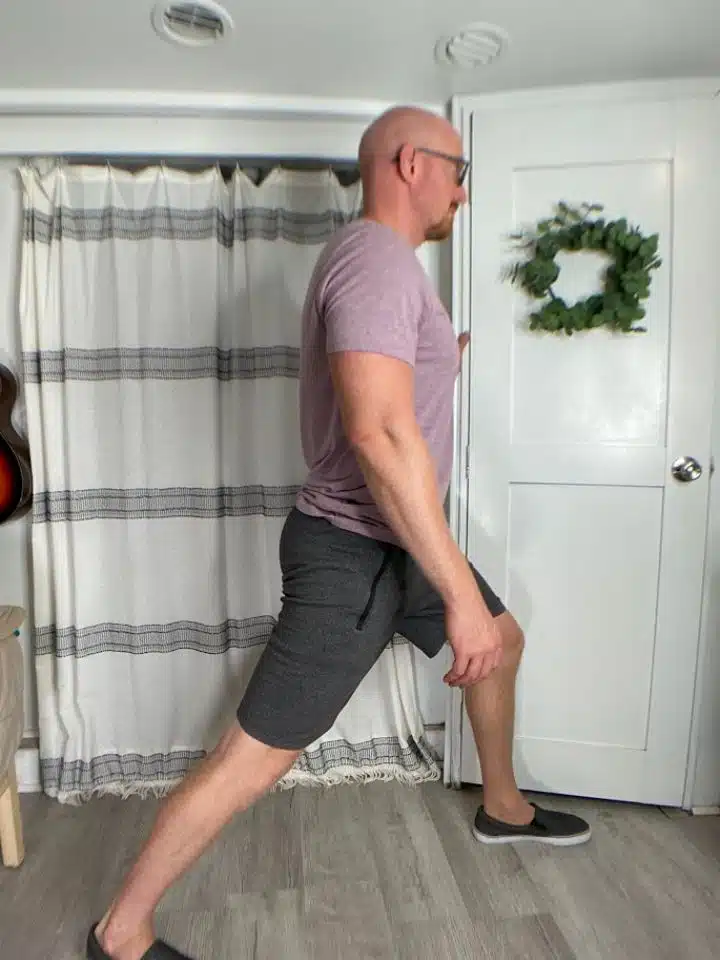
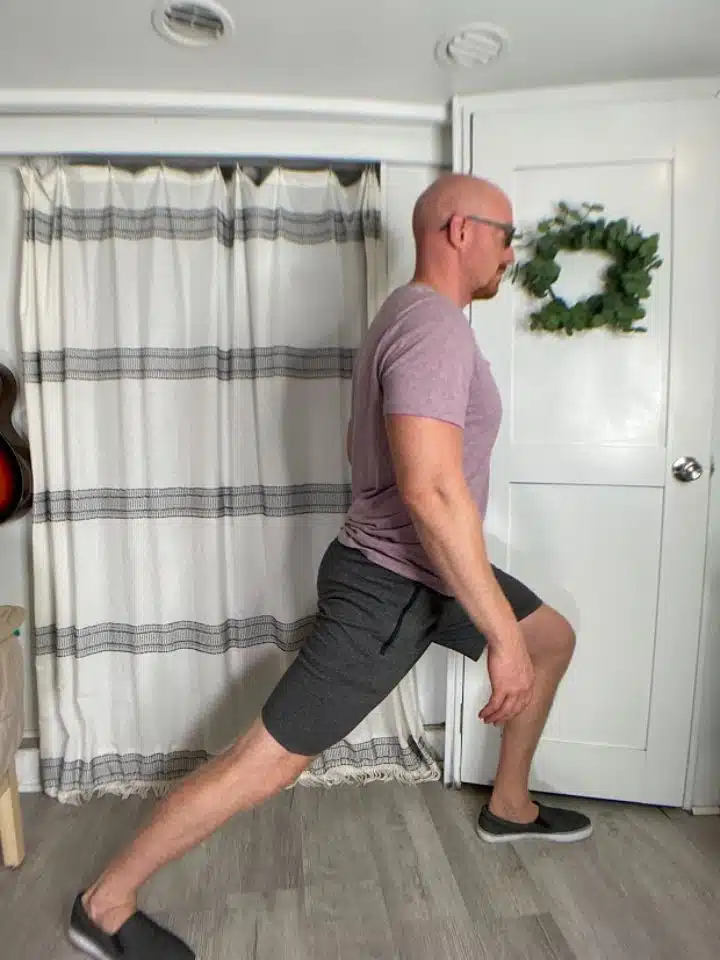
- Begin standing in front of a sturdy surface, such as the countertop, in case you need additional balance support.
- Position the unaffected leg forward and the painful leg back (the further apart the legs are, the stronger the stretch for the hip flexors).
- The front leg should have a bent knee, while the other knee in the back should be straight.
- Lean the body forward towards the front leg until a stretch is felt in the front of the hip in the back leg (make sure to keep both heels on the ground).
- Hold the stretch for at least 30 seconds.
- Repeat 3 times.
The Benefits of Exercise for Rheumatoid Arthritis in Knees:
Regular exercise helps in bringing down swelling, making moving easier, and strengthening the muscles around your knees. When you do these exercises right, they can help lessen the symptoms of RA in your knees.
This helps in easing the load on your knee joints and as a result, the pain. Plus, staying active can improve your mood, keep your heart healthy, help you sleep better, and enhance your overall life quality – all of which are especially helpful for people living with RA.
Staying with an exercise routine can sometimes feel hard, especially during an RA flare-up. But remember, the goal is not to push yourself to the edge but to keep moving and stay flexible as much as you can. Keep a close watch on how your body responds to each exercise and tweak your routine as needed. Take breaks when needed, but try to keep active.
Conclusion:
Living with rheumatoid arthritis in the knees can bring challenges, but it doesn’t mean you can’t enjoy life. You can handle RA with courage and strength by adding the right exercises to your daily routine and keeping a positive outlook.
Cheers to your health and happiness! Always check with a doctor or health professional before starting any new exercise routine. They can guide you on what’s best for your specific needs and abilities. And remember, every little step you take towards managing your RA symptoms is a big win.
Wondering What's Next?
Discover 11 Easy, At-Home “Stretch Exercises” for Stronger, Pain-Free Joints (click below)