Free download: Top 10 Natural & Easy Remedies for Joint Pain from Home. Learn these helpful remedies.
Estimated Reading Time: 8 minutes read
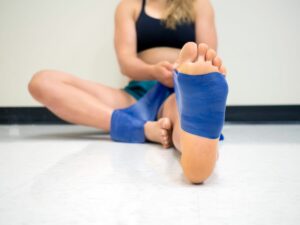
Ankle strains are common and can happen to anyone, often when you least expect it. Imagine walking or running, and suddenly, your ankle rolls or twists – that’s a typical scenario for an ankle strain. This type of injury, while common, can be painful and limit your mobility. However, with the right knowledge and approach, managing it effectively is within reach for everyone, even those without medical knowledge.
Ankle strains generally occur when the ligaments that support the ankle are forced beyond their normal range of movement. This can lead to discomfort and a temporary loss of functionality in the affected area.

Table of Contents
Understanding the Basics: Causes and Symptoms
It’s essential to understand the common causes and symptoms of an ankle strain to manage it effectively and prevent future occurrences.
Causes of Ankle Strains:
- Twisting or Rolling the Ankle: This is the most common cause, often happening during sports or even simple activities like walking on uneven ground.
- Slips and Falls: Landing awkwardly after a slip or fall can overstretch the ankle ligaments.
- Sudden Impact: A direct blow to the ankle, such as being stepped on, can cause a strain.
- Overuse: Repeated stress on the ankle from activities like running or jumping can lead to strains over time.
- Improper Footwear: Wearing shoes that don’t provide adequate support can increase the risk of ankle strains.
Symptoms of Ankle Strains:
- Pain and Tenderness: You might feel pain not just when moving the ankle but also when pressing on the area.
- Swelling and Bruising: The ankle might swell up and show signs of bruising.
- Restricted Movement: It may become difficult to move the ankle through its full range of motion.
- Instability: A feeling that the ankle is ‘giving way’ or unable to support weight properly.
- A Popping Sound or Sensation: Sometimes, at the moment of injury, a pop or snap might be felt or heard.
Recognizing these causes and symptoms early can help in taking timely action, which is crucial for effective recovery and preventing further complications.
Getting Ready for Recovery
Before beginning any exercises, it’s crucial to ensure that they are suitable for your specific condition. If your ankle strain is severe, consulting a healthcare professional is advisable. Remember, exercises should be performed without causing pain. If you experience increased pain, stop immediately and consult a professional.
Initial Strengthening Exercises
Gentle exercises are the first step when the ankle is still sore. These exercises help maintain strength without worsening your injury.

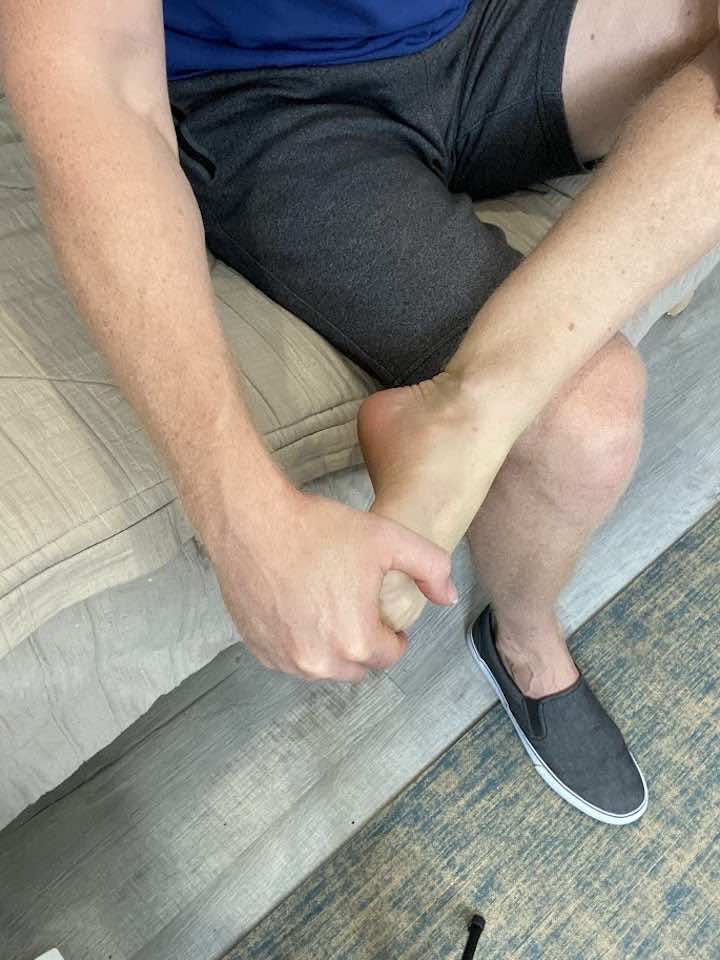
1. Isometric Ankle Dorsiflexion
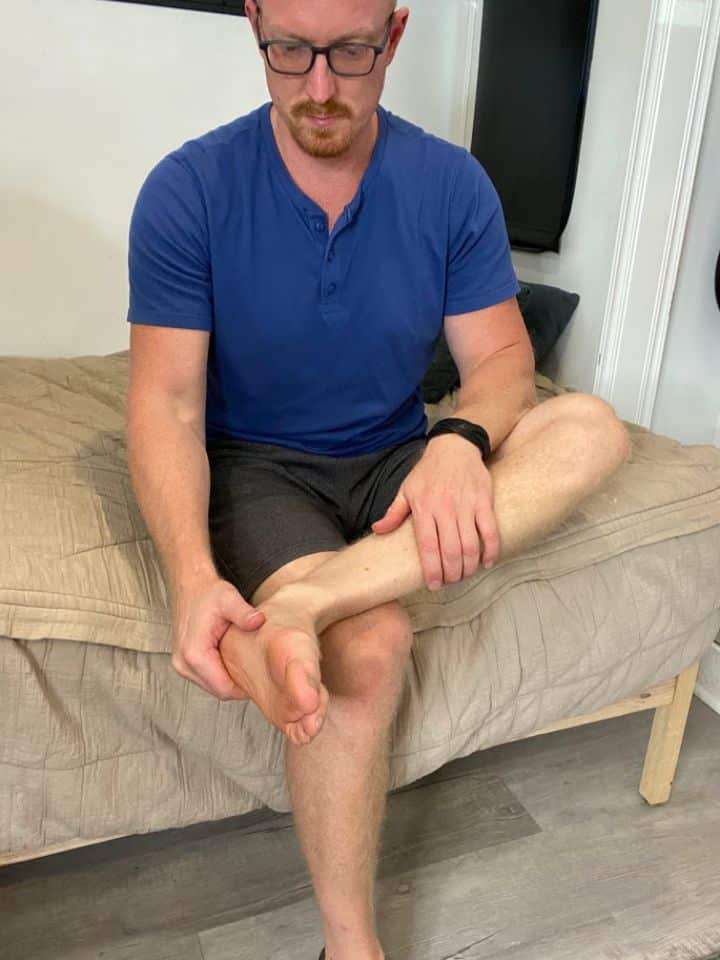
- Place one hand on the bottom of the foot, positioned over the ball of foot.
- Gently, pull the foot back into dorsiflexion until a gentle stretch is felt on the back side of the heel and ankle.
- If the stretch is very intense at first, try holding for 5 seconds, then rest. Repeat 10x.
- If the stretch is only mild, then try a longer hold time anywhere from 30-60 seconds.
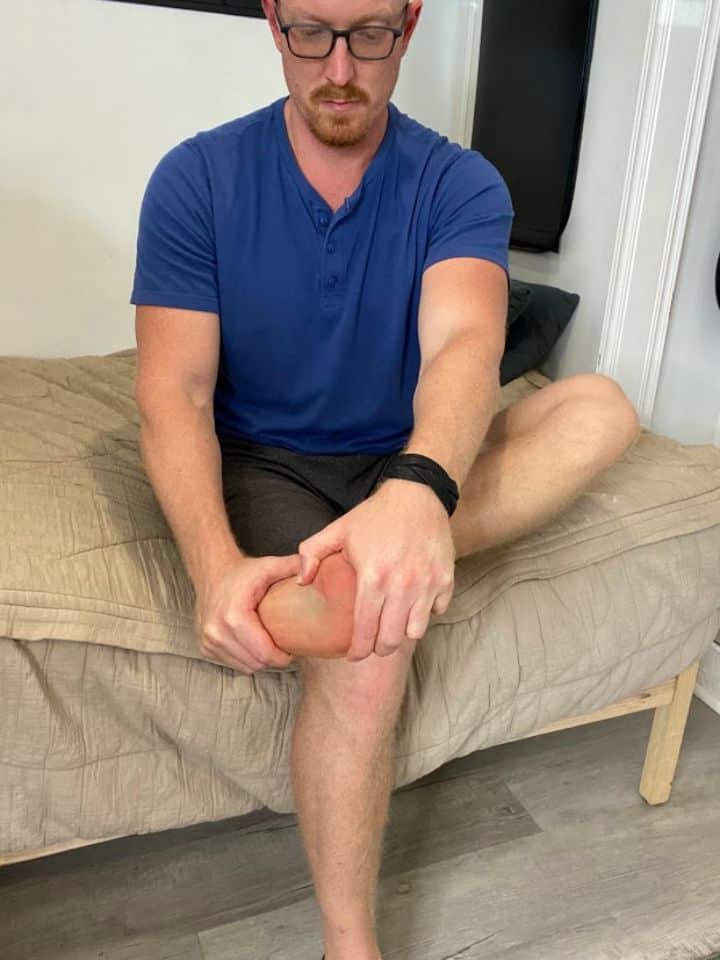
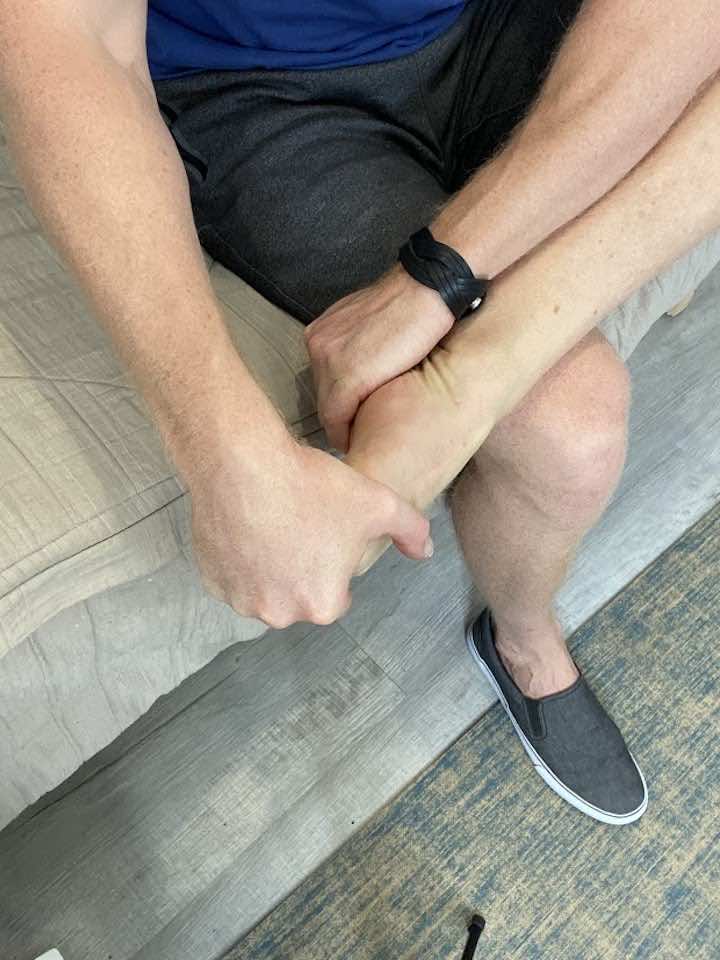
2. Isometric Ankle Plantarflexion
- Place one hand on the top of the foot, positioned on the forefoot near the toes.
- Gently, pull the foot down into plantar flexion until a gentle stretch is felt on the front side of the foot and ankle.
- If the stretch is very intense at first, try holding for 5 seconds, then rest. Repeat 10x.
- If the stretch is only mild, then try a longer hold time anywhere from 30-60 seconds.
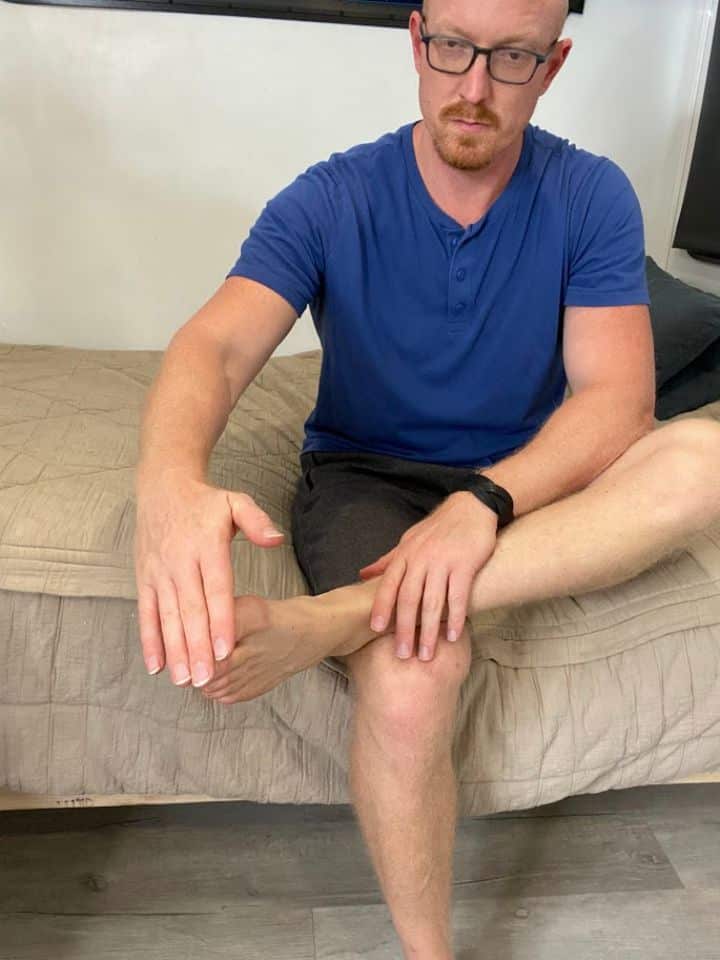
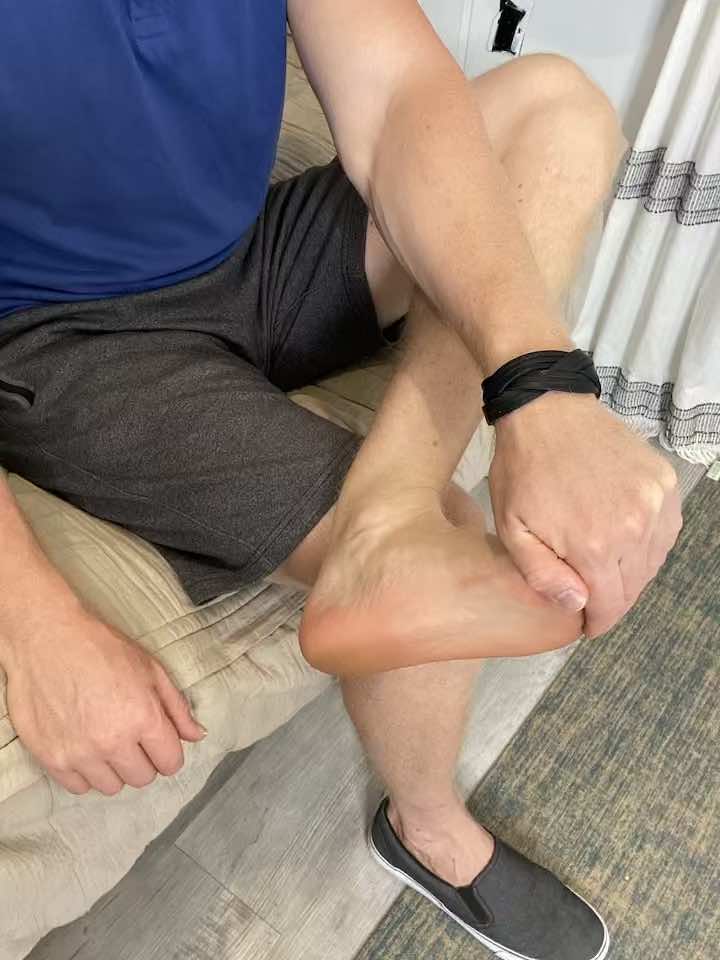
3. Isometric Ankle Inversion
- Place one hand on the top of the foot, positioned on the forefoot near the toes.
- Gently pull the foot and ankle into a plantar flexion stretch, then pull slightly inward to pull the foot towards you.
- If the stretch is very intense at first, try holding for 5 seconds, then rest. Repeat 10x.
- If the stretch is mild, try a longer hold time, anywhere from 30-60 seconds.
- Repeat this exercise two more times for a total of three repetitions.
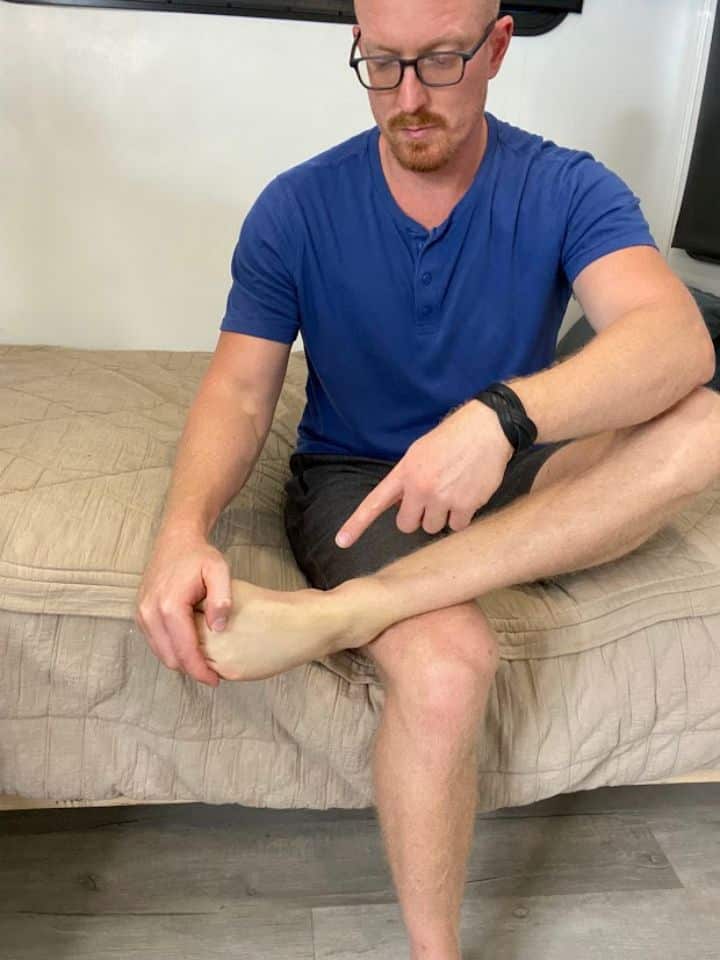
4. Isometric Ankle Eversion

- Place one hand on the bottom of the foot, over the ball of the foot.
- Gently pull the foot and ankle back into dorsiflexion, then pull slightly outward, so the foot moves away from you.
- If the stretch is very intense at first, try holding for 5 seconds, then rest. Repeat 10x.
- If the stretch is mild, try a longer hold time, anywhere from 30-60 seconds.
- Repeat this exercise two more times for a total of three repetitions.
Stretching for Flexibility
Stretching is key to regaining flexibility in your ankle. These exercises are simple yet effective in restoring your ankle’s range of motion.
1. Calf Stretch
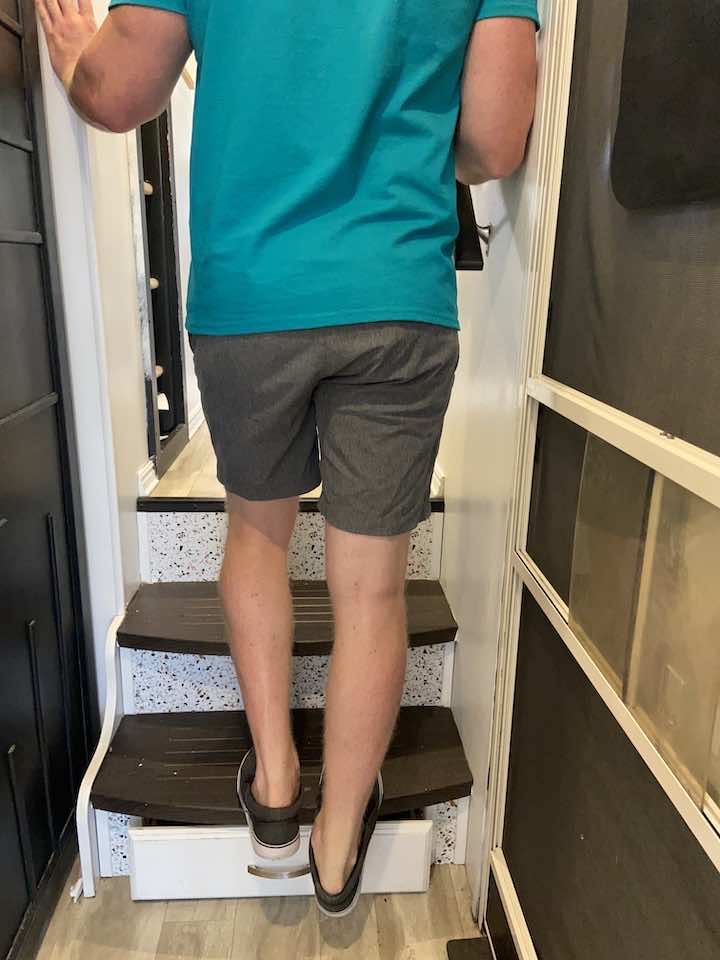
- While holding onto the railing of a staircase, step both feet up.
- Slightly stagger your feet so that the injured heel is hanging off the step.
- Your front leg should bend slightly, while the back (injured) leg’s knee will be straight.
- Hold this stretch for 30 seconds before relaxing.
- Repeat the stretch two more times for a total of three sets.
Advanced Strengthening Exercises
Once your ankle starts feeling better, you can progress to more challenging exercises. These will help strengthen and stabilize your ankle, preventing future injuries.
1. Marble Pick-Ups
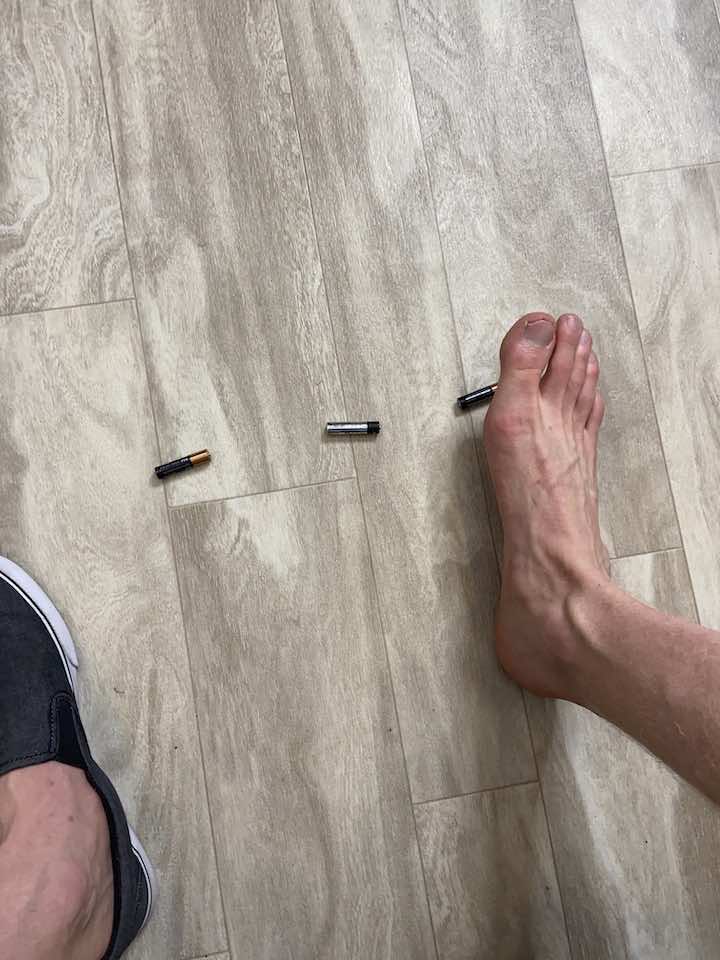
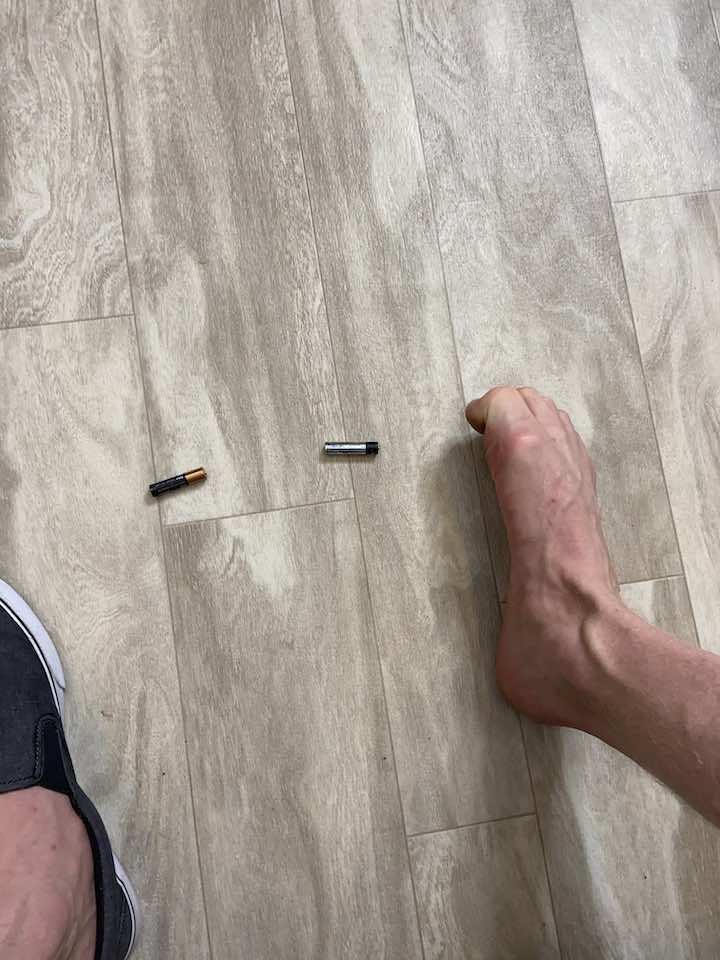
- Get 10-20 marbles and place them on the floor with a cup next to your pile of marbles.
- Stand up and hold onto a steady surface like a counter to help with balance.
- Then in standing, grab a marble with your toes and lift it into the cup. Picking up marbles can be challenging, but the great thing is that even just trying to pick up the marble will strengthen your foot!
2. Arch Doming
- Starting position: Seated in a chair with the fleet flat on the floor. Shoes should be removed.
- You can practice with both feet at the same time or one foot at a time.
- Squeeze the bottom of the foot and lift the inner arch off the floor, without moving any other part of the foot.
- Hold this lift for 2 seconds, then slowly allow the arches to relax back down to the floor.
- Repeat 10 repetitions for 3 sets.
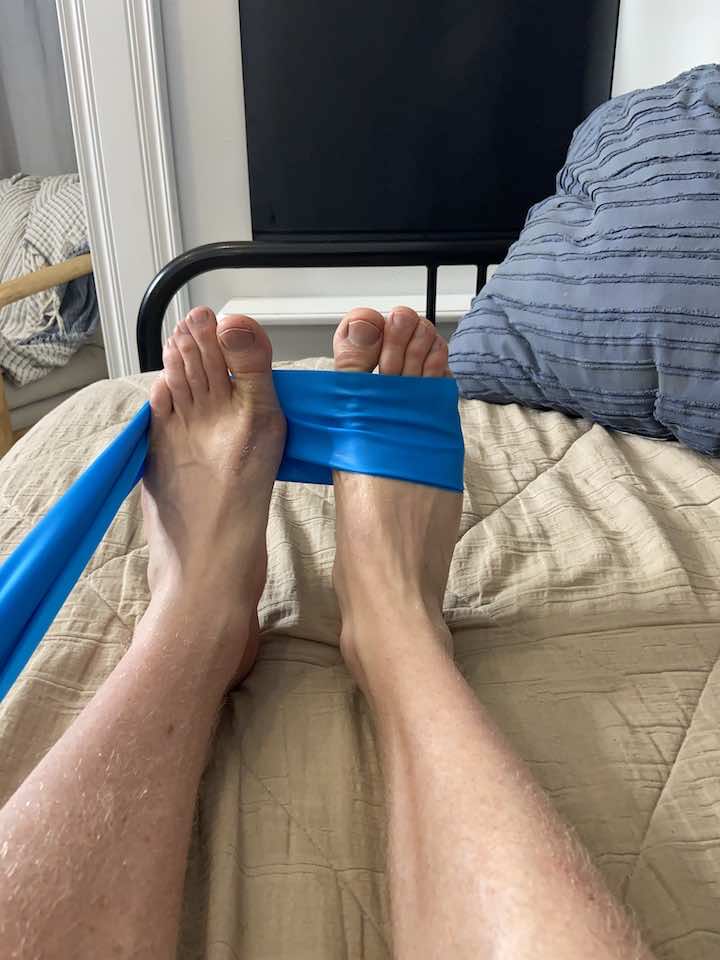
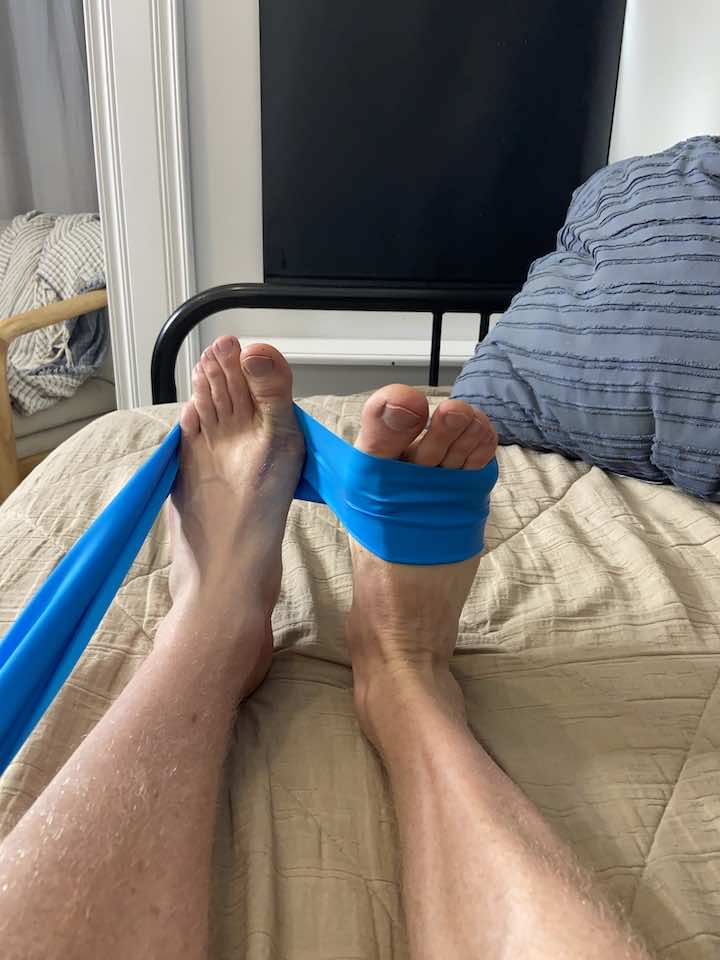
3. Ankle Eversion with Resistance Band
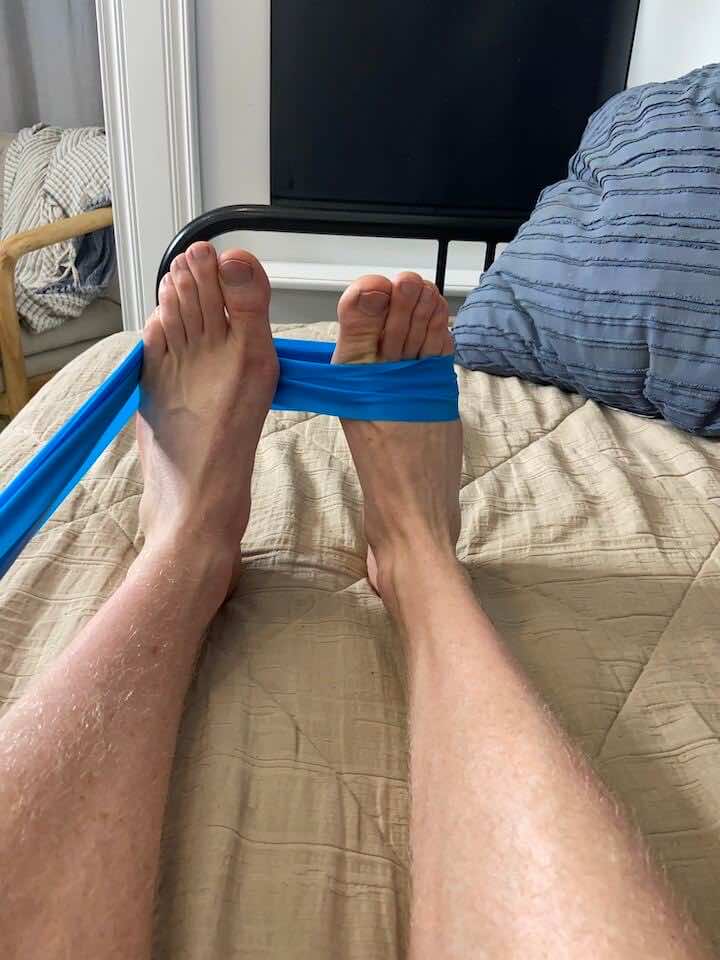
- Lay down on your bed with your ankle off the end.
- Loop the band around your right foot and around your left, as seen in the graphic. We’re going to use your left foot as an anchor for your right foot as your exercise.
- Bring your right foot out like you’re angling your ankle away from your left foot, squeeze in, then relax.
- Do this for 10 repetitions and complete 3 sets in total.
Tip: Work on just moving your ankle and not your entire leg when performing this exercise! See if your knee rolls out at all; try to keep it still.
4. Ankle Inversion with Resistance Band
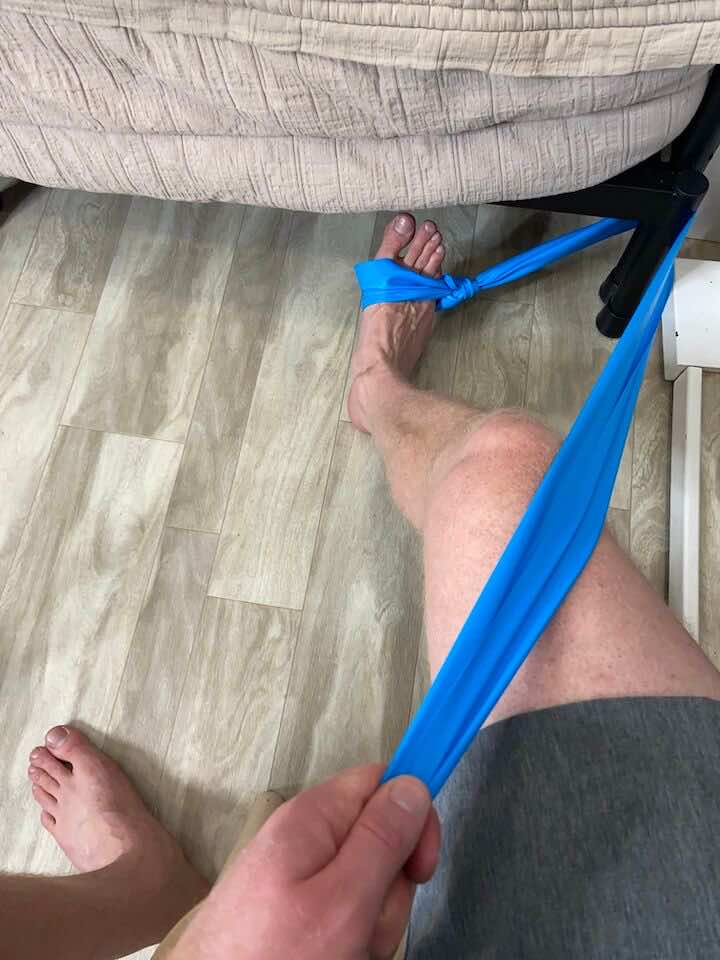
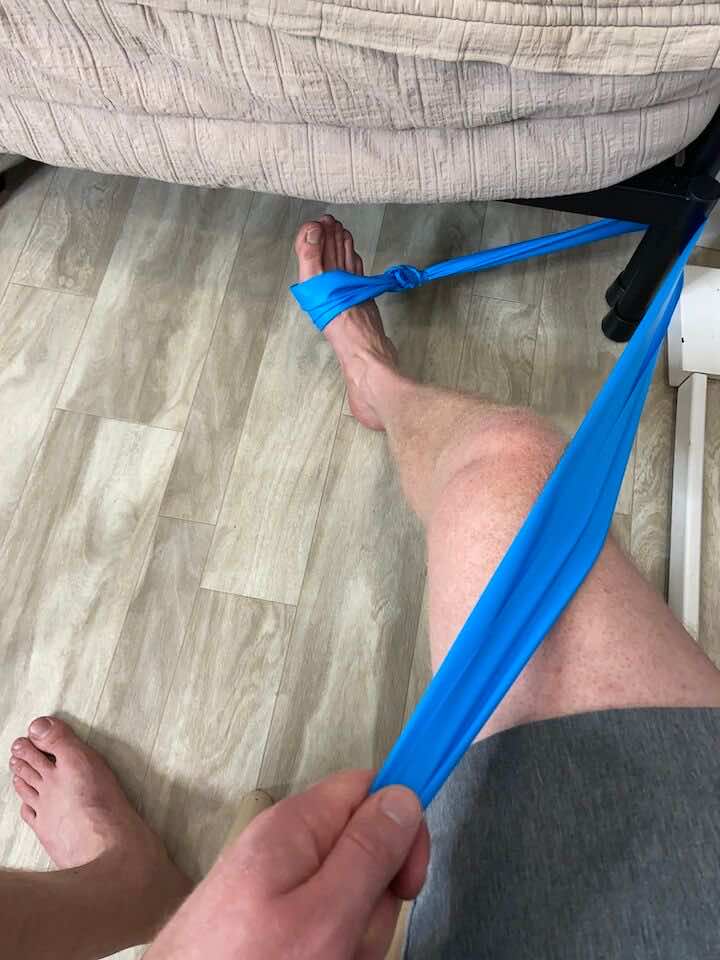
- Sit near a heavy table or sturdy chair that won’t move easily.
- Bring your foot in like you’re angling your ankle toward your other foot, squeeze in, then relax. Loop the resistance band over your foot and around the table or chair leg, as shown in the graphic above.
- Repeat this movement for 10 reps, and do a total of 3 sets.
Tip: Work on just moving your ankle and not your entire leg when performing this exercise! See if your knee rolls out at all, try to keep it still.
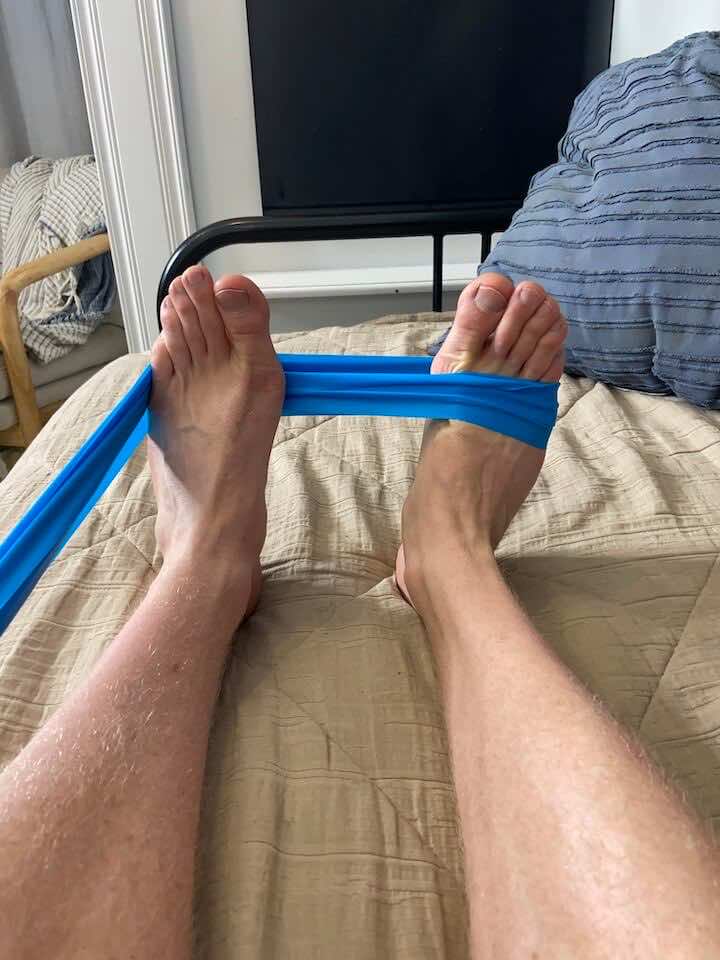
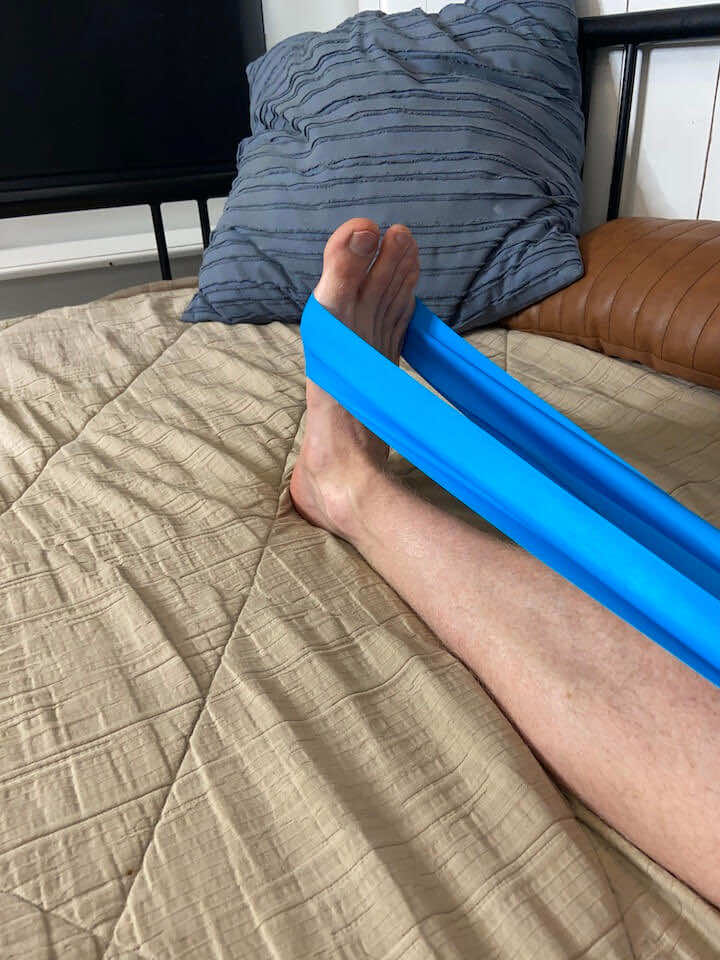
5. Ankle Dorsiflexion with Resistance Band
- Lay down on your bed with your ankle off the end.
- Loop the band around your right foot and loop the band around your left foot.
- Point your left foot and hold that position.
- Draw your right foot up like you’re trying to bring your toes to your nose, then relax. Finish the set, then repeat with your left foot.
- Repeat 10 repetitions for 3 sets.
6. Ankle Plantar Flexion with a Resistance Band
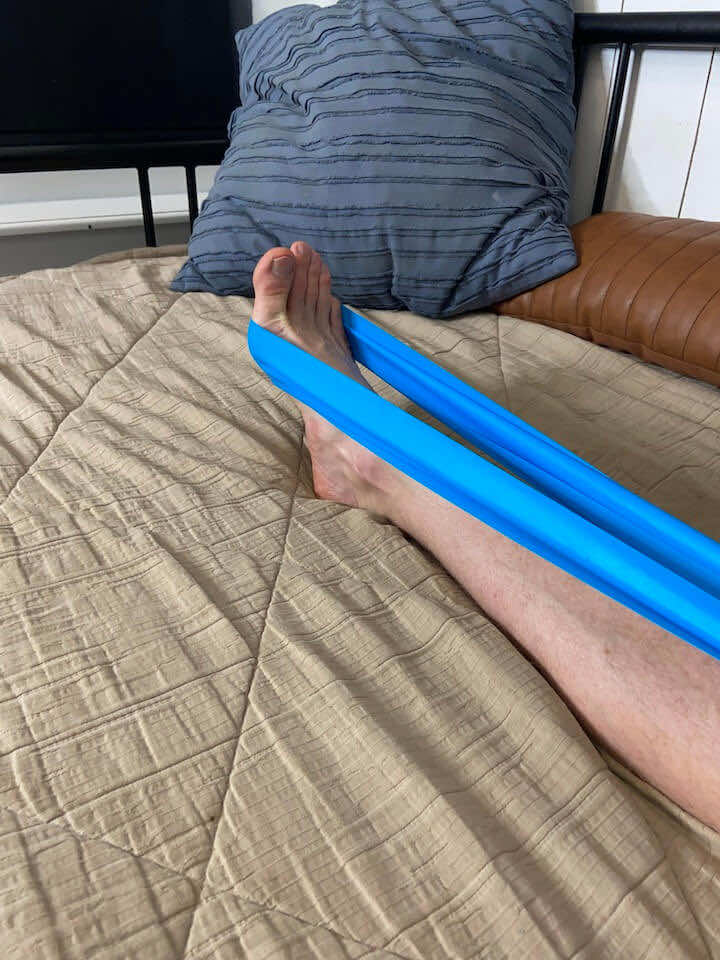
- Lay down on your bed with your ankle off the end.
- Loop the band around your right foot and hold onto the other end of the band with your hands.
- Point your toes and squeeze the back of your calf muscles, then relax. Finish the set, then repeat with your left foot.
- Repeat 10 repetitions for 3 sets.
7. Single Leg Balance

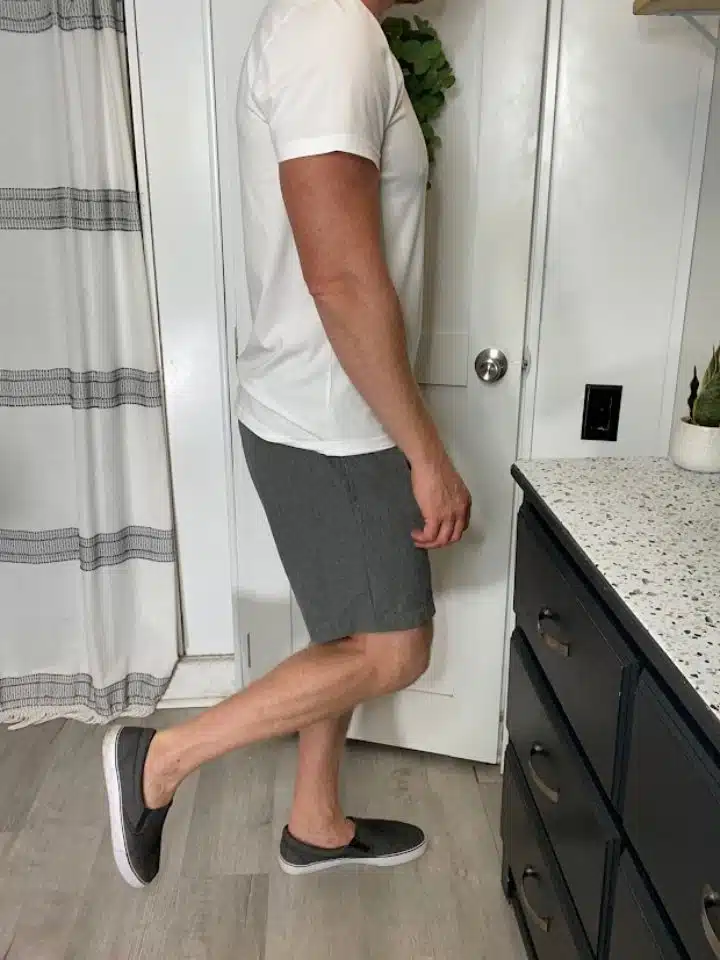
- Starting position: Standing in front of a sturdy surface, such as your countertop.
- Shift all of your weight onto the injured leg (avoid locking into the knee joint), picking the opposite foot up off the floor.
- Practice balancing for 30 seconds (you can use the counter for balance assist as needed).
- Return to your starting position to take a break.
- Repeat 2 more times on both sides.
Conclusion
Managing an ankle strain effectively involves understanding the causes and symptoms, preparing your body for recovery, and engaging in a structured exercise regimen. This balanced approach aids in healing and helps fortify your ankle against future injuries.
Always listen to your body, and if in doubt, or if pain persists, consult a healthcare professional for personalized advice. Your recovery journey is unique, and taking it one step at a time is critical to a successful and safe recovery.
Wondering What's Next?
Discover 11 Easy, At-Home “Stretch Exercises” for Stronger, Pain-Free Joints (click below)