Free download: Top 10 Natural & Easy Remedies for Joint Pain from Home. Learn these helpful remedies.
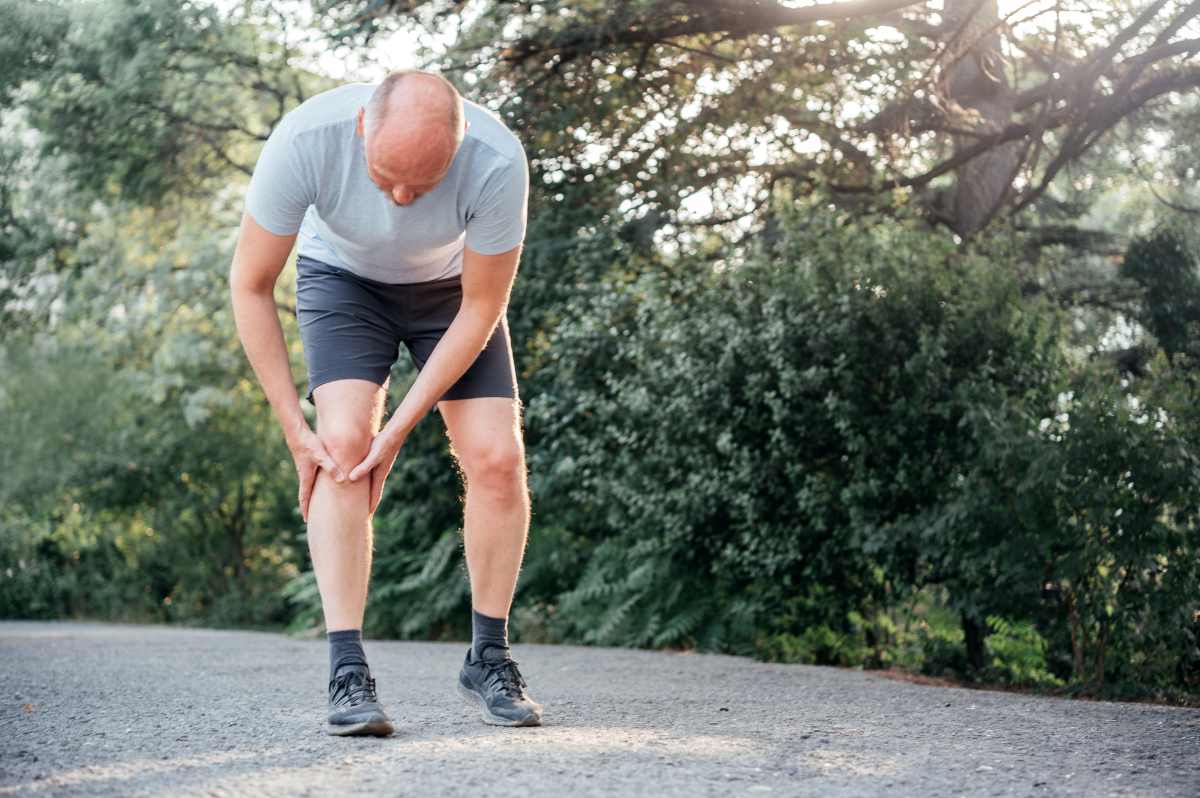
Tendonitis is an overuse injury that causes irritation and inflammation in the structure of a tendon. The overuse is normally created from repetitive motions, like running.
This type of stress on the soft tissue can create tiny tears in the tendon.
While tendonitis can occur in any tendon in the body, patellar tendonitis is a common overuse injury at the knee joint.

Patellar tendonitis can make a full recovery if treated immediately and correctly.
So, what is patellar tendonitis? Let’s first start with the basic anatomy and role of the patellar tendon.
Table of Contents
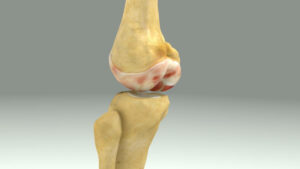
The Patellar Tendon
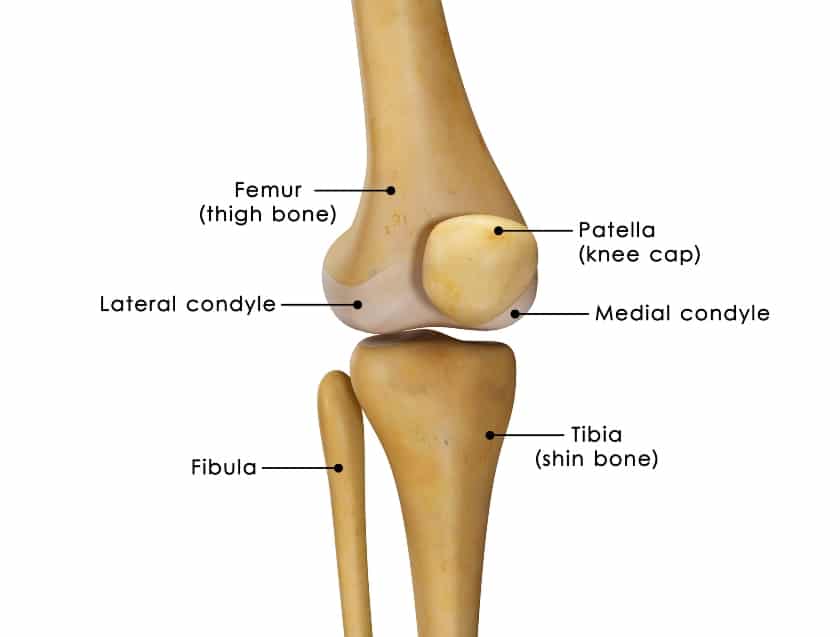
Anatomy
The patellar tendon attaches at the patellar, or kneecap, apex. This is the lowest region on the patella. The patellar tendon connects this area of your kneecap to the tibial tuberosity, or a bony prominence on the shin bone.
Function
The patellar tendon allows for better functioning and performance of the quadriceps muscles, who also connect to the tibial tuberosity.
The quadriceps are responsible for extending, or straightening, the knee. The patellar tendon ensures optimal force production from the quadriceps through the tibia.
Patellar Tendon Vs. Patellar Ligament
The name of the patellar tendon requires some clarification.
A tendon will connect muscles to bone, while a ligament connect bone to bone.
So, we just talked about how the patellar “tendon” connects the patella bone to the tibia bone… Wouldn’t that make it a “ligament?”…
Technically, yes.
This soft tissue is more commonly known as the patellar “tendon” due to the force production and muscle efficiency it creates through the quadricep muscles.
However, a ligament by its true definition is meant to limit motion in order to create a more stable joint. The patellar “ligament” does this by limiting how much the knee can bend or flex.
For this article, we’ll refer to the area being discussed as the patellar tendon for simplicity’s sake.
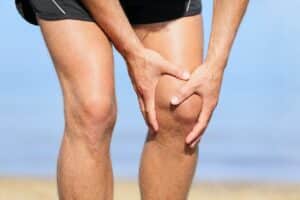
Causes of Patellar Tendonitis
You may hear of patellar tendonitis commonly called jumper’s knee. The reason for this is because this type of knee injury is usually a sports injury that occurs most often in jumping athletes.
These athletes participate in sporting or recreational activities that require repetitive stress in the form of jumping.
The following are a few examples of sports that are likely to lead to jumper’s knee:
- Repetitive running
- Track and field
- Basketball
- Soccer
- Dance
- Volleyball
While jumper’s knee is one of the more common causes of patellar tendonitis, this knee pain can be caused for other reasons. Some of these include:
- Osteoarthritis
- Muscle imbalances around the knee joint, such as tight leg muscles
- Postural or structural deviations that affect the alignment of the knees, such as misaligned feet
- Chronic diseases that affect circulation, such as diabetes and rheumatoid arthritis
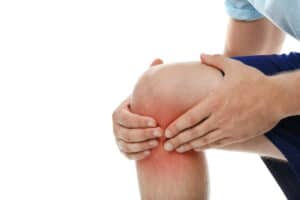
Signs and Symptoms of Patellar Tendonitis

Patellar tendonitis symptoms can vary among individuals, depending on the severity of the injury.
Patellar tendon pain is usually located right over the patellar tendon itself, just below the kneecap and slightly on the shinbone.
Pain may be more noticeable at first during the triggering activity or immediately after. If not treated, pain can worsen to the point of becoming more constant and interfering with your daily mobility.
This includes knee pain with bending or squatting, walking, climbing stairs, and getting up from a chair.
You may also notice the following common symptoms around the painful area:
- Dull pain on or around the patellar tendon
- Tenderness
- Swelling
- Pain with knee range of motion
Diagnostic Confirmation of Patellar Tendonitis
A healthcare professional such as your primary care physician, an orthopedic specialist, or physical therapist can help to diagnose patellar tendonitis.
In addition to a physical exam and intake of your medical history, imaging tests may also be performed. An X-ray may be used to make sure there are no issues with any bony areas that may contribute to or cause your knee pain.
An ultrasound or MRI can take a closer look at the patellar tendon soft tissue in greater detail.
Treatment Options for Patellar Tendonitis
Patellar tendonitis, or jumper’s knee, can be managed very easily if the proper steps are taken.
Successful treatment depends on if you address the symptoms right away and avoid prolonging treatment. By doing this you can usually make a full recovery in a few weeks. A 6-8 week time frame is pretty standard.
Initial Phase of Recovery
The initial goal of any tendonitis treatment is to reduce pain and inflammation. The same principles apply for patellar tendonitis.
R.I.C.E.
During this phase of pain and inflammation, we return to the classic R.I.C.E. method.
You must first and foremost rest the painful area. You won’t make any progress and can actually cause further tendon damage if you don’t allow proper rest.
If you continue to ignore your body’s warning signs and push through severe pain, the damaged tissues may never be able to make a full recovery and can turn into chronic pain, or a tendinopathy.
Ice the area frequently when you first start noticing pain. You can ice up to 20 minutes maximum multiple times throughout the day. Make sure to take at least a 30 minute break from icing before repeating it.
Applying compression to the area can help to reduce swelling and relieve pain. This can be achieved via an ACE wrap or a patellar tendon knee brace.
Another type of device that can apply a compression pressure over the patellar tendon is a patellar tendon strap.
This strap takes away any unnecessary pressure or force from the patellar tendon, which can help with pain relief.
Elevation will also help reduce pain and swelling. Try to aim for elevating above the level of the heart.
Additional Treatment Methods for Initial Recovery
Your doctor may recommend for you to take pain relievers, such as over-the-counter anti-inflammatories. These can help reduce pain and inflammation, which will help you get moving sooner in a pain free way.
Your doctor will also likely recommend for you to participate in physical therapy.
If you’re experiencing severe pain, your doctor may recommend corticosteroids or a cortisone injection to break through the pain.
Cortisone injections will typically not be used with chronic tendinopathies, as this can actually cause further break down of the tendon and create risk for a ruptured tendon.
Physical Therapy
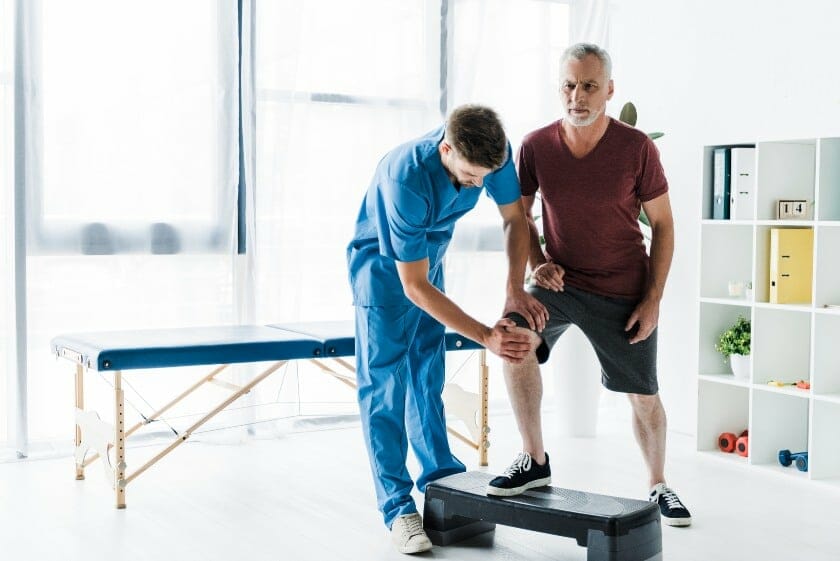
A physical therapist will perform an in-depth examination to identify the painful area and other locations that may be contributing to your patellar tendonitis.
Physical therapy may involve manual therapy, taping, modalities (e.g., low level laser therapy, ultrasound, electrical stimulation), and an exercise program.
What to Expect In a Physical Therapy Exercise Program
Patellar tendonitis exercises will typically involve stretches and strengthening exercise. Patellar tendonitis stretches are focused on regaining any lost range of motion, especially at the knee.
Strengthening exercises for patellar tendonitis will focus on any areas along the leg that may be showing weakness and contributing to pain.
Let’s look over a few basic stretching and strengthening exercises you may encounter while in physical therapy.
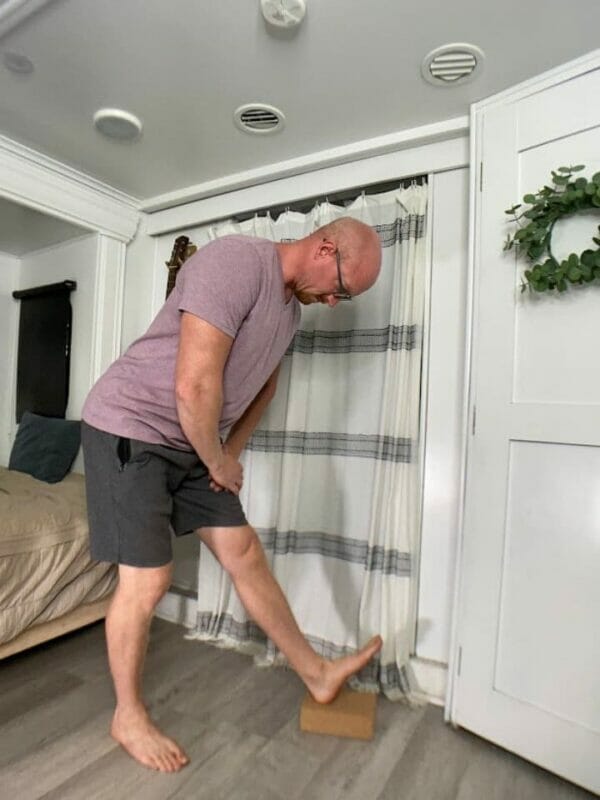
1. Step Stretch
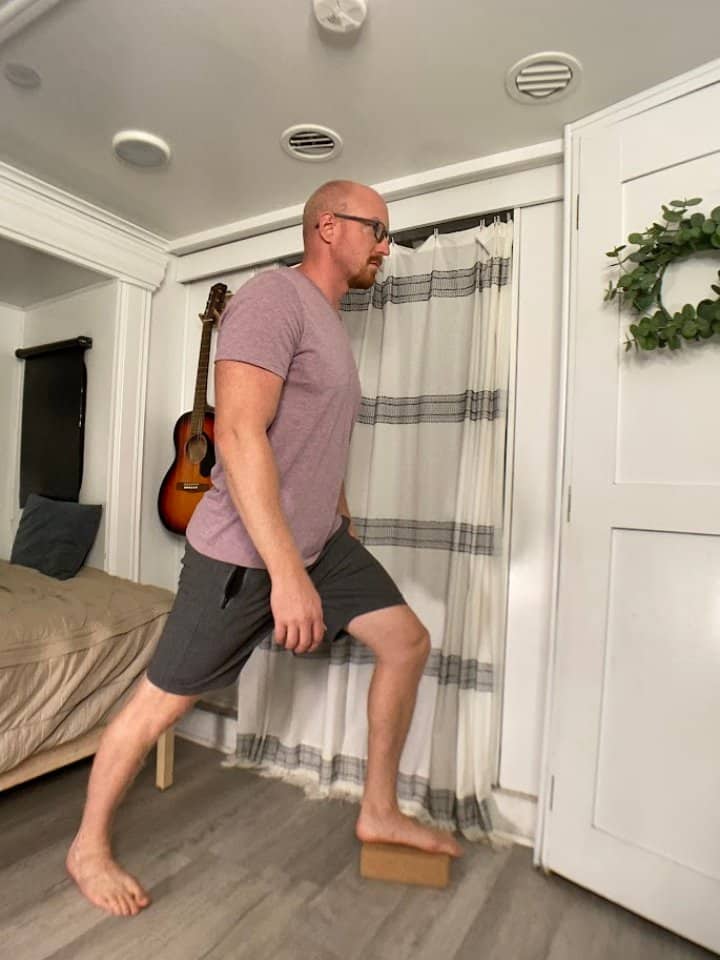
- Place the foot of the leg being stretched on a 6 or 8 inch step.
- Slowly lunge forward as far as the injured knee is able to bend without causing pain. Make sure to keep the heel on the step down. You should feel a stretch in the front of the knee.
- Hold for 30 seconds, then return to your starting position.
- Now, reverse the previous motion by leaning onto the back leg while straightening the front knee. You can allow the front ankle to flex by lifting the toes off the step.
- Bend slightly forward at the hips to feel a stretch in the hamstrings behind the thigh.
- Hold for 30 seconds, then return to your starting position.
- Repeat each position a second time.
2. Supine Hip Flexor and Quad Stretch

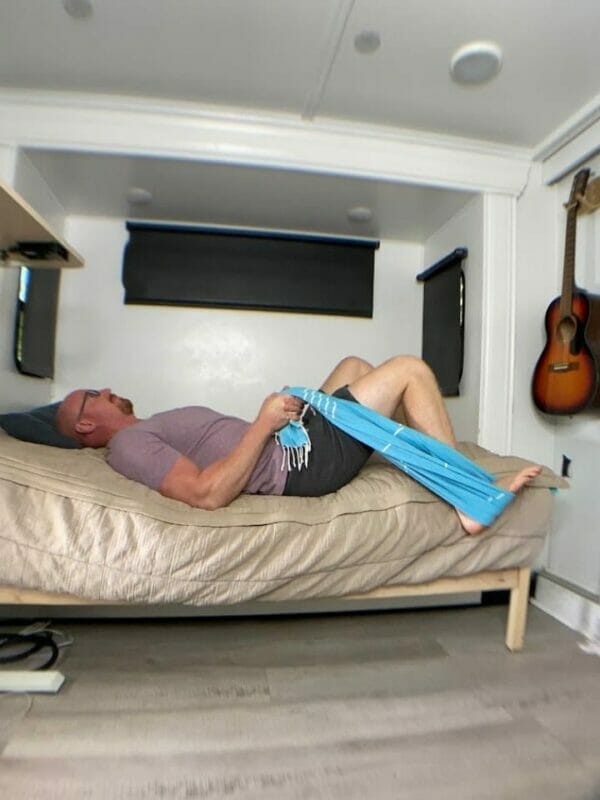
- You’ll be laying on your bed for this stretch with a non-elastic strap wrapped around your foot (e.g., stretch strap, belt, towel).
- If stretching the right leg, lay on the right side of the bed, and vice versa.
- Position the opposite leg so that the knee is bent and the foot is flat on the bed to support the back.
- Allow the leg to be stretched to gently fall off the side of the bed and hang. You should be holding the strap in your hands.
- Gently bend the knee while pulling back with the strap. Avoid hyperextending the low back.
- You should feel a stretch in the front of the hip, or your hip flexors, and over the quads, or front of the thigh. The front of the knee may also feel a stretch.
- Hold for at least 30 seconds to 1 minute.
- Repeat on the opposite leg for an even stretch.
3. Long Arc Quad
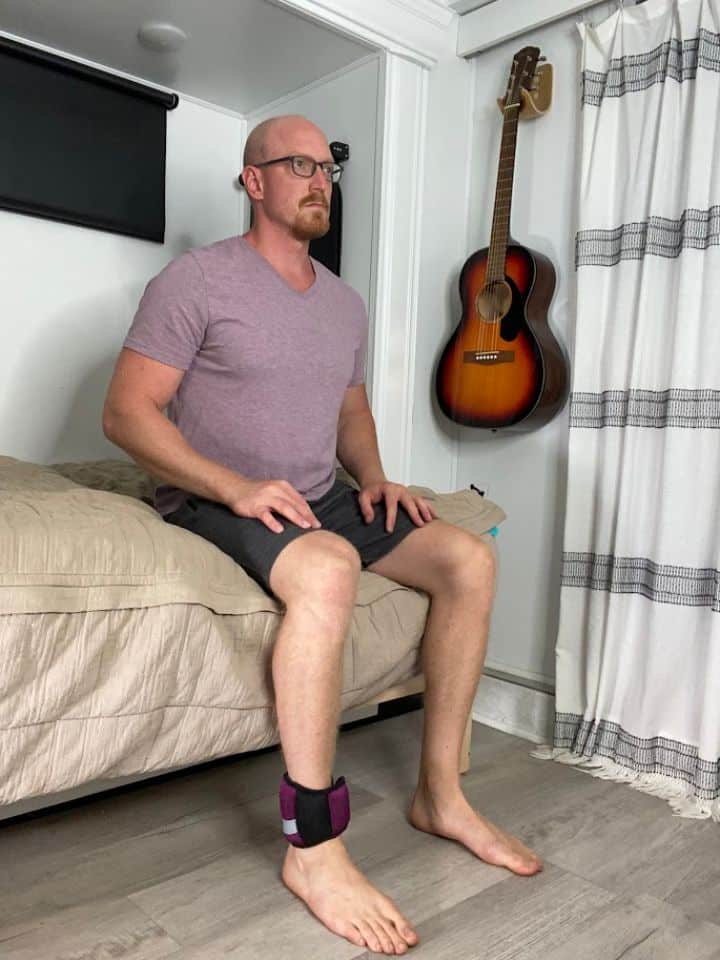
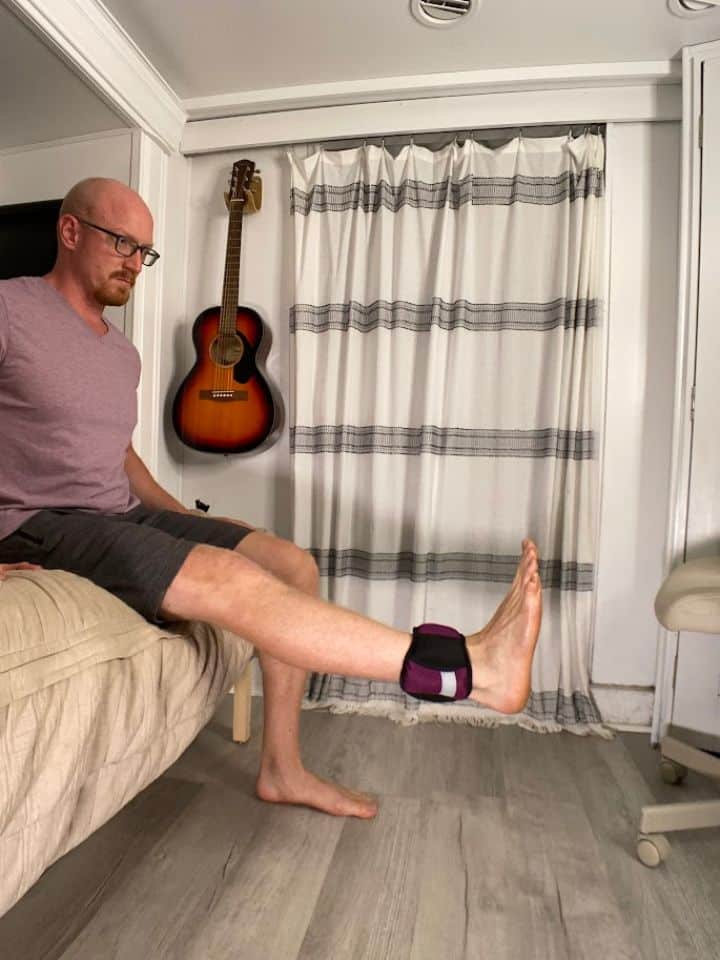
- You can perform this at home using an ankle weight (2-5#, as tolerated) or a resistance band tied around the ankles (light, medium, or heavy resistance).
- Begin seated in a chair with the feet flat on the floor.
- Kick the foot up off the floor and allow the knee to fully straighten.
- Hold for 2 seconds, then slowly return to your starting position.
- Repeat 10-15 repetitions for 2 sets.
- Perform on the opposite leg for even symmetry.
4. Wall Squat

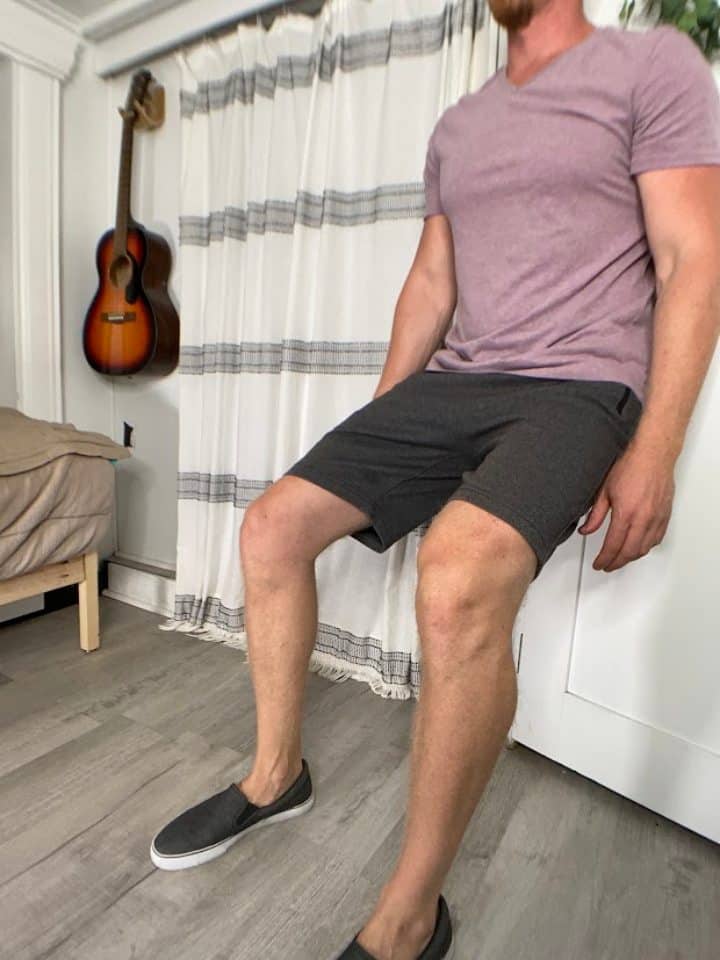
- Stand with your back against a wall and the feet slightly in front of you (you should now be leaning on the wall).
- Slowly bend the knees and slide down the wall into a squat.
- Make sure your knees don’t go past the toes (try to keep them in line with the ankles). Avoid squatting deeper than a 90 degree angle at the knees max.
- Hold for 2 seconds, then push yourself back up to your starting position.
- Repeat 10-15 repetitions for 2 sets.
One of the most important things to remember with any exercise is avoid pushing into more pain! A “no pain, no gain” mindset can absolutely cause further damage to the tendon tissue and prolong your recovery.
Patellar Tendonitis Exercises to Avoid

While recovering there are some exercises you may want to avoid as they could cause you to experience pain.
Avoid plyometrics, or jumping exercises (e.g., jump squats, jumping lunges), as these can cause significant pain if attempted too soon.
Avoid positions and motions that cause excessive bending of the knee. This will usually occur with anything beyond a 90 degree angle at the knee.
The reason for this is that excessive knee bending can create greater compression forces in the knee joint and more of an uncomfortable pull on the patellar tendons.
It’s important to exercise in a controlled range of motion. If you feel pain increasing, try to modify the range you’re performing the exercise in.
Certain body weight exercises may be more tolerable than others. Regular squats and lunges using only your body weight should be tolerable when performed in a controlled range of motion, but if you try these too early, such as the first week or two of recovery, your patellar tendonitis may become irritated.
More generally speaking, if you try any exercise for patellar tendonitis and you keep experiencing more pain, you may want to defer that exercise altogether.
Return to Sport
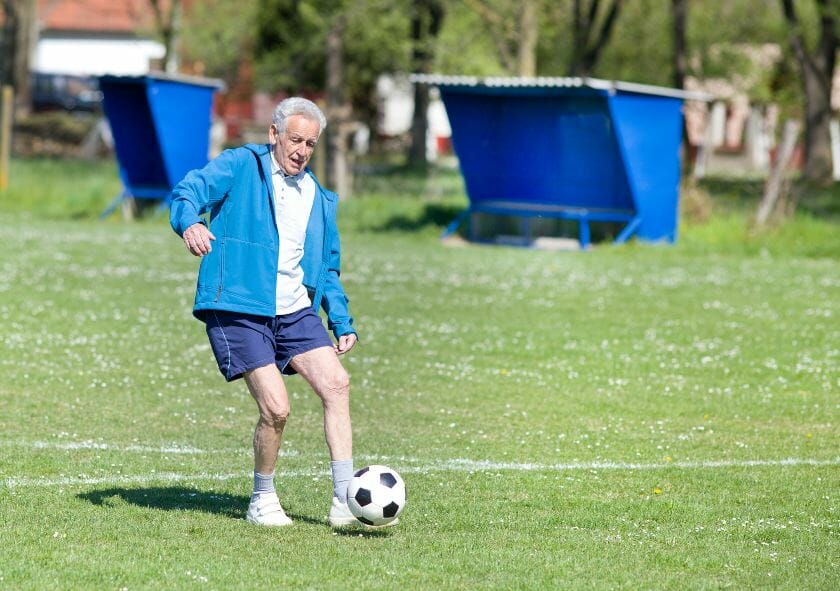
Once your patellar tendonitis symptoms have resolved, you can begin the process of resuming your previous sport and recreational activities.

It’s very important to ease your way back into your sport or activity. If you try to jump right back where you left off, you will likely re-injure yourself and cause the patellar tendonitis to flare up again.
Try to begin with some of the basic movements and motions your sport or activity requires to test out the knee. If everything is looking good, begin practicing some basic drills.
For example, if you’re returning to basketball, try a light jog up and down the court, static jump shots, and dribbling while jogging prior to participating in an actual game.
It can be helpful to discuss with your physical therapist what activities and sports you’re trying to get back to. While still in physical therapy, your physical therapist can begin incorporating specific tasks and movements that you’ll be needing to do.
Surgery
Surgery is normally not needed for patellar tendonitis.
If, however, your tendonitis isn’t properly treated and you continue the physical activity stressing the tendon, you could potentially cause a a chronic tendinopathy, a tendon tear or worst case scenario a rupture.
A chronic tendinopathy, if debilitating, may require surgical debridement, or a clean out, of the tendon.
In cases of a full tear or rupture, surgical correction may be needed. You will absolutely need physical therapy after this type of surgery, and it may take a few months or up to a year to make a full recovery.
Prevention of Patellar Tendonitis
A great question would be how can you prevent patellar tendonitis in the first place?
Always make sure to give yourself a proper warm-up prior to your activity or sport. The best warm-up will include dynamic movements. This might include heel raises, marching in place, or leg swings to loosen up the muscles and improve circulation.
Make sure you’re practicing the correct form and technique. If you’re not quite sure about what you’re doing it’s never a bad idea to take some classes or formal training for that particular activity or sport in order to avoid injury.
Implement a well-rounded strengthening program for the legs. This will help to avoid muscle imbalances and provide the right support your joints need.
If you do begin noticing mild patellar tendonitis symptoms, make sure to address those symptoms right away. Take the appropriate steps listed above to treat patellar tendonitis as soon as it begins.
You’ll be able to resolve them sooner and get back to what you love doing.
Moral of the Story

The big takeaway here is that patellar tendonitis is very manageable! Don’t make the mistake of thinking it will just go away if you ignore it.
Treat your symptoms right from the start, and you’ll be back in action in no time.
FAQ:
Is getting a massage okay for patellar tendonitis?
Yes!
A massage can be great for pain relief and relaxing tight muscles in the legs.
Are pool exercises good for patellar tendonitis?
Yes!
The pool is a fantastic tool to help with recovery. It will help unload the joints and provide a more supportive environment for the body to recover.
Should I still wear a patellar tendon strap even once my pain is gone?
It won’t hurt to wear this type of strap, but you also want to make sure your own soft tissues are supporting the knee independently.
Try not to rely on the strap all the time, but if you feel some mild symptoms beginning, you can always wear it for additional support.
Wondering What's Next?
Discover 11 Easy, At-Home “Stretch Exercises” for Stronger, Pain-Free Joints (click below)