Free download: Top 10 Natural & Easy Remedies for Joint Pain from Home. Learn these helpful remedies.
Estimated Reading Time: 7 minutes read
Lumbar stabilization exercises are like superheroes for your back – they strengthen your trunk to support your lower back and fight off joint instability. These exercises aim to prevent spinal conditions, neurological damage, and pain.
Now, when it comes to these exercises, most of them focus on strengthening the muscles around your abdomen and back. But that’s not all! You also need to think about posture (no slouching, folks), breathing mechanics (breathe naturally, no need to hold your breath), and conditioning your hips and shoulders (they need love, too, you know).

We all know that as we get older, we might not be as spry as we used to be. But don’t worry, and lumbar stabilization exercises can help with that! They can help with insufficient core muscular recruitment or weakness in the deep spinal muscles. Plus, by improving your posture and refining your movement patterns, you’ll be able to show those young whipper-snappers that age is just a number!
Now, we know that seeing a doctor about your back pain should be your first step. Low back pain’s causes can vary, and some conditions require medical attention before starting any exercise routine. But if you’re good to go, then get to it! By building your strength over time and maintaining proper posture, you’ll be able to live your life with less pain and more confidence. So go on, show the world that you’re still the boss!
Table of Contents
Benefits of Lumbar Stabilization Exercises
As we age, our bodies require more care and attention. Lumbar stabilization exercises are an excellent way to support our lower back and improve our overall well-being. Here are some of the key benefits that are especially relevant for seniors:
- Improved posture and balance: These exercises help strengthen the muscles around your abdomen and back, improving your posture and balance. This can help to prevent falls and injuries, which can be particularly important for seniors.
- Increased spine and core stability: Lumbar stabilization exercises can help to reduce the risk of lower back pain and injuries. By strengthening the muscles around your spine and core, you’ll be better equipped to handle everyday tasks and activities without pain or discomfort.
- Enhanced athletic performance: While this might not be a top priority for everyone, lumbar stabilization exercises can help to improve your overall fitness and mobility. By building strength and improving your movement patterns, you’ll be better able to enjoy the activities you love, whether that’s gardening, dancing, or playing with your grandkids.
8 Essential Exercises for a Strong and Stable Back
Here are 8 essential exercises that can help you build a strong and stable back:

1. Diaphragmatic Breathing
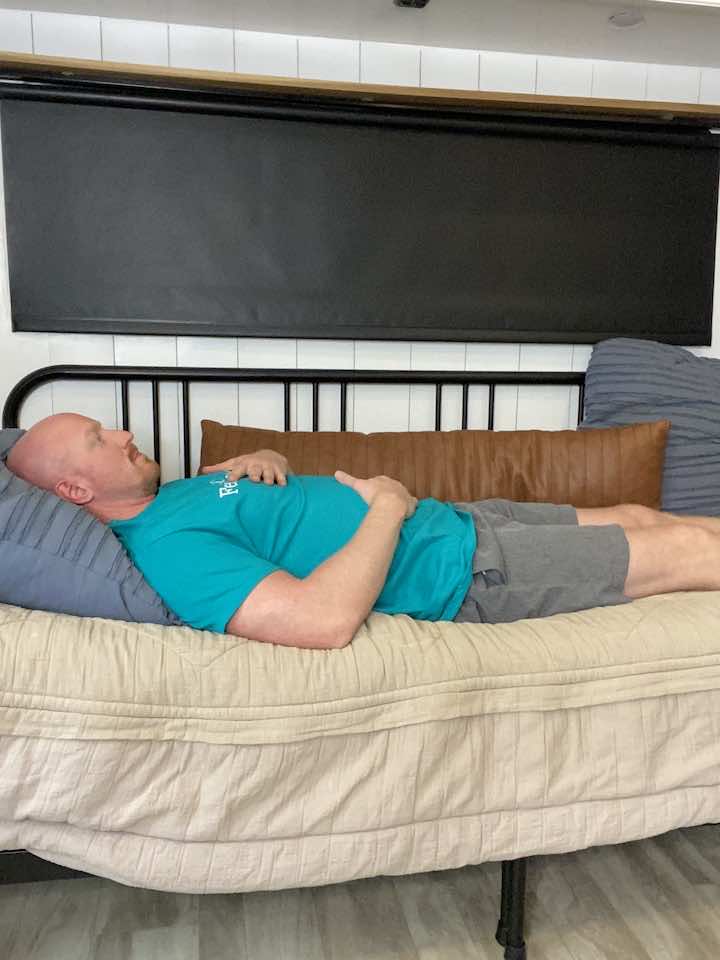
- Lay on your back in a comfortable position, and your knees could be bent or straight. Bent knees will support your lower back better.
- Place one hand on your chest and one on your stomach, and close your eyes.
- Take a deep breath through your nose and feel which hand rises up more. When stressed, you often feel more movement on the hand on the chest, indicating chest breathing. The goal is for you to switch to feeling the hand on the belly rise and fall more, indicating diaphragmatic breathing. This can take some time to accomplish; try to imagine breathing in through your nose and filling up a balloon in your belly.
- After taking a deep breath through your nose, breathe out through your mouth with pursed lips like you’re blowing out a candle.
- Continue taking 15 deep breaths through your nose, filling up the balloon in your belly, then breathing out through your mouth and feeling the hand on your belly drop as you deflate the balloon.
2. Abdominal Bracing
- Begin on your back, and knees bent, and feet flat on the floor.
- Exhale and draw your belly button towards your spine (as if a string was pulling on the inside of your belly button from the ground).
- Hold for 5 seconds before relaxing. Repeat 10 times.
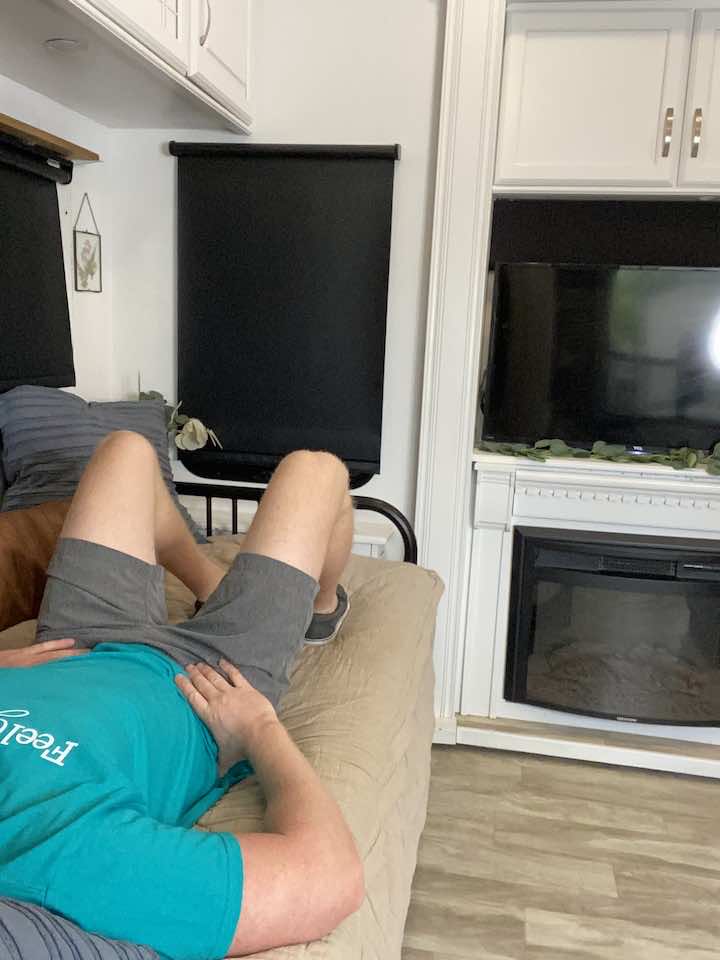
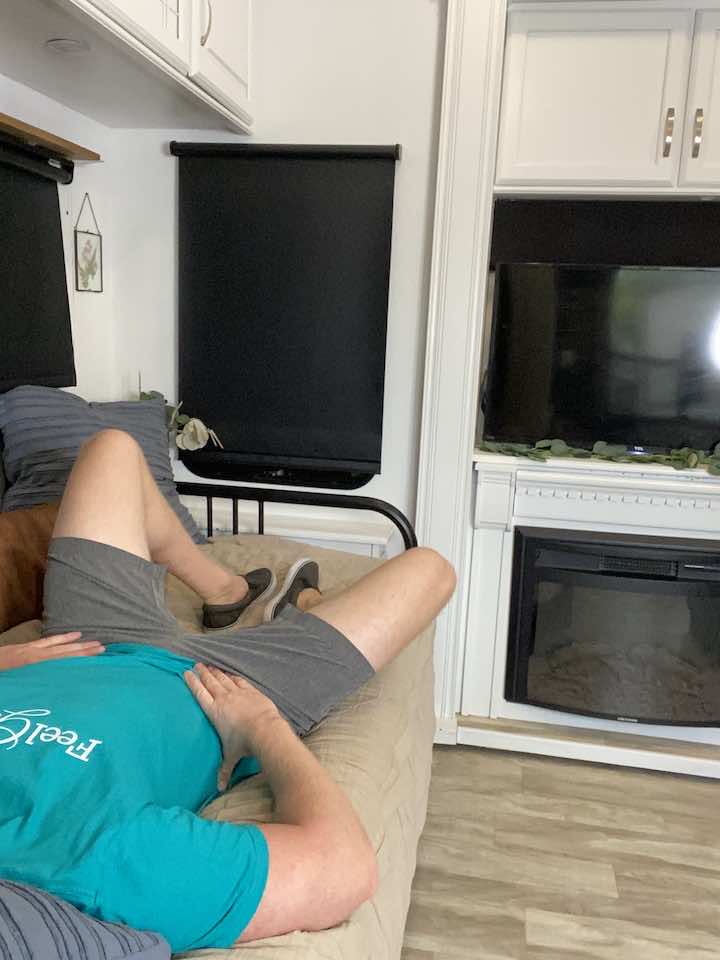
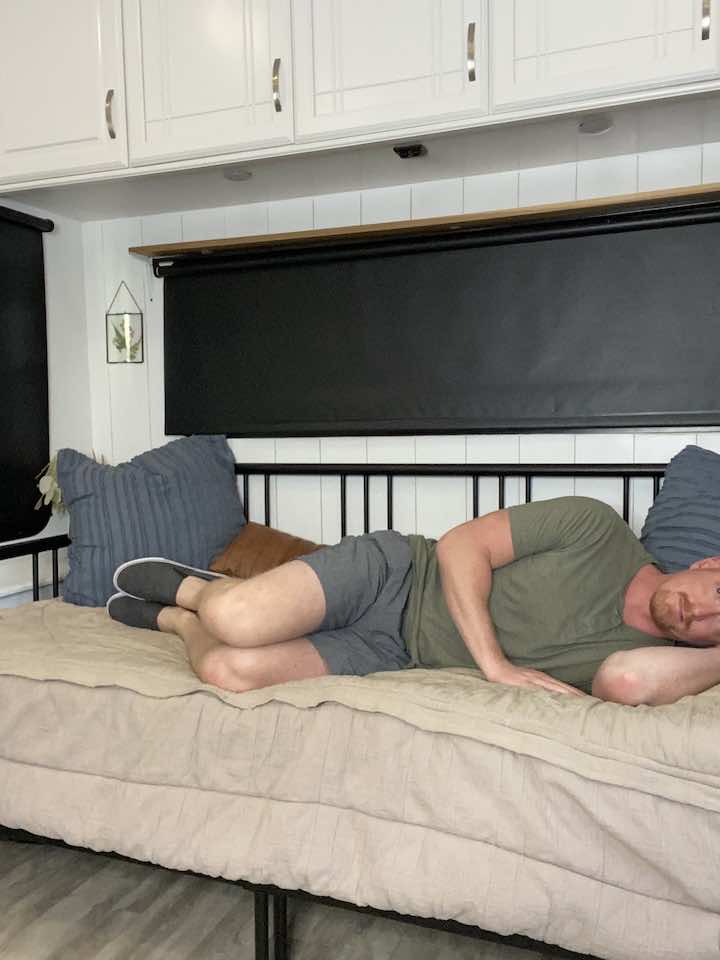
3. Marching Core
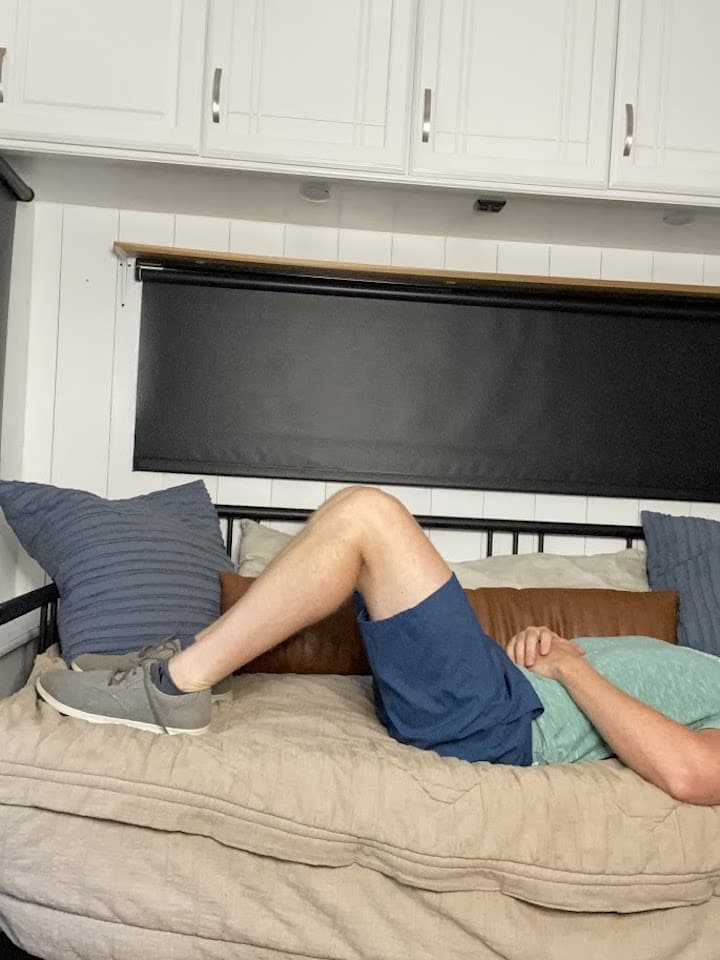
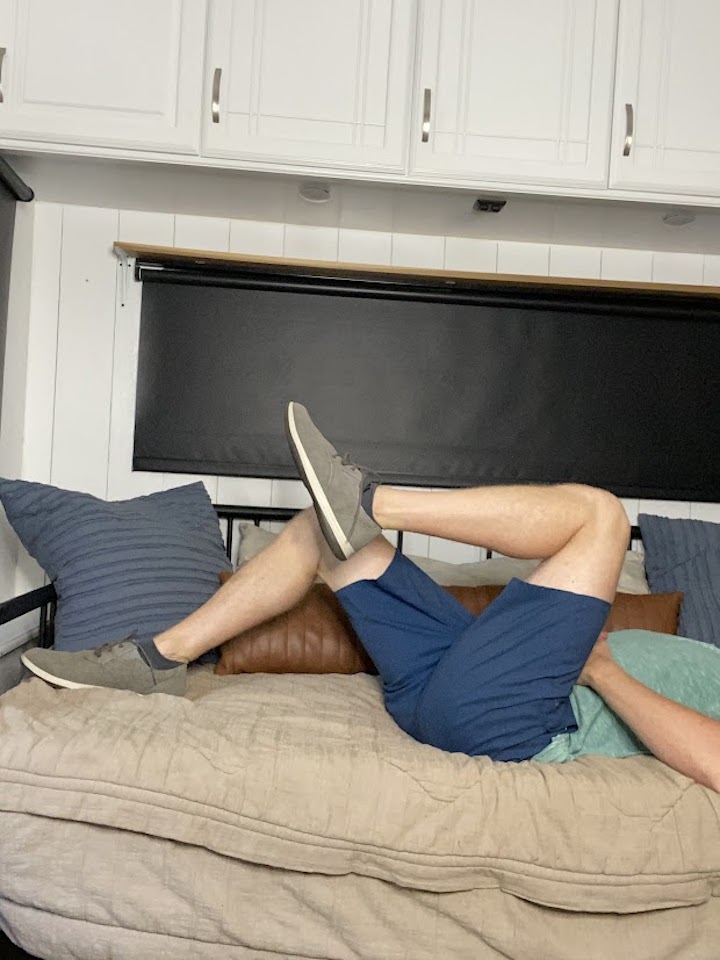
- Starting position: Laying flat on your back (on your bed, couch, or floor), with your knees bent and feet flat on the surface.
- To activate your transverse abdominis, try to pull the belly button down towards the surface, gently flattening the back simultaneously. This will help to brace the core.
- While keeping this braced core (don’t forget to breathe!), lift one knee towards your chest, like a march, then lower back down to the surface.
- Repeat 10 repetitions for 3 sets. Perform on the opposite leg.
- You can perform all repetitions on one side, switch to the other or perform alternatingly between the legs.
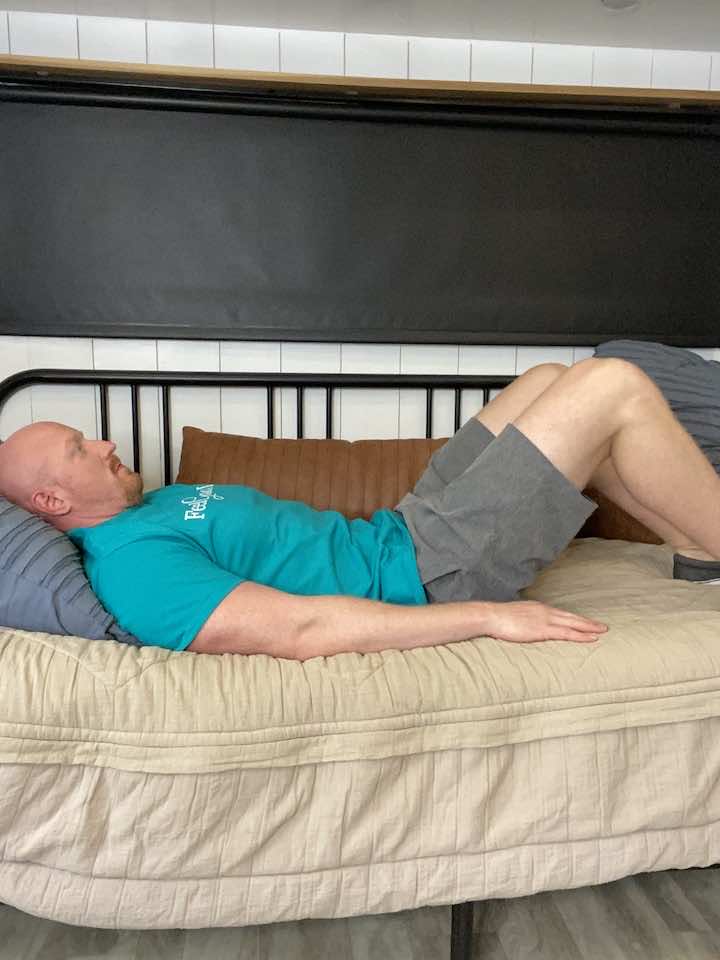
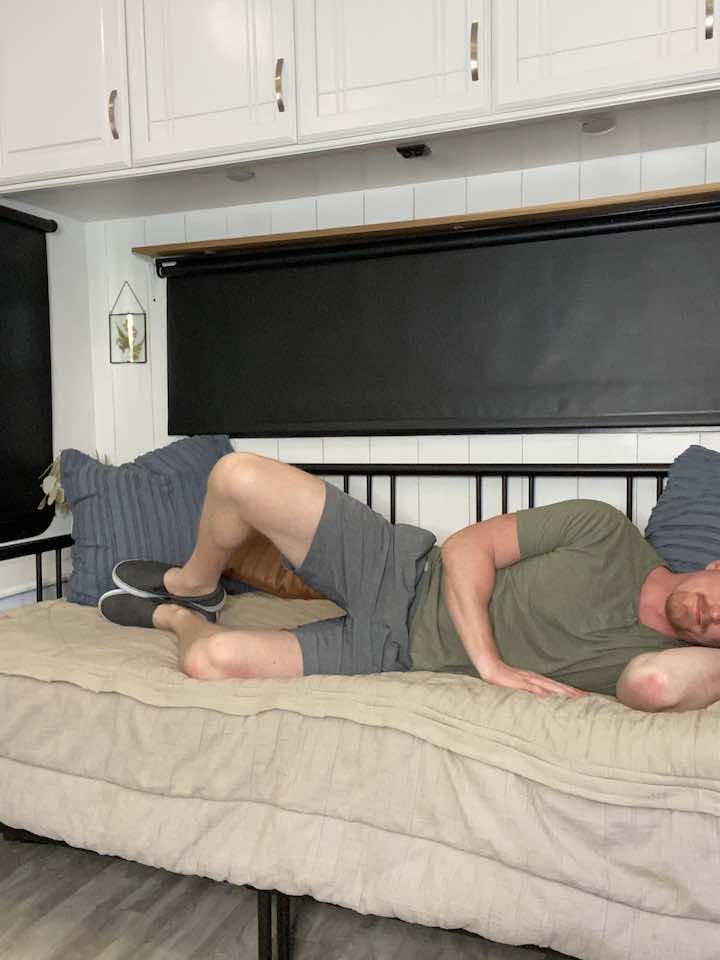
4. Bent Knee Fallouts
- Lie on your back with both knees bent and your hands on your hips.
- Engage your core by bracing your muscles like a trampoline surface. It’s a subtle movement and shouldn’t feel like you’re pushing your core up or sucking your core in. Just a gentle brace as though someone was about to place a weight on your belly.
- Keep your left knee frozen where it is, then let your right knee lower to the side 45 degrees and come back to the center. Keep your core engaged the whole time. You can monitor for control by using your hands on your hips. If your hip drops to the right side as the right leg moves, you’re not keeping your core engaged. The goal is for your hips to stay perfectly still while you perform this asymmetrical movement.
- Perform sets on the right side, then repeat on the left.
5. Bridges
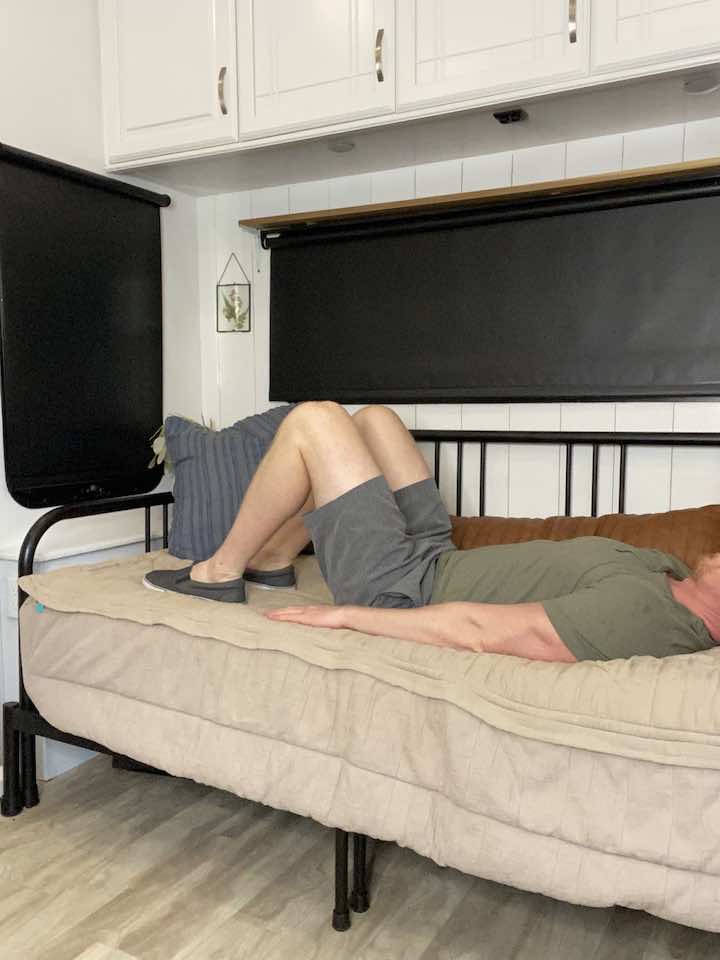
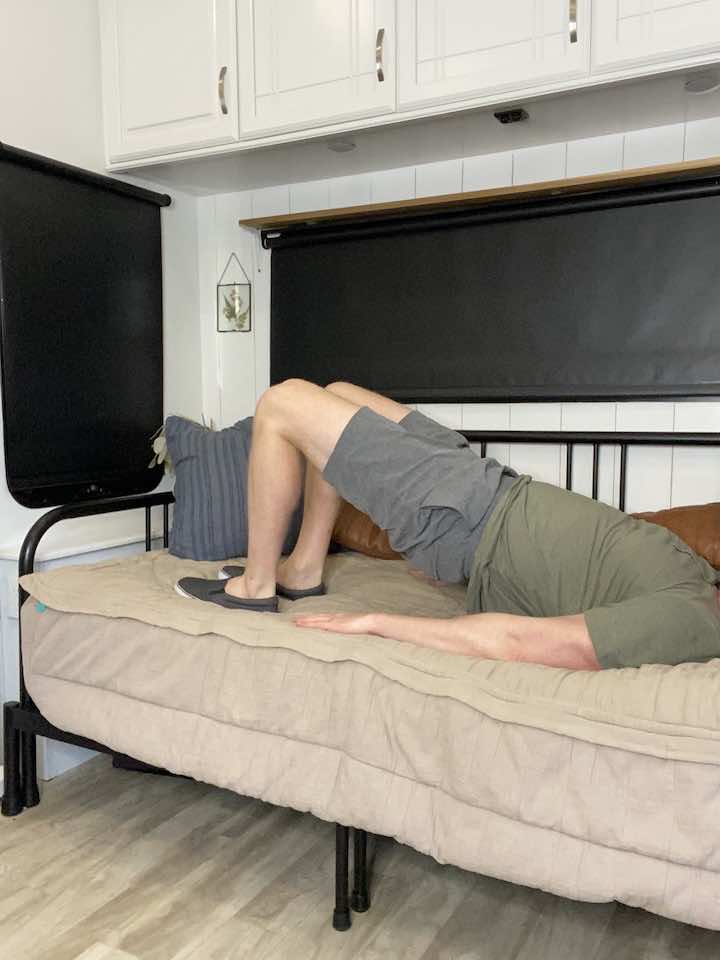
- Lie on your bed or floor (a bed is better if you have difficulty getting on the floor). Again, ensure your knees are bent at about 90 degrees and your feet are flat on the floor.
- Lift your hips off the ground, using your hands to help push your hips up if needed.
- Slowly lower your hips back down to the bed or floor and repeat for 10 reps.
6. Clamshells
- Lie on your side with your legs bent at a 90-degree angle and your feet together.
- Keep your feet and spine in line.
- Keep your core tight and hip stable, lifting your top knee as high as you can.
- Lower your top knee back down to the starting position, maintaining a contraction in your glutes and lower abs.
- Repeat for 10 repetitions, 3 times a day.
7. Side Lying Leg Lifts

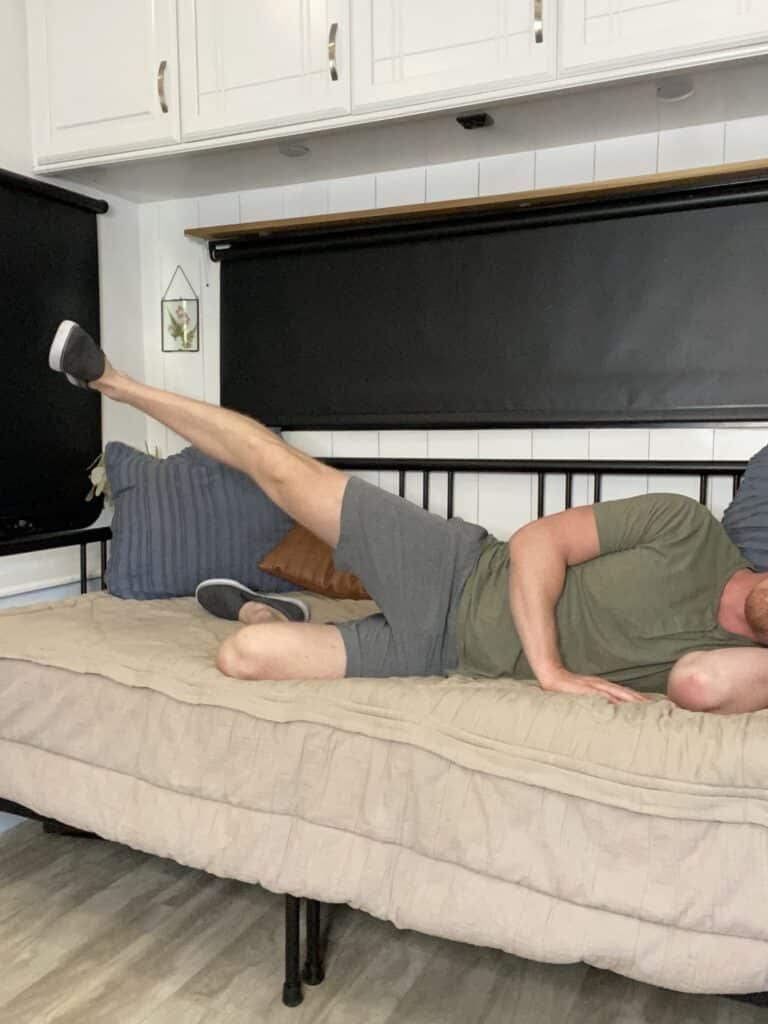
- Lie on your side with legs bent at a 90-degree angle
- Keep your feet and spine in line and your core tight
- Slowly raise the top leg to hip level
- Lower your leg back to starting position.
- Then repeat for 10 repetitions, 3 times a day.
8. Superman
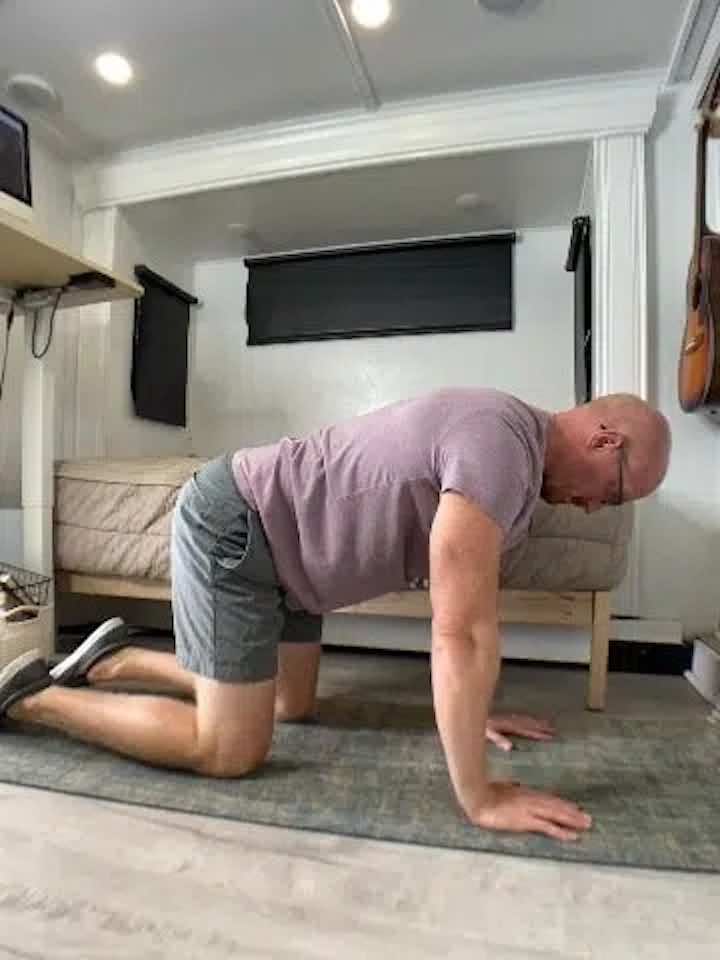
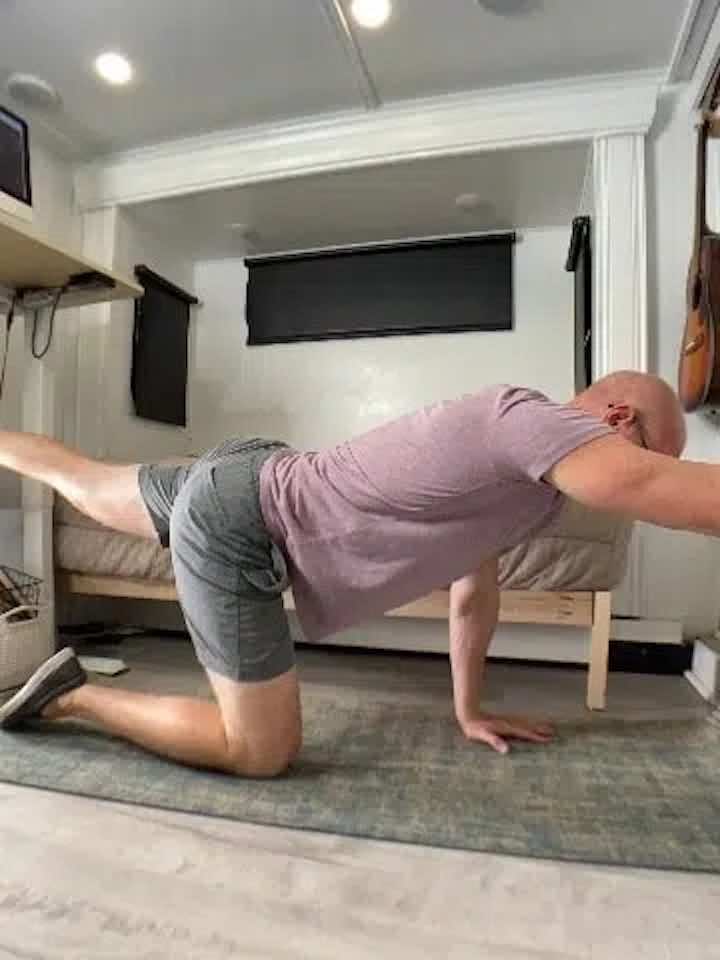
- Gently push yourself up from the lying position to a tabletop position. Your knees will be directly under your hips, hip-width apart, and your hands will be firmly on the ground, directly underneath the shoulders, about shoulder-width apart.
- Brace the abdominals. Extend your left leg behind you and your right arm, forming one straight line from the tips of your fingers to your heel, keeping your hips squared to the ground.
- Raise your leg only as high as you can while keeping your back straight. Hold for 5 seconds, then return. Switch to the other side. Perform 10 reps on each side.
Conclusion
In short, lumbar stabilization exercises are an excellent way for seniors to support their back health and maintain an active lifestyle. Including these exercises into your workout routine, you’ll be better equipped to handle the physical demands of everyday life and enjoy all the things that bring you joy and happiness.
Wondering What's Next?
Discover 11 Easy, At-Home “Stretch Exercises” for Stronger, Pain-Free Joints (click below)