
Free download: Top 10 Natural & Easy Remedies for Joint Pain from Home. Learn these helpful remedies.
Estimated Reading Time: 8 minutes read
Hey there, my friend! Do you sometimes feel like your body is getting a bit stiffer with each passing year? Well, don’t worry, you’re not alone! As we age, joint pain becomes a common issue, and poor posture may only worsen it. But here’s the good news – we’ve got some exercises that can help relieve joint pain and improve your posture. And we’re going to make it fun while we do it!
Let’s start by talking about good posture. Good posture means standing, sitting, or moving in a way that keeps your body in proper alignment. This means your head, neck, shoulders, spine, and hips should be in a straight line. And let’s remember, it also helps you breathe more easily!

But if you’ve been slouching and slumping for a while, it can lead to joint pain, back pain, and even headaches. So it’s essential to practice good posture as much as possible. And that’s where our exercises come in!
Exercise is a great way to improve your posture and relieve joint pain.
It can strengthen the muscles that support your spine and joints, making maintaining good posture throughout the day easier. Exercise can also increase flexibility and range of motion, which can reduce stiffness and discomfort in your joints. And the best part? You don’t have to go to a gym or buy any fancy equipment to do these exercises. You can do them right in your own home!
So let’s get started with the 12 exercises that can help relieve joint pain and improve your posture.

Table of Contents
12 Exercises to Improve Your Posture
Are you ready to start improving your posture and relieving joint pain? Before we get into the exercises, you should keep a few things in mind.
Firstly, it’s important to listen to your body. Don’t push yourself too hard, especially if you’re new to exercise or have any underlying health conditions. If something feels uncomfortable or painful, stop and try a different exercise or consult a doctor.
Secondly, it’s important to warm up before starting any exercise routine. You can warm up by doing some light cardio, like marching in place or walking around the room, for a few minutes. Or you can do dynamic stretchings, like arm circles or leg swings. This helps prepare your muscles and joints for activity, reducing the risk of injury.
Once you’re warmed up and ready to go, it’s time to get into the exercises. Remember to take it slow and steady, and don’t forget to breathe! These exercises are meant to be enjoyable and effective, so let’s have some fun while we improve our posture and relieve joint pain.
1. Scapular Retraction
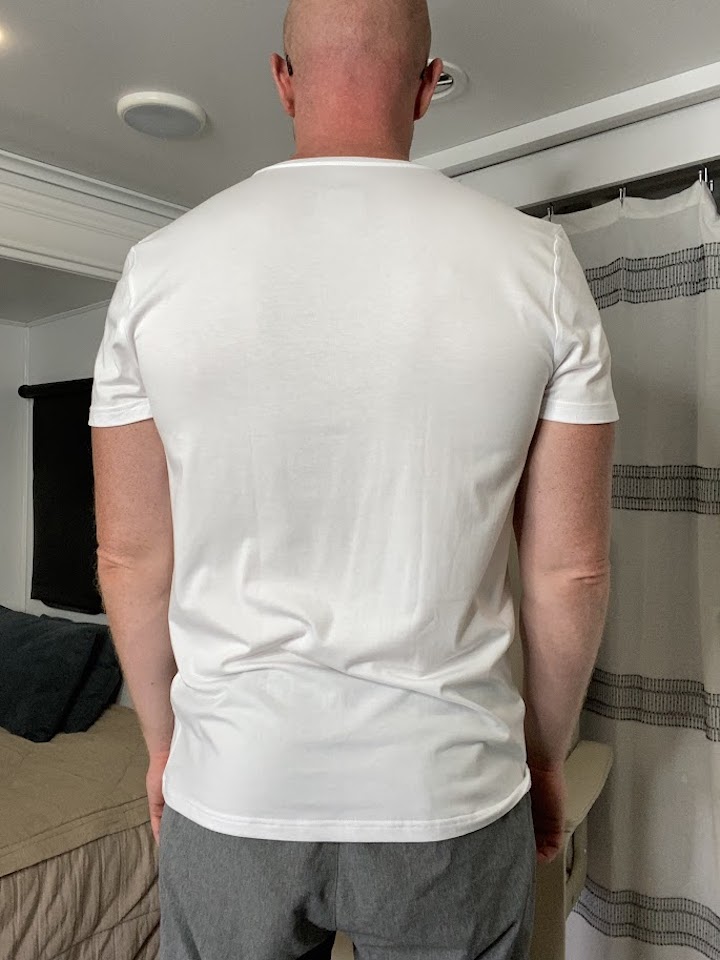

- In a sitting or standing position, try to sit as straight as possible. Aim to position the head in a neutral position as possible.
- Gently pull the shoulders back and squeeze the shoulder blades together.
- Hold for 5 seconds, then relax.
- Repeat 10 repetitions for 3 sets.
2. Chin Tucks
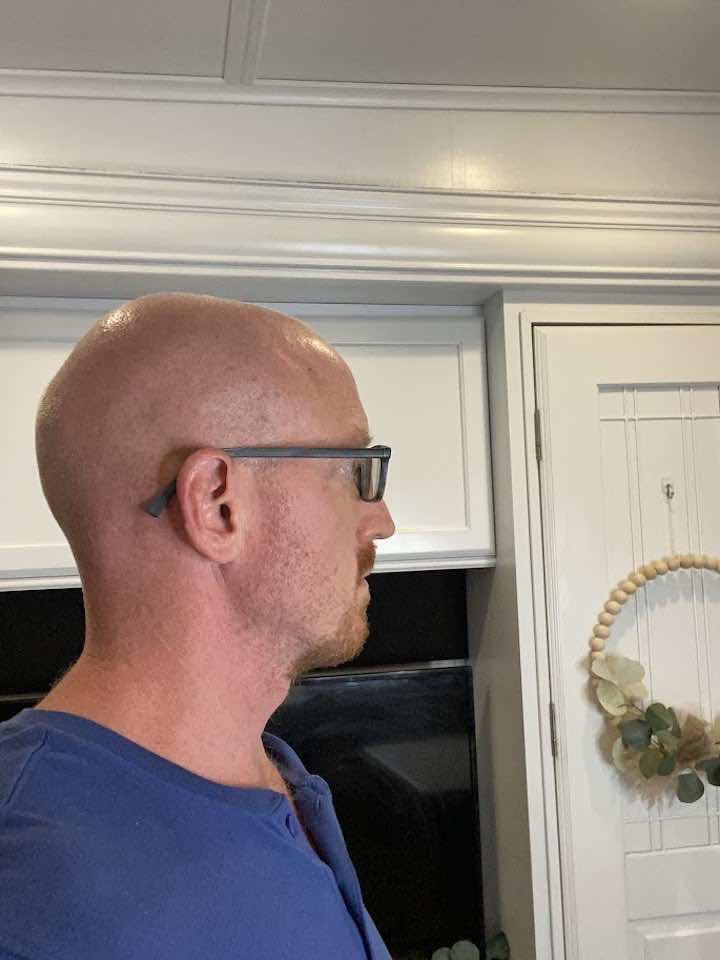
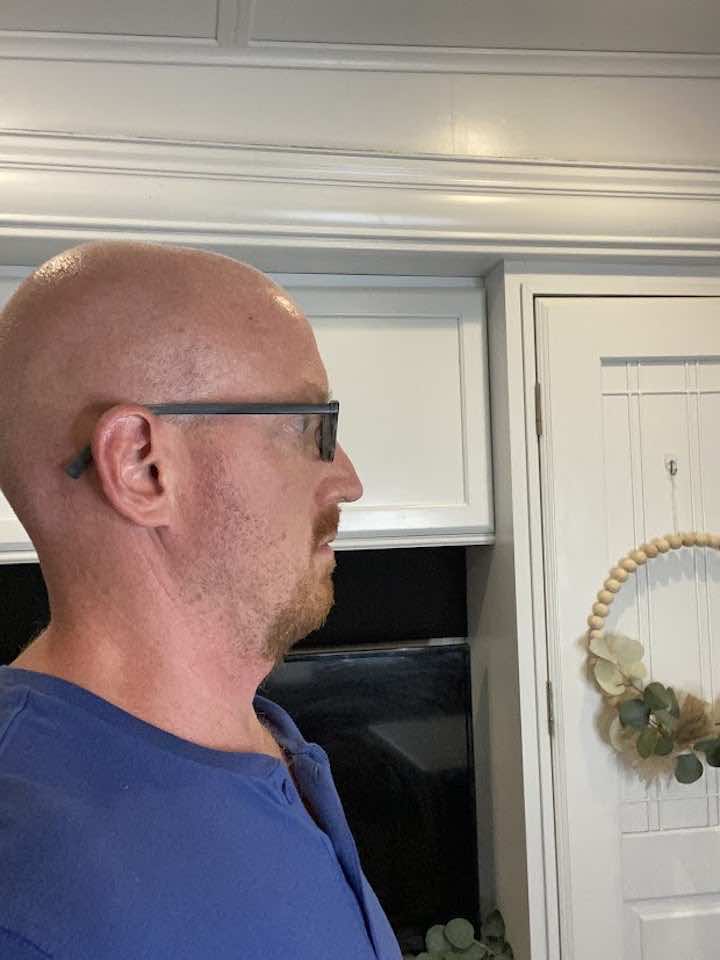
- You can perform a chin tuck laying on your back or sitting or standing.
- Gently tuck the chin directly back as if trying to make a double chin. Avoid nodding your head.
- Hold this position for 2 seconds, then slowly relax your muscles.
- Repeat 10 repetitions for 3 sets.
3. Door Frame Stretch

- Standing in front of your doorway, raise your arms up to shoulder height like a goalpost. The elbows will be bent with the palms facing forward.
- Keeping this position, rest the arms against your doorway.
- Slowly lean forward into a gentle stretch and hold for at least 30 seconds. Repeat 3 times.
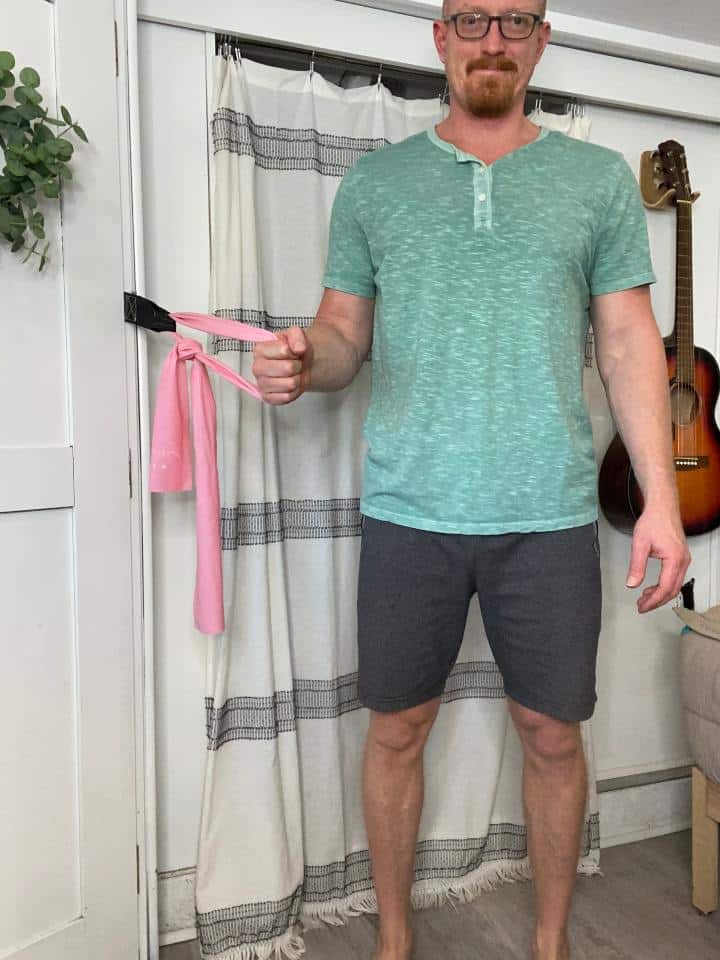
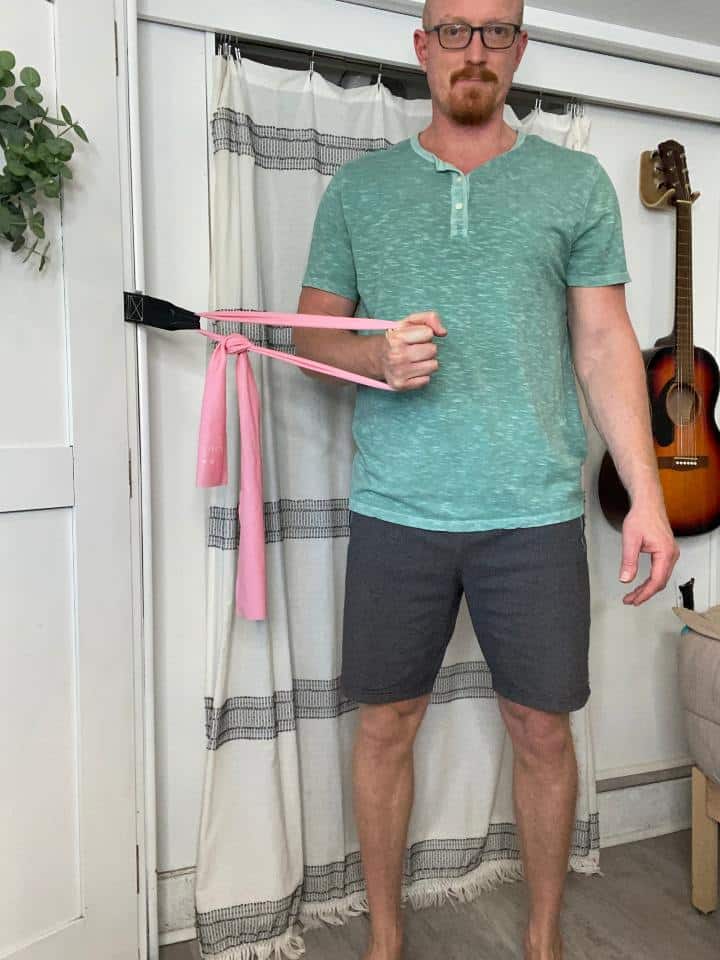
4. Rows with Resistance Band
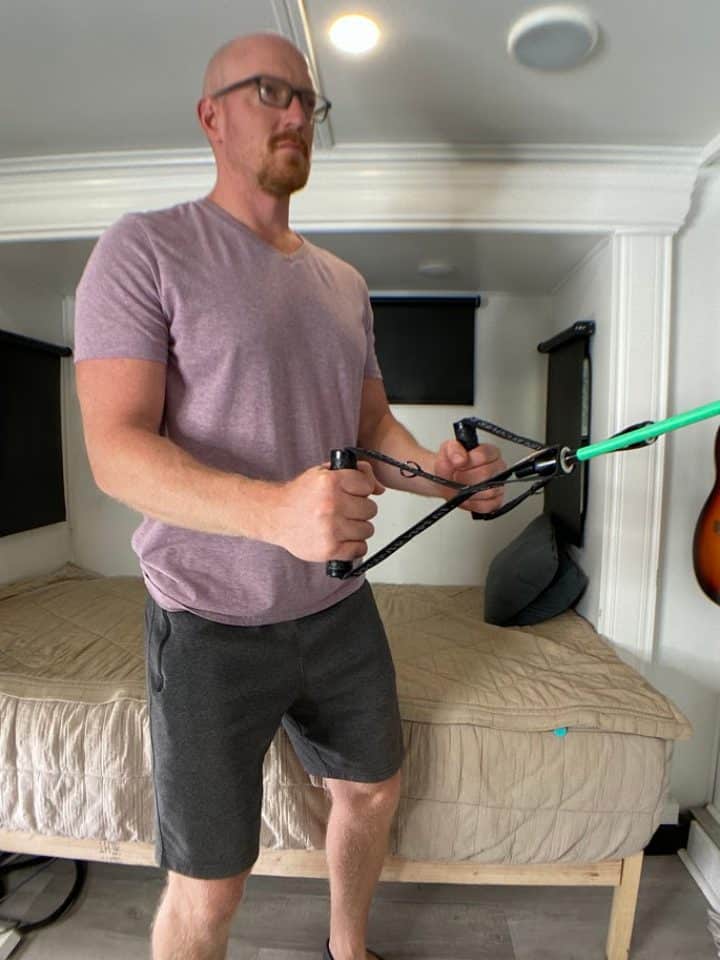
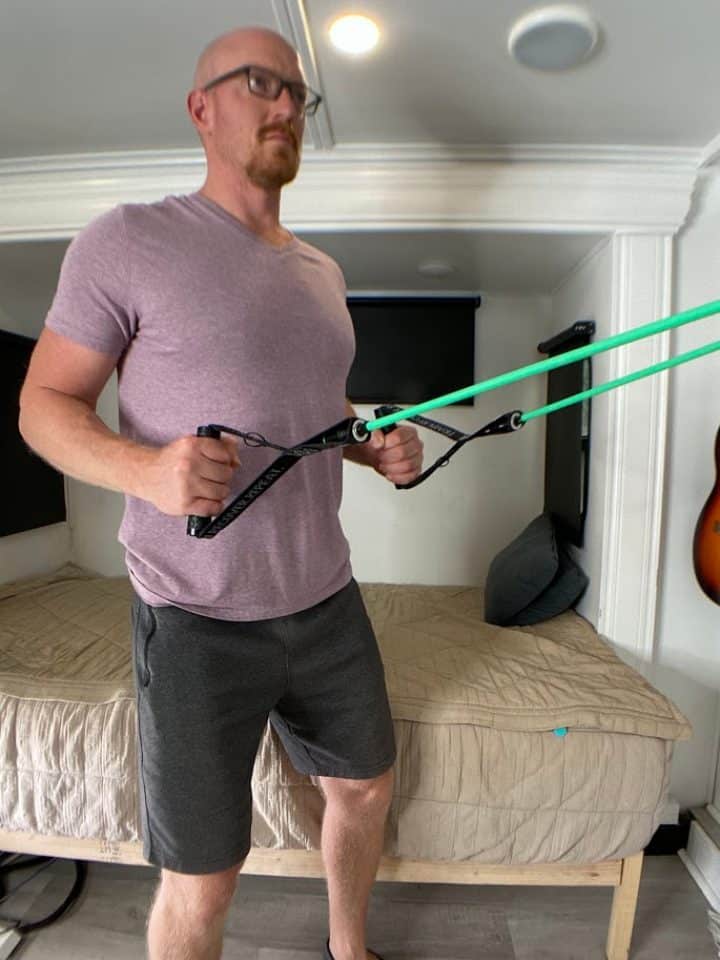
- Hold on to the ends of a resistance band (light, medium or heavy), which you can attach to a door knob.
- Begin with the arms elevated in front of you to shoulder height and the palms facing each other.
- Step back far enough that the resistance bend has a little tension.
- Pull back on the band by bending the elbows and swinging the arms back next to you. Make sure to squeeze the shoulder blades together.
- Hold for 2 seconds, then return to your starting position.
- Repeat 10 repetitions for 3 sets.
5. Pulldowns with Resistance Band

- Securely attach the resistance band to a high anchor point, such as a pull-up bar or a sturdy doorframe.
- Hold the band with both hands, palms facing forward and hands shoulder-width apart.
- Stand facing the anchor point with your arms extended upwards and your hands positioned above your head.
- Keeping your elbows straight, pull the band down towards your chest while squeezing your shoulder blades together.
- Pause at the bottom of the movement and then slowly return to the starting position.
- Repeat for 10 repetitions and aim for 3 sets.
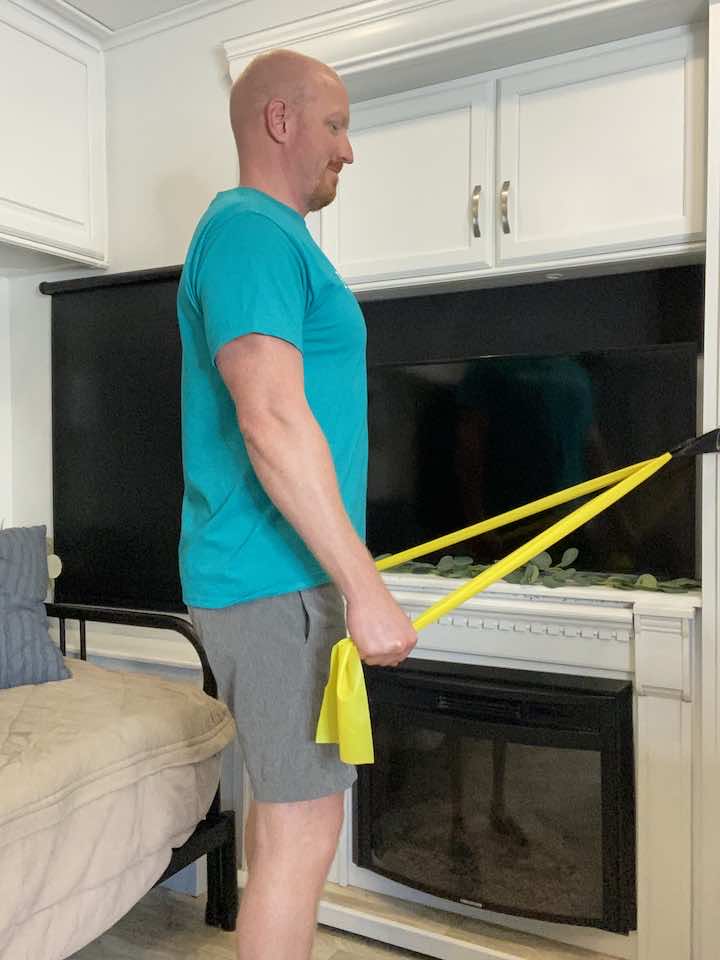
6. External Rotation with Resistance Band
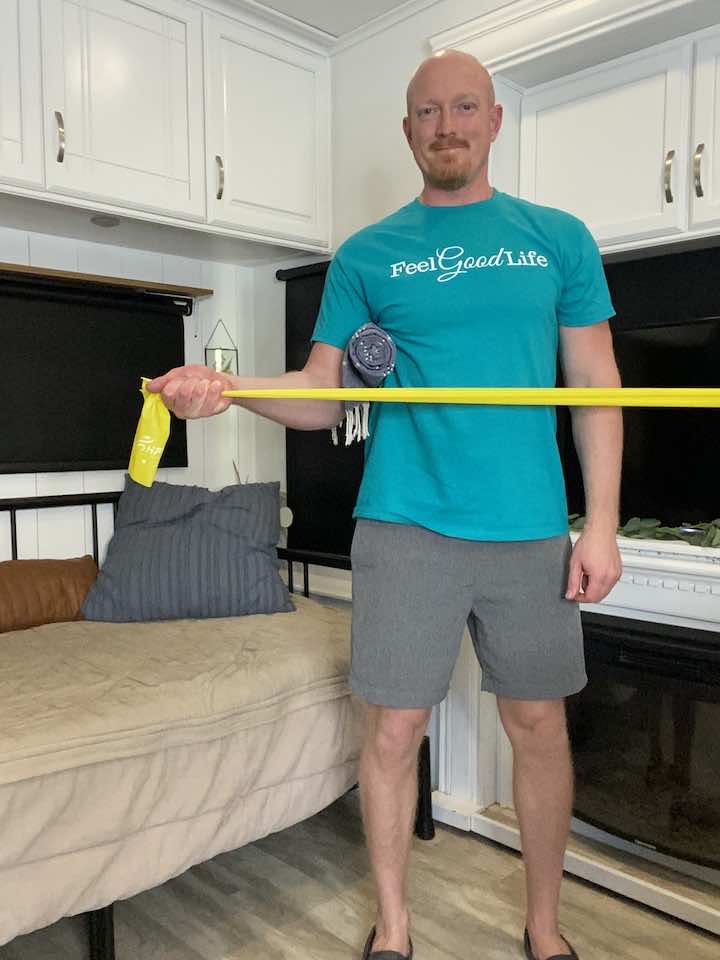
- Attach one end of the resistance band to a secure location, such as a doorknob or post, at the height of your elbow to perform the correct motion.
- Stand facing the band and hold the other end with your hand on the same side, elbow bent at a 90-degree angle and tucked by your side, and palm facing towards your body.
- Keeping an upright posture, slowly pull the band away from your body, rotating your arm outward and away from your torso while maintaining the 90-degree angle of your elbow.
- Hold this position for 2 seconds, then return to your starting position.
- Repeat the movement for 10 repetitions, then switch to the other arm.
- Aim for 3 sets of this exercise.
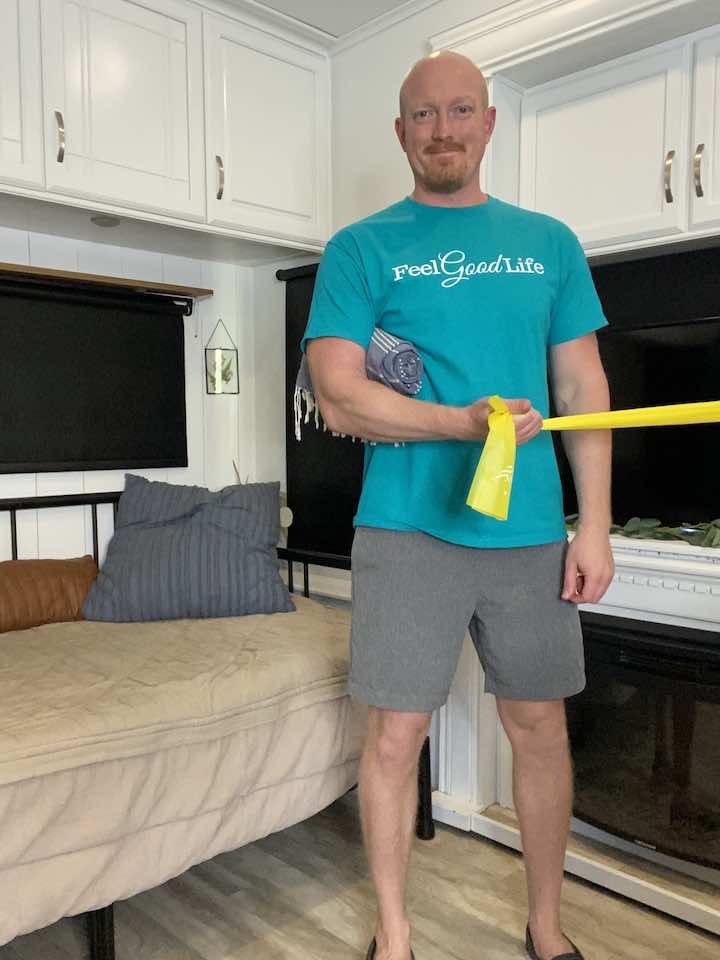
7. Internal Rotation with Resistance Band
- To perform this exercise, you will need to attach one end of the band to a secure location, such as a doorknob or post, at the height of your elbow to perform the correct motion.
- Keeping an upright posture, slowly pull the band towards your stomach while maintaining the 90-degree angle of your elbow.
- Hold for 2 seconds, then return to your starting position.
- Repeat the movement for 10 repetitions, then switch to the other arm.
- Aim for 3 sets of this exercise.
8. Seated Back Bends
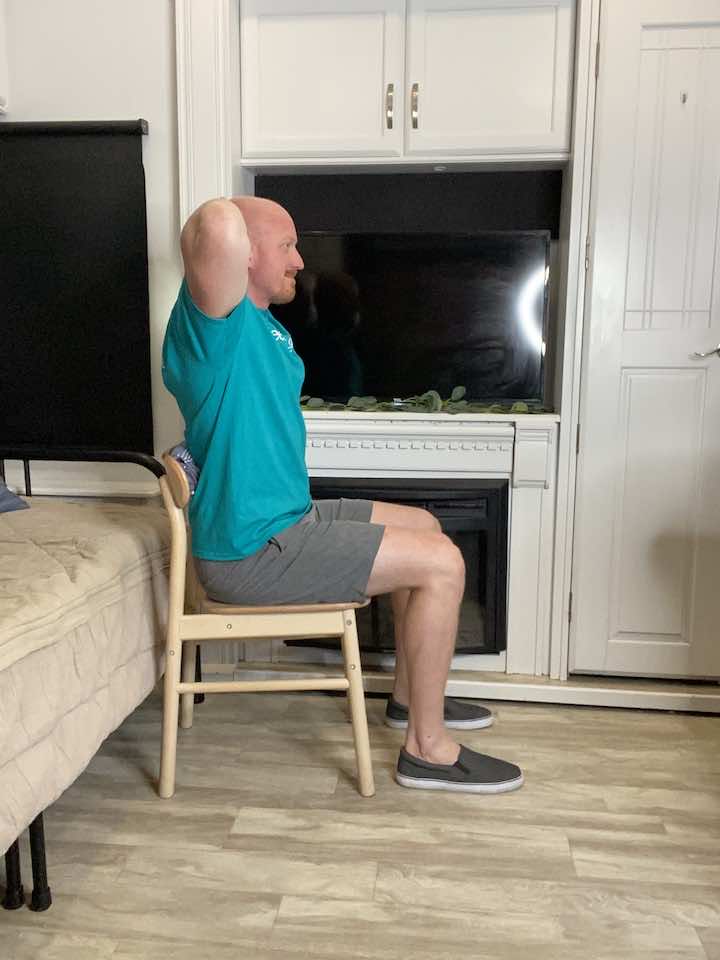
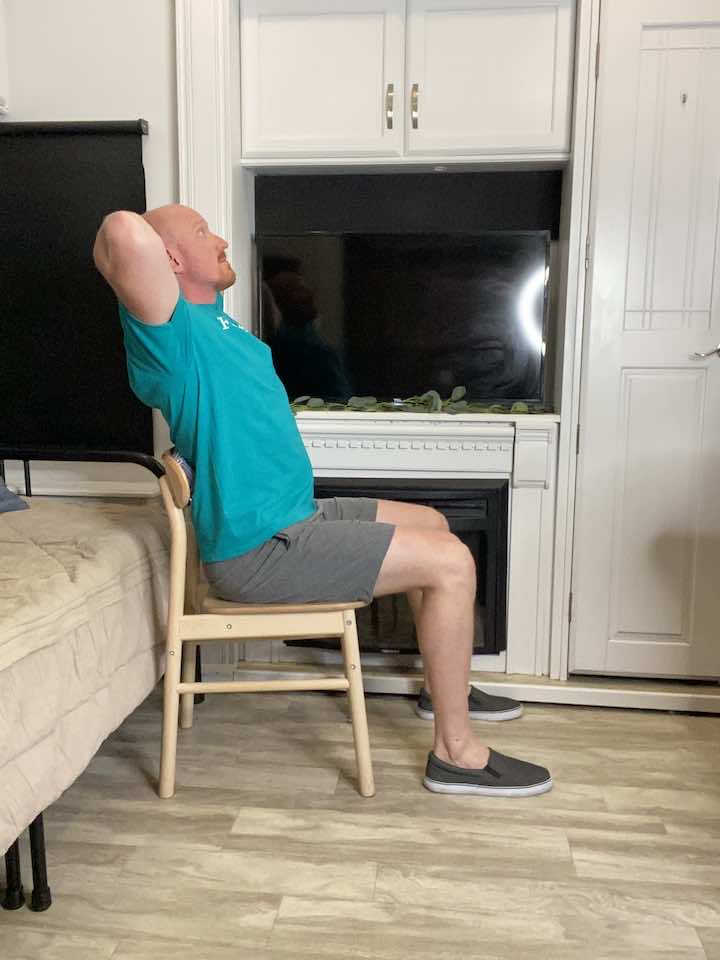
- Sit in a chair with your knees at a 90-degree angle and shoulder-width apart. Place a ball or large rolled-up towel between the middle portion of your back and the chair. The ideal placement is at the bra strap level. Guys, you’ll have to use your imagination to correct the placement.
- Now slowly lean your upper back over the ball one vertebrae at a time. Make sure not to arch using your lower back. You want to roll the middle back over the ball.
- Don’t expect huge movements here. Each single vertebra doesn’t have a large range of motion. And since you are isolated in your thoracic, focus on precision over huge movements. Continue to perform this stretch for 2 seconds.
- Repeat 10 times.
9. Reach the Sky
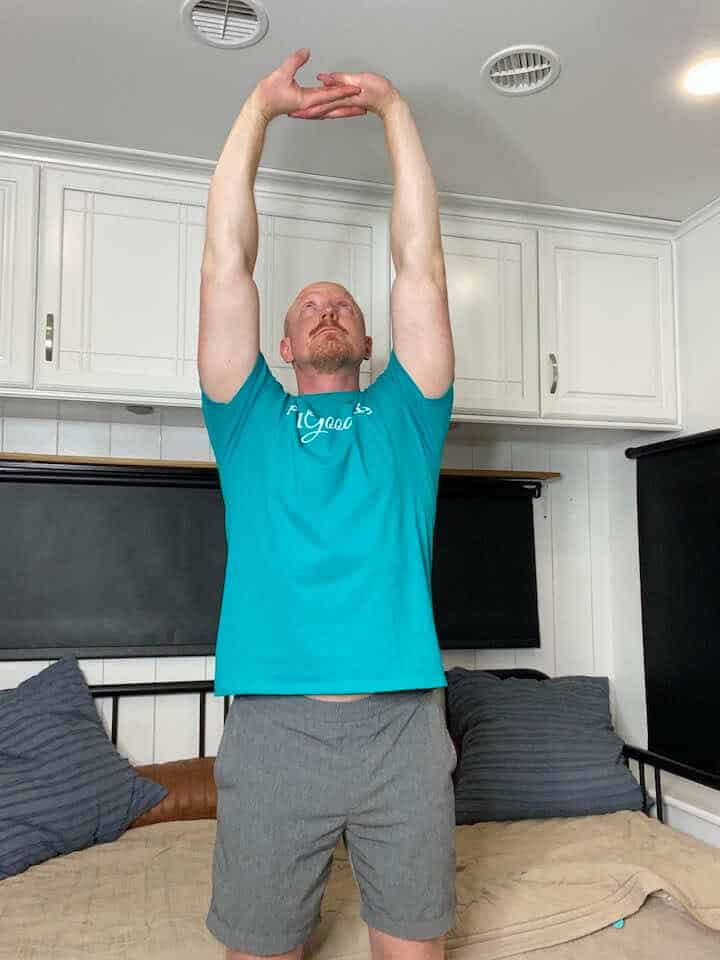
- Stand shoulder-width with knees parallel. Keep your spine neutral and not hunched over.
- Interlace your hands and reach up toward the sky with your elbows straight. It’s important to keep your shoulders down.
- Look toward the sky, right at your hands. You should feel like you’re dangling! As you do this, squeeze and release your thighs, and repeat.
10. Seated Cat/Cow
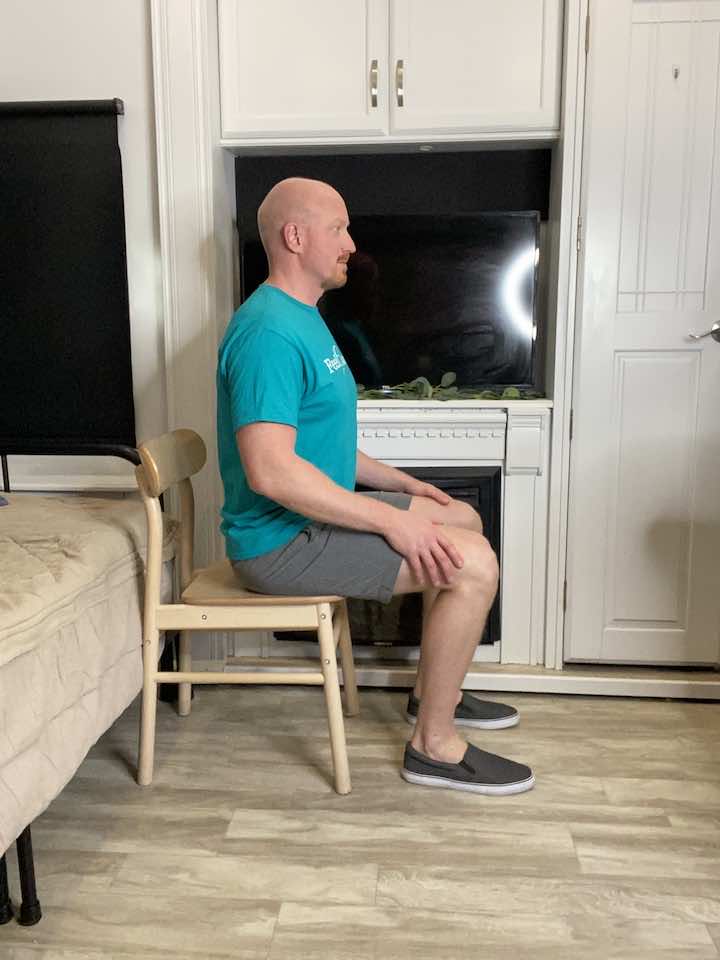
- Sit on the edge of your chair and place your hands on your knees.
- Take a deep inhale and expand your belly, sides, and back similar to the pelvic tilts.
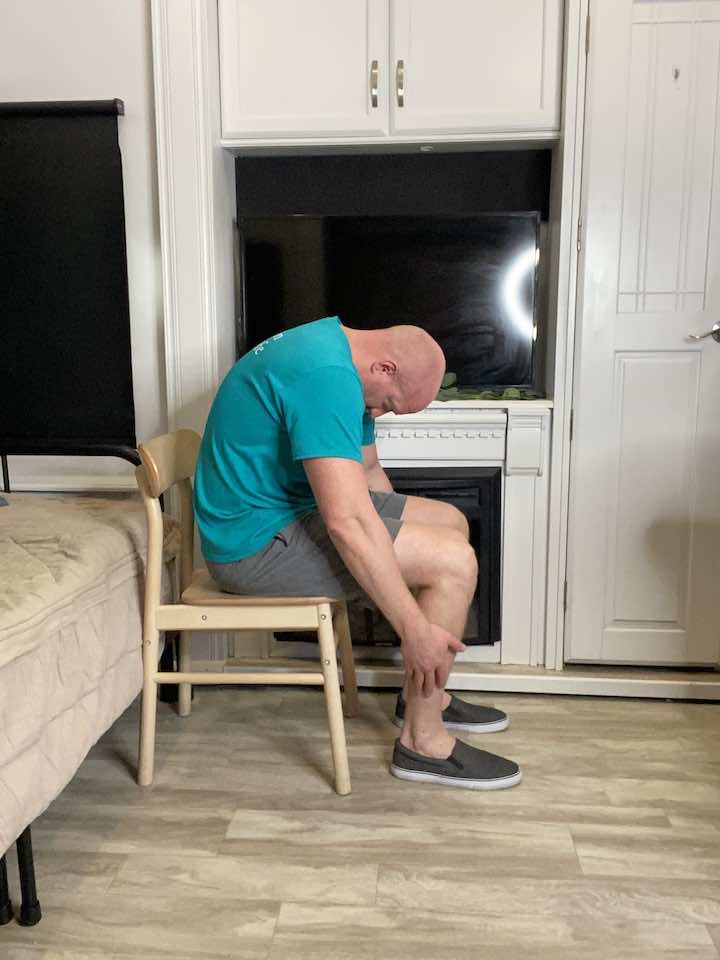
- Upon exhaling, round your spine, sliding your hands down your knees and tucking your chin for greater depth.
- Go as far as comfortable (or until your exhale is complete).
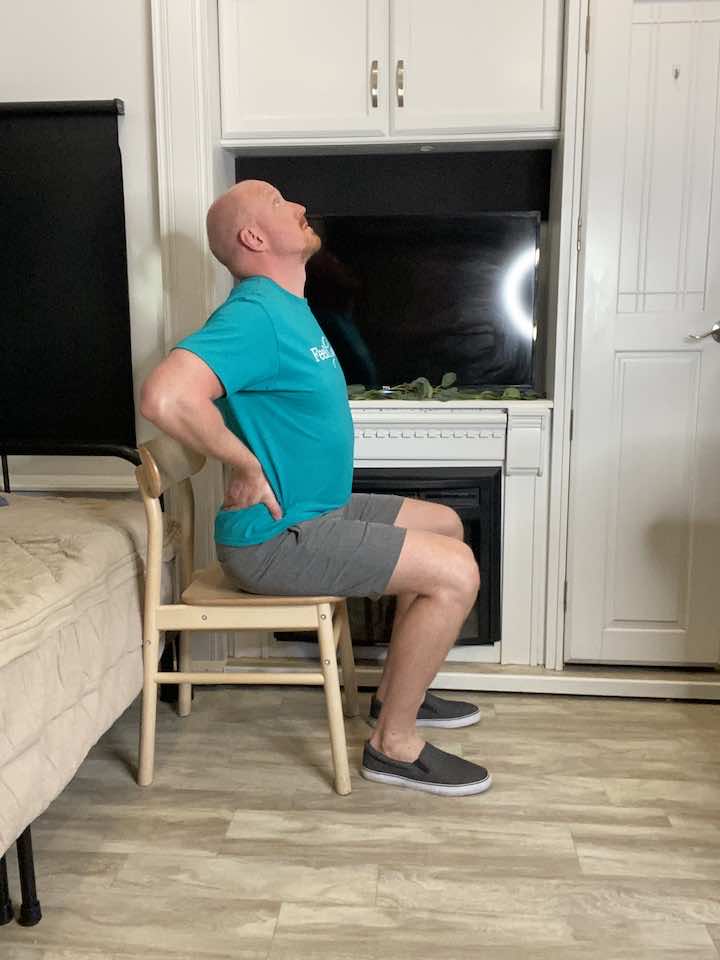
- Inhale and return past the neutral position and into a slight back arch.
- Repeat these two movements 10 times, moving with your breath.
11. Knee-to-Chest Stretch
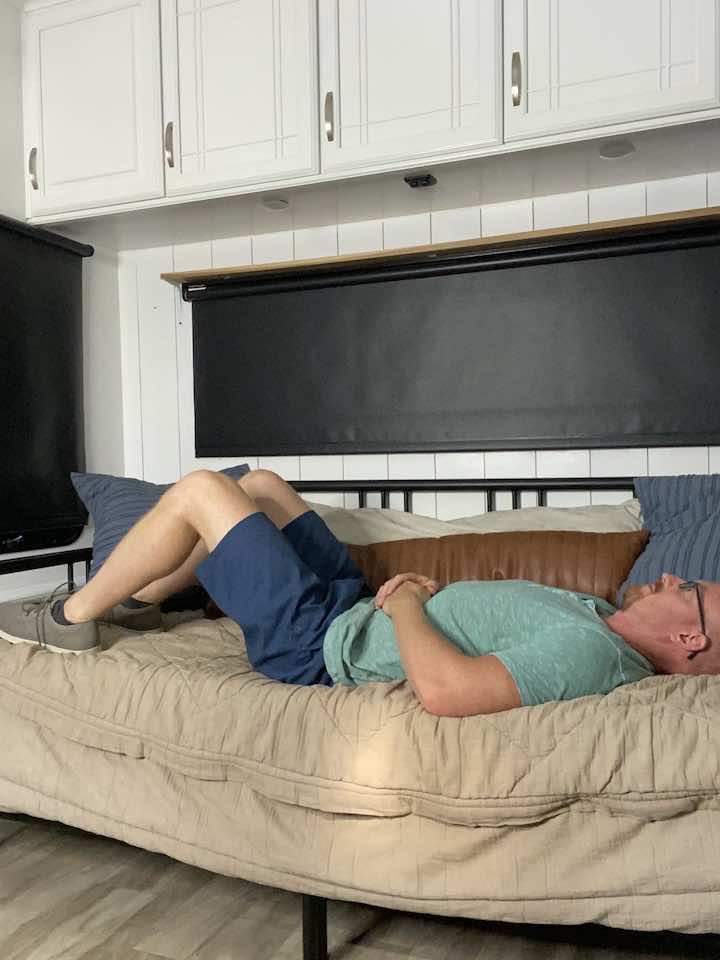
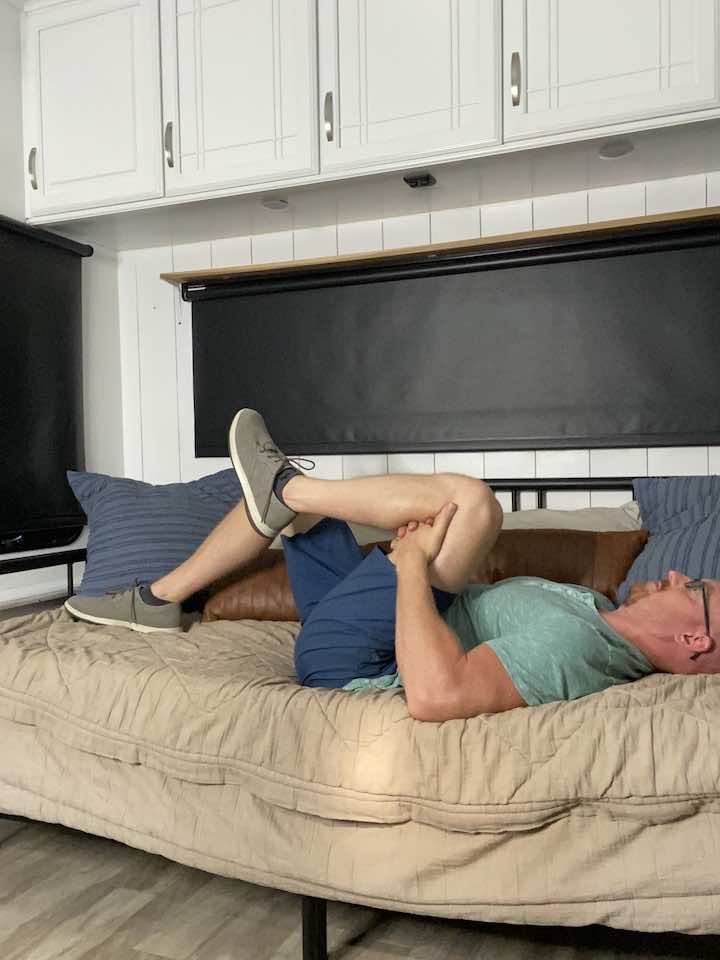
- Starting position: Laying on your back with your knees bent and feet flat on the bed. This is a nice, decompressed position for the spine to begin in.
- Reach the hands behind the thigh of one leg and slowly pull the leg so that your knee moves in towards the chest. Keep the intensity of the stretch gentle and the leg as relaxed as possible.
- Hold for at least 30 seconds. Repeat 3 sets and switch to another side.
12. Abdominal Bracing
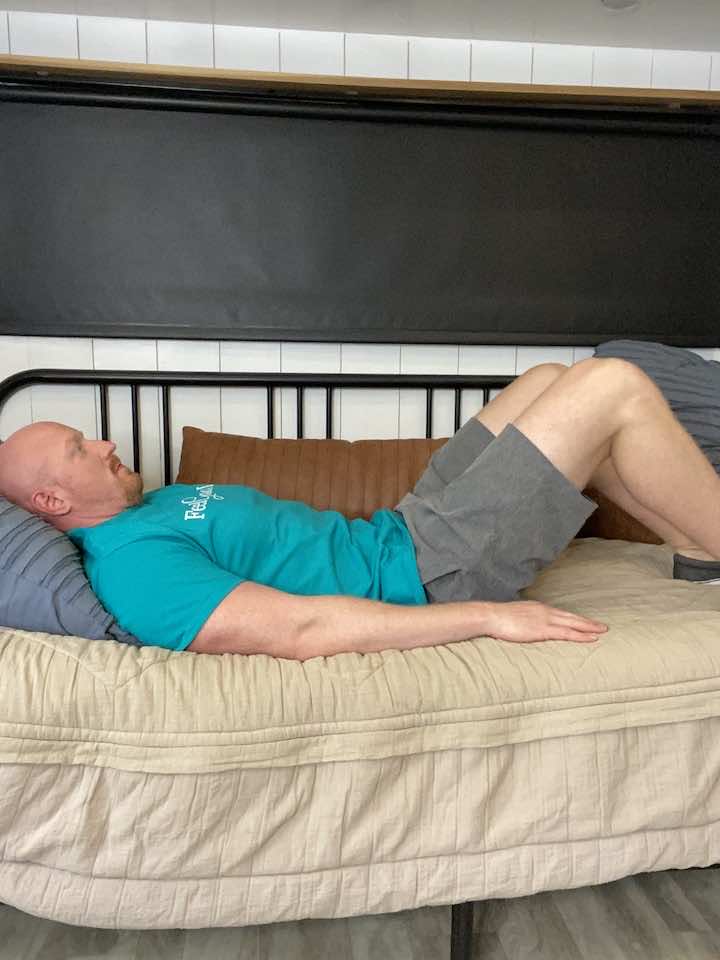
- Begin on your back, knees bent, and feet flat on the floor.
- Exhale and draw your belly button towards your spine (as if a string was pulling on the inside of your belly button from the ground).
- Hold for 3 seconds before relaxing.
- Repeat 10 repetitions for 2 sets.
Conclusion
Improving your posture and relieving joint pain doesn’t have to be a chore. Remember to take it slow and listen to your body. If something feels uncomfortable, stop and try a different exercise or consult a doctor. And most importantly, have fun! With these 12 exercises, you can have fun while you work on your health.
By incorporating these exercises into your daily routine, you’ll soon notice an improvement in your posture and a reduction in joint pain. And who knows, you might even start feeling like a kid again!
Wondering What's Next?
Discover 11 Easy, At-Home “Stretch Exercises” for Stronger, Pain-Free Joints (click below)